
Leaky oil-cooler line.


Rock Crawling
Joined: Oct 2012
Posts: 407
Likes: 0
From: San Diego, CA
Ok folks, the weather was nice enough this weekend to finally install these lines. The write-up may be excessive, but hopefully it helps other newbies like me.
They look great, they're pretty and shiny and well built...super solid fittings, and the fitment was perfect. Not too long, not too short, didn't need any crazy rerouting under the hood. Excellent piece. Talking to my independent mechanic it would have been around $250 for OEM replacement lines and $170 to install. I bought directly from the folks at Trailhead 4x4 for just under $300 (link above, sold through Lucky 8 too), and they were super helpful with install questions over email and offers to call in to help during the install. They said it was easy enough to do..."if you can change your oil, you can install these lines". Great, except I've never changed my own oil before.
All in all, I think it would have taken maybe an hour total from start to finish if I had all the tools in one place. Now that I have all the tools (after running back and forth to Advanced Auto) I'm pretty sure I could do it under an hour. It's basically an oil change with removing the fan. I thought I had everything I needed, but as a newbie shadetree mechanic I obviously did not.
Here's my virtual walkthrough.
1. Flip to Page 364-365 on the D1 workshop manual .pdf.
2. Disconnect negative battery terminal
3. Remove plastic upper fan shroud (two clips on the sides, used a flathead screwdriver)
4. Buy/rent/borrow the clutch fan tools to remove the fan per instructions. There are some threads about using the correct tools, some about which Ford wrench sets work, and also how to do it with brute force. I was mistakenly directed to buy the Ford diesel kit (part number KDT 3950...came with a 47mm fan wrench, you need a 36mm which I borrowed for free from Advanced Auto. Rovers North has a combo 32/36mm fan wrench for $17)
5. Remove the fan. Careful not to just freewheel it off to the left and drop it.
6. Remove the plastic lower fan shroud. This gives you room to get the original lines off.
7. Drop underneath the vehicle, 1-1/8" wrench to remove the oil drain plug.
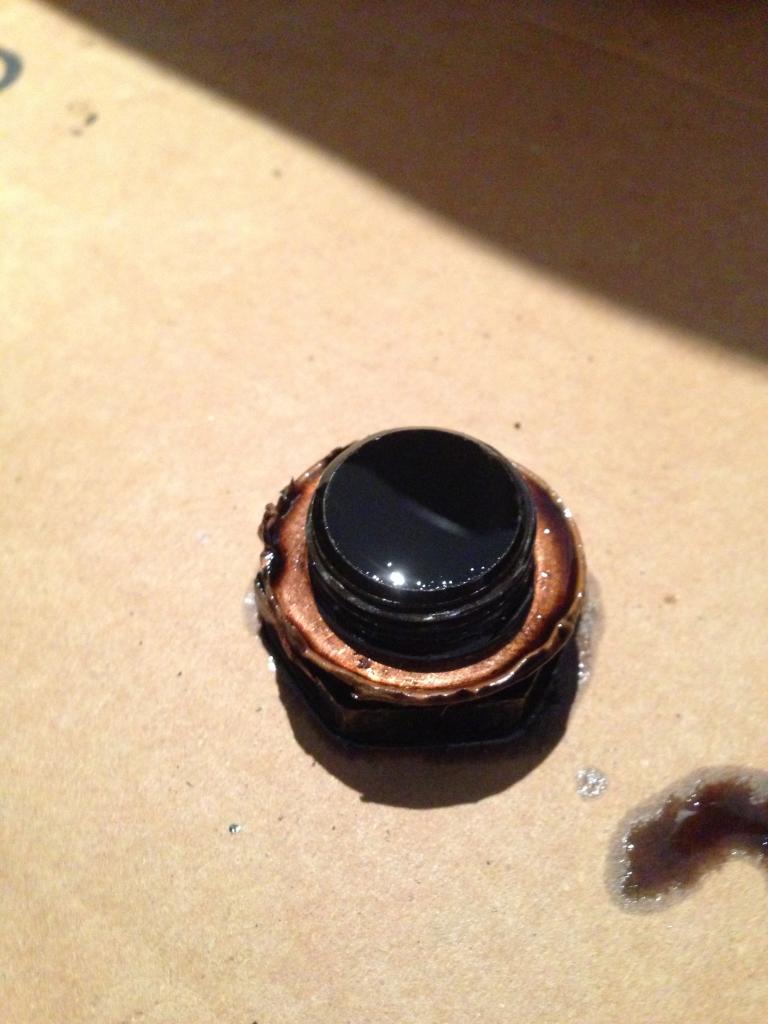
8. Drain the oil, put the plug back in. I purchased extra oil plugs and crush washers from British Atlantic...glad I did, the one I pulled out looked like this
9. Go back up top. Remove upper and lower hose fittings. I think it's a 1" hose fitting. It was too big for my 7/8" and too small for the 1-1/16". I just used an adjustable wrench since I wasn't worried about damage since I was going to throw it away. Worked fine.
Here it is standing center, looking left with the lines gone

10. Go back underneath. Disconnect the oil cooler fasteners underneath and to the left of the oil filter with a 7/8" crescent wrench. Then pull the lines themselves out.
11. Go back up top. Pull the lines out of the radiator fitting.
12. Remove the old lines...I pulled them out from the bottom.
13. Install the Trailhead lines with a 1-1/16" wrench (top/radiator end) and 7/8" wrench (bottom/oil filter end). Tighten the radiator fitting (silver) and the blue one (important! Trust me!). Same goes down below.
Here they are installed from top and bottom


14. Remove oil filter, replace with new.
15. Put the bottom shroud, fan and upper fan shroud back in.
16. Poured in 4-5 quarts of oil back in.
17. Reconnected the negative terminal, started up to check the oil level.
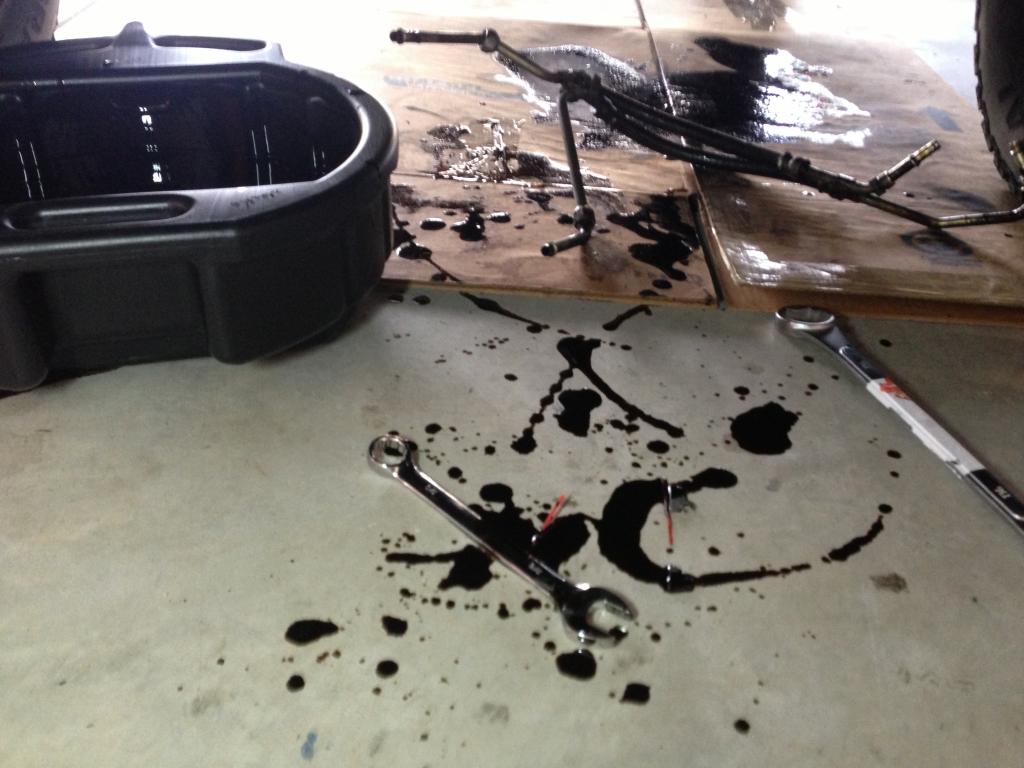
18. At this point, be sure to look UNDER THE TRUCK to make sure you're not leaking all that precious dino juice all over your garage floor like I did. As mentioned above, I secured the silver fittings to the radiator and oil pan down below...but forgot to secure the blue hose fittings. Oil everywhere!
19. Once the new lines are in, there IS enough room to squeeze your arm and wrench (my arm at least) between them and the reinstalled fan and fan shroud to tighten all the fittings again.
20. Top off the oil, finish the oil change.
21. Bask in the glory of fixing your first engine problem and successful first oil change.
22. Go grab the kitty litter and pretend you didn't make a mess.
So yeah, long-winded but there you have it. Super happy with the hoses. Yes they are a few dollars more than the OEM replacements but the ease in routing the hoses looks to be way easier than having to re-route OEM rubber hoses with their angular metal ends; then there's the likely increased durability and definite increase in functional engine bling.
They look great, they're pretty and shiny and well built...super solid fittings, and the fitment was perfect. Not too long, not too short, didn't need any crazy rerouting under the hood. Excellent piece. Talking to my independent mechanic it would have been around $250 for OEM replacement lines and $170 to install. I bought directly from the folks at Trailhead 4x4 for just under $300 (link above, sold through Lucky 8 too), and they were super helpful with install questions over email and offers to call in to help during the install. They said it was easy enough to do..."if you can change your oil, you can install these lines". Great, except I've never changed my own oil before.
All in all, I think it would have taken maybe an hour total from start to finish if I had all the tools in one place. Now that I have all the tools (after running back and forth to Advanced Auto) I'm pretty sure I could do it under an hour. It's basically an oil change with removing the fan. I thought I had everything I needed, but as a newbie shadetree mechanic I obviously did not.
Here's my virtual walkthrough.
1. Flip to Page 364-365 on the D1 workshop manual .pdf.
2. Disconnect negative battery terminal
3. Remove plastic upper fan shroud (two clips on the sides, used a flathead screwdriver)
4. Buy/rent/borrow the clutch fan tools to remove the fan per instructions. There are some threads about using the correct tools, some about which Ford wrench sets work, and also how to do it with brute force. I was mistakenly directed to buy the Ford diesel kit (part number KDT 3950...came with a 47mm fan wrench, you need a 36mm which I borrowed for free from Advanced Auto. Rovers North has a combo 32/36mm fan wrench for $17)
5. Remove the fan. Careful not to just freewheel it off to the left and drop it.
6. Remove the plastic lower fan shroud. This gives you room to get the original lines off.
7. Drop underneath the vehicle, 1-1/8" wrench to remove the oil drain plug.
8. Drain the oil, put the plug back in. I purchased extra oil plugs and crush washers from British Atlantic...glad I did, the one I pulled out looked like this
9. Go back up top. Remove upper and lower hose fittings. I think it's a 1" hose fitting. It was too big for my 7/8" and too small for the 1-1/16". I just used an adjustable wrench since I wasn't worried about damage since I was going to throw it away. Worked fine.
Here it is standing center, looking left with the lines gone
10. Go back underneath. Disconnect the oil cooler fasteners underneath and to the left of the oil filter with a 7/8" crescent wrench. Then pull the lines themselves out.
11. Go back up top. Pull the lines out of the radiator fitting.
12. Remove the old lines...I pulled them out from the bottom.
13. Install the Trailhead lines with a 1-1/16" wrench (top/radiator end) and 7/8" wrench (bottom/oil filter end). Tighten the radiator fitting (silver) and the blue one (important! Trust me!). Same goes down below.
Here they are installed from top and bottom
14. Remove oil filter, replace with new.
15. Put the bottom shroud, fan and upper fan shroud back in.
16. Poured in 4-5 quarts of oil back in.
17. Reconnected the negative terminal, started up to check the oil level.
18. At this point, be sure to look UNDER THE TRUCK to make sure you're not leaking all that precious dino juice all over your garage floor like I did. As mentioned above, I secured the silver fittings to the radiator and oil pan down below...but forgot to secure the blue hose fittings. Oil everywhere!
19. Once the new lines are in, there IS enough room to squeeze your arm and wrench (my arm at least) between them and the reinstalled fan and fan shroud to tighten all the fittings again.
20. Top off the oil, finish the oil change.
21. Bask in the glory of fixing your first engine problem and successful first oil change.
22. Go grab the kitty litter and pretend you didn't make a mess.
So yeah, long-winded but there you have it. Super happy with the hoses. Yes they are a few dollars more than the OEM replacements but the ease in routing the hoses looks to be way easier than having to re-route OEM rubber hoses with their angular metal ends; then there's the likely increased durability and definite increase in functional engine bling.
Last edited by keoni004; Jan 12, 2013 at 03:02 PM. Reason: typo, narrative

Mudding
Joined: Sep 2008
Posts: 162
Likes: 5
I finally have the materials back in stock for my take on this repair.
With compression fittings, the price is $150.
I offer them with compression fittings and weld-on fittings, along with blinging stainless hoses in all manner of configurations.
With compression fittings, the price is $150.
I offer them with compression fittings and weld-on fittings, along with blinging stainless hoses in all manner of configurations.


Thread
Thread Starter
Forum
Replies
Last Post