
Coil under the coil packs?
#41
 10-15-2014, 01:35 PM


Recovery Vehicle
wow, very detailed and informative write up. This should definitely be listed in the sticky threads. I did luck out and Abran on the forum is shipping me the kit he purchased for a much better rental price than motorcarsltd, so that worked out. Again, very greatful for the write up in the event I find myself in this situation again.
Cheers
Cheers
Glad Abran was able to help you out on that.... cause it really is kind of a PITA to make if it's something you may only use once for a few minutes.
Good luck with everything!
Last edited by RicketyTick; 10-15-2014 at 01:38 PM.
#42
10-15-2014, 03:17 PM

No problem...I wanted to offer to loan you mine, but someone we all know borrowed it and has been having other problems so, it hasn't been sent back my way yet.
Glad Abran was able to help you out on that.... cause it really is kind of a PITA to make if it's something you may only use once for a few minutes.
Good luck with everything!
Glad Abran was able to help you out on that.... cause it really is kind of a PITA to make if it's something you may only use once for a few minutes.
Good luck with everything!

Thanks again and hopefully my block isn't affected, fingers crossed but it might be a long shot
#43
10-22-2014, 09:37 PM
Update:
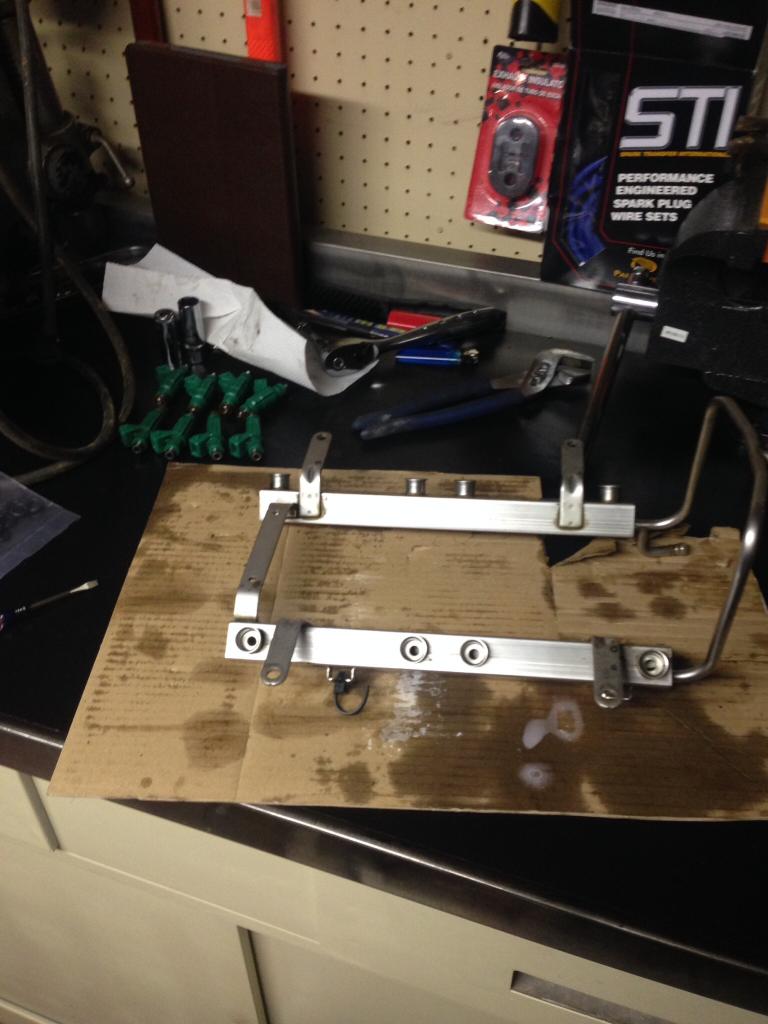
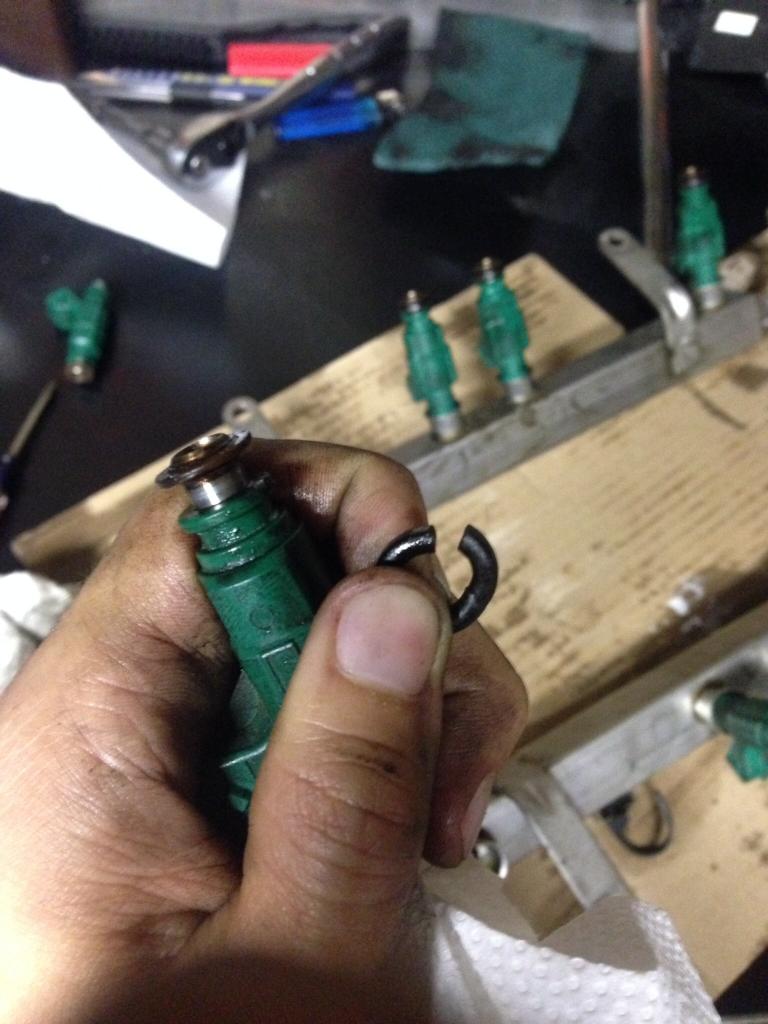
Decided to get stuff cleaned up and rebuilt while I waited for the kit. Started with cleaning up the fuel rail, injectors and new o rings. Good thing too, the o rings on the sprayer end of the injectors were pretty brittle
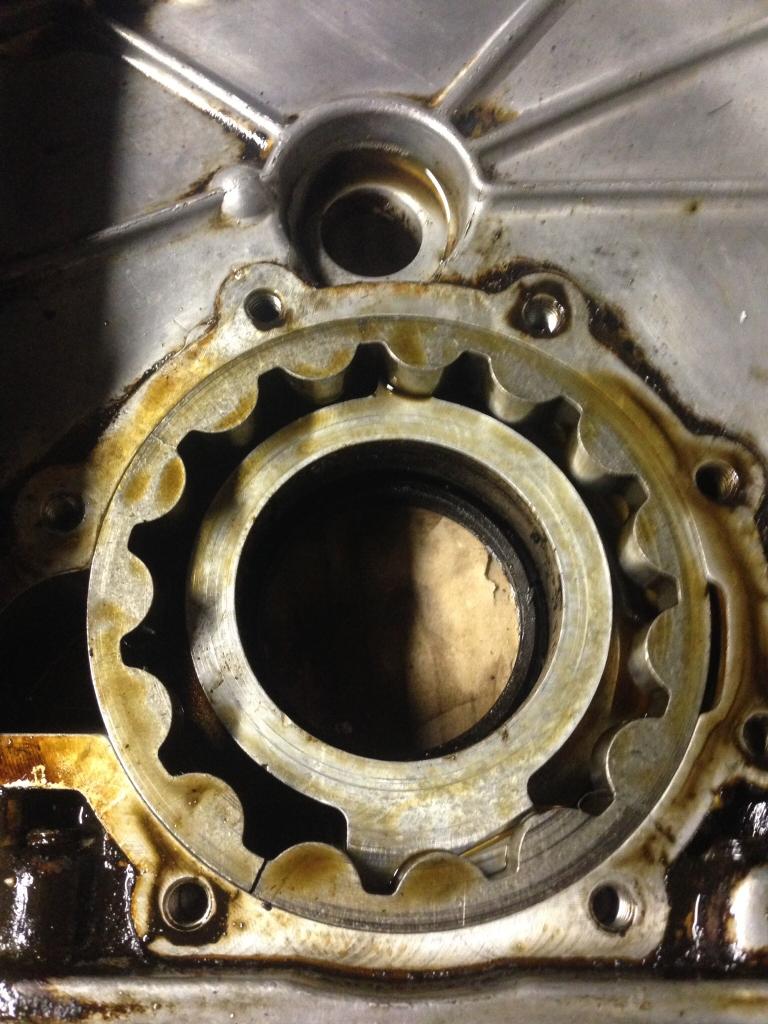
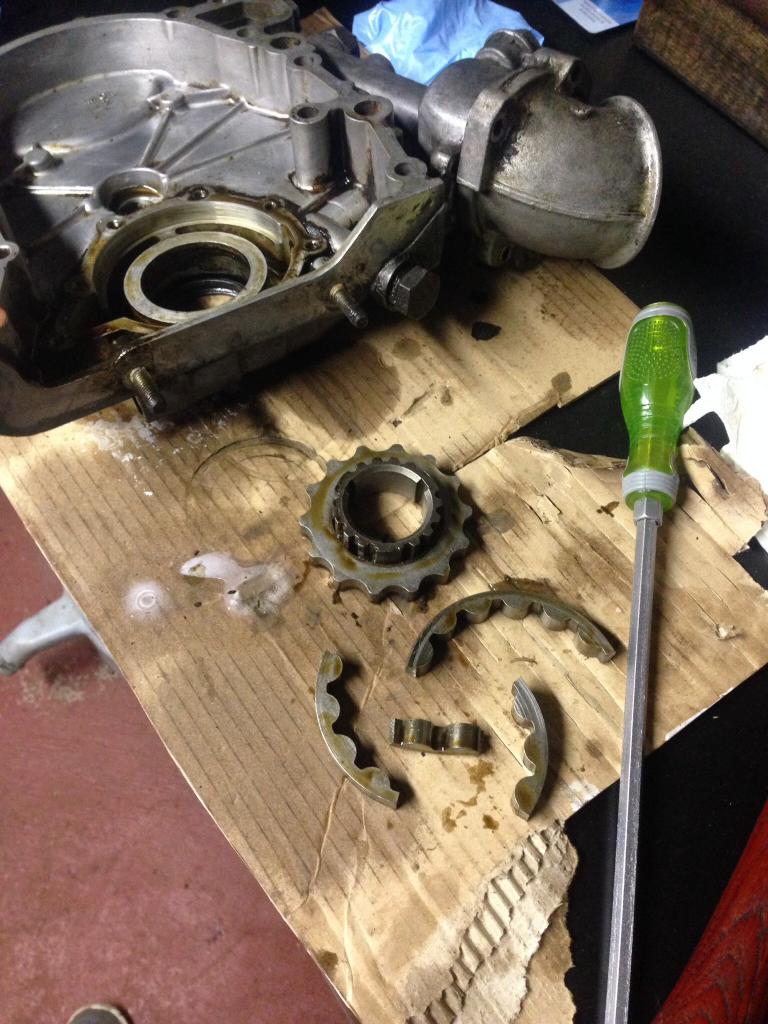
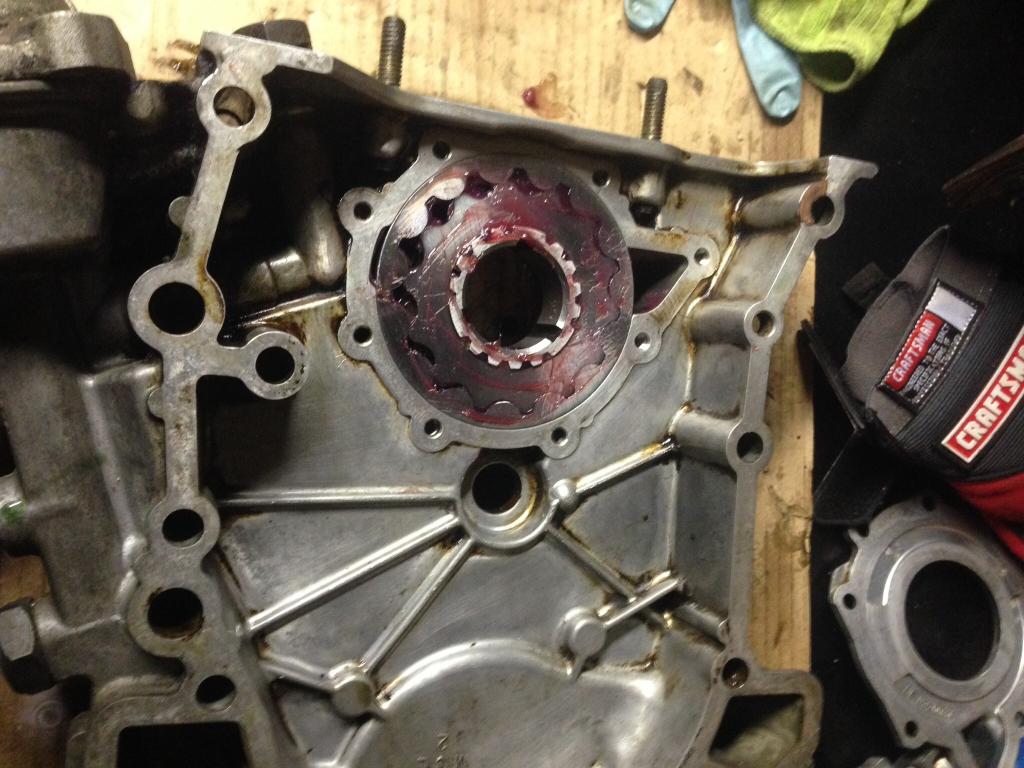
Then we stripped off the water pumped (checked out good, appears recently replaced bc of all the red gasket goop. Got the timing chain and sprockets, seemed fine but getting replaced due to age/mileage. The oil pump was another hidden problem, opened it up to a broken outer gear. Replaced them and a new oil seal

Good as new

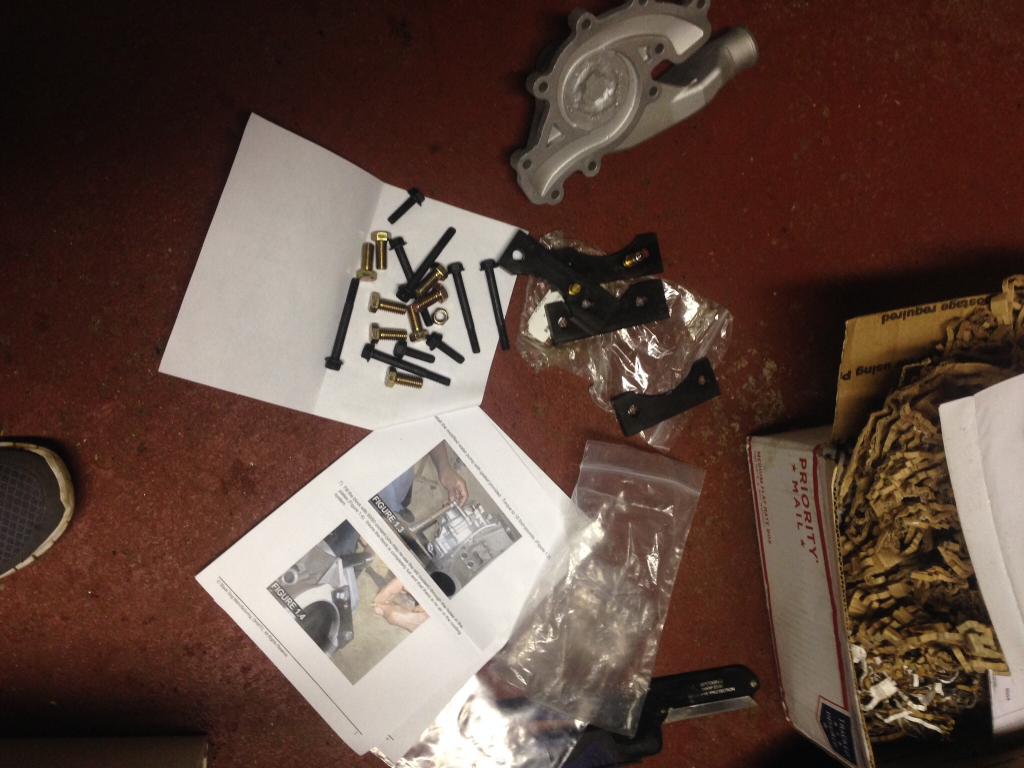
Oh yeah, and Abran's kit showed up:
Decided to get stuff cleaned up and rebuilt while I waited for the kit. Started with cleaning up the fuel rail, injectors and new o rings. Good thing too, the o rings on the sprayer end of the injectors were pretty brittle


Then we stripped off the water pumped (checked out good, appears recently replaced bc of all the red gasket goop. Got the timing chain and sprockets, seemed fine but getting replaced due to age/mileage. The oil pump was another hidden problem, opened it up to a broken outer gear. Replaced them and a new oil seal


Good as new

Oh yeah, and Abran's kit showed up:

#44
10-22-2014, 10:32 PM
Recovery Vehicle
Glad you caught the oil pump before it did your engine in.
Did you put the beveled edge of the outer oil pump gear into the pocket?
Some say it doesn't matter, some say it does. The original has the beveled edge into the pocket and aiming toward the radiator and the flat side without a bevel toward the cover plate that holds the gears into the front cover.
Some also say the aftermarket gear doesn't have a beveled edge but it does, so hopefully you got it right or haven't put it all back on the engine.
Last edited by RicketyTick; 10-22-2014 at 10:42 PM.

#47
10-23-2014, 10:24 AM
Rovers are like legos for adults, just follow the directions and you'll be fine
-Chris
#48
10-23-2014, 10:29 AM
Recovery Vehicle
Another friendly reminder/tip or whatever...when putting the heads back on, put the new head gaskets on, set the heads on, set the old intake/valley gasket on, set the intake on, start the 4 corner bolts in the intake and snug them up not tight just snug, then torque the heads down, then remove the intake to put the new valley gasket on.
That way you will be sure the heads will be lined up perfect with the intake.
I guess 99% of the time it isn't a problem but, one of the big time builders says he always does this to insure everything lines up correctly.
Alot of people don't bother with all of that but, we had a member here awhile back who's intake didn't line up right after torquing the heads down and turned into a nightmare from hell for him. He ended up cross-threading bolts and pulling threads from his heads and putting in inserts and all kinda problems.
So anyway, good cheap insurance.
Last edited by RicketyTick; 10-24-2014 at 08:48 AM.
#50
10-24-2014, 07:36 PM

Another friendly reminder/tip or whatever...when putting the heads back on, put the new head gaskets on, set the heads on, set the old intake/valley gasket on, set the intake on, start the 4 corner bolts in the intake and snug them up not tight just snug, then torque the heads down, then remove the intake to put the new valley gasket on.
That way you will be sure the heads will be lined up perfect with the intake.
I guess 99% of the time it isn't a problem but, one of the big time builders says he always does this to insure everything lines up correctly.
Alot of people don't bother with all of that but, we had a member here awhile back who's intake didn't line up right after torquing the heads down and turned into a nightmare from hell for him. He ended up cross-threading bolts and pulling threads from his heads and putting in inserts and all kinda problems.
So anyway, good cheap insurance.
That way you will be sure the heads will be lined up perfect with the intake.
I guess 99% of the time it isn't a problem but, one of the big time builders says he always does this to insure everything lines up correctly.
Alot of people don't bother with all of that but, we had a member here awhile back who's intake didn't line up right after torquing the heads down and turned into a nightmare from hell for him. He ended up cross-threading bolts and pulling threads from his heads and putting in inserts and all kinda problems.
So anyway, good cheap insurance.