Had my new Discovery for about a minute... and already have it taken apart!!!!!


#25
 04-10-2013, 11:47 AM
This is awesome! I'm really liking how often you are posting your progress! Sure has me wishing I had the time and funding to do something similar, but until then atleast I can enjoy watching your progress.
May have to do that metal on the rear door of my 99 since it has a big hole from the sub box being ripped out. Rivets would look nice, but with my rover luck the second I riveted it the rear lock actuator would go out and I'd have to drill them all out.
May have to do that metal on the rear door of my 99 since it has a big hole from the sub box being ripped out. Rivets would look nice, but with my rover luck the second I riveted it the rear lock actuator would go out and I'd have to drill them all out.
#26
04-10-2013, 11:54 AM
This is awesome! I'm really liking how often you are posting your progress! Sure has me wishing I had the time and funding to do something similar, but until then atleast I can enjoy watching your progress.
May have to do that metal on the rear door of my 99 since it has a big hole from the sub box being ripped out. Rivets would look nice, but with my rover luck the second I riveted it the rear lock actuator would go out and I'd have to drill them all out.
May have to do that metal on the rear door of my 99 since it has a big hole from the sub box being ripped out. Rivets would look nice, but with my rover luck the second I riveted it the rear lock actuator would go out and I'd have to drill them all out.

#27
04-10-2013, 12:39 PM

Cool thread, nice truck!
For some added flare...take the rear metal door panel off you made (great idea by the way) and add a design to it with a grinder with one of those wheels with the little sanding pads on the end... i did this to my dune buggy floor and it looks sweeet...took us a little messing around to get a design we liked but came out great...i dont have a picture of the floor right now but here are some other examples that my friend has done...couldnt find a big sheet with the design but you will get the idea:
For some added flare...take the rear metal door panel off you made (great idea by the way) and add a design to it with a grinder with one of those wheels with the little sanding pads on the end... i did this to my dune buggy floor and it looks sweeet...took us a little messing around to get a design we liked but came out great...i dont have a picture of the floor right now but here are some other examples that my friend has done...couldnt find a big sheet with the design but you will get the idea:
#28
04-10-2013, 01:00 PM
Cool thread, nice truck!
For some added flare...take the rear metal door panel off you made (great idea by the way) and add a design to it with a grinder with one of those wheels with the little sanding pads on the end... i did this to my dune buggy floor and it looks sweeet...took us a little messing around to get a design we liked but came out great...i dont have a picture of the floor right now but here are some other examples that my friend has done...couldnt find a big sheet with the design but you will get the idea:
For some added flare...take the rear metal door panel off you made (great idea by the way) and add a design to it with a grinder with one of those wheels with the little sanding pads on the end... i did this to my dune buggy floor and it looks sweeet...took us a little messing around to get a design we liked but came out great...i dont have a picture of the floor right now but here are some other examples that my friend has done...couldnt find a big sheet with the design but you will get the idea:
Thank brother, ya funny you bring this up because I was just watching some vids on this, looks sick. I really like that HD logo and the bird. That would look sweet as hell on the inside of my truck.
I really enjoy metal work, I generally use wood as a media so its a nice change of pace. Dirty work.. but fun.. oh ya molting metal in your shirt kinda sux too.

#29
04-11-2013, 07:40 AM
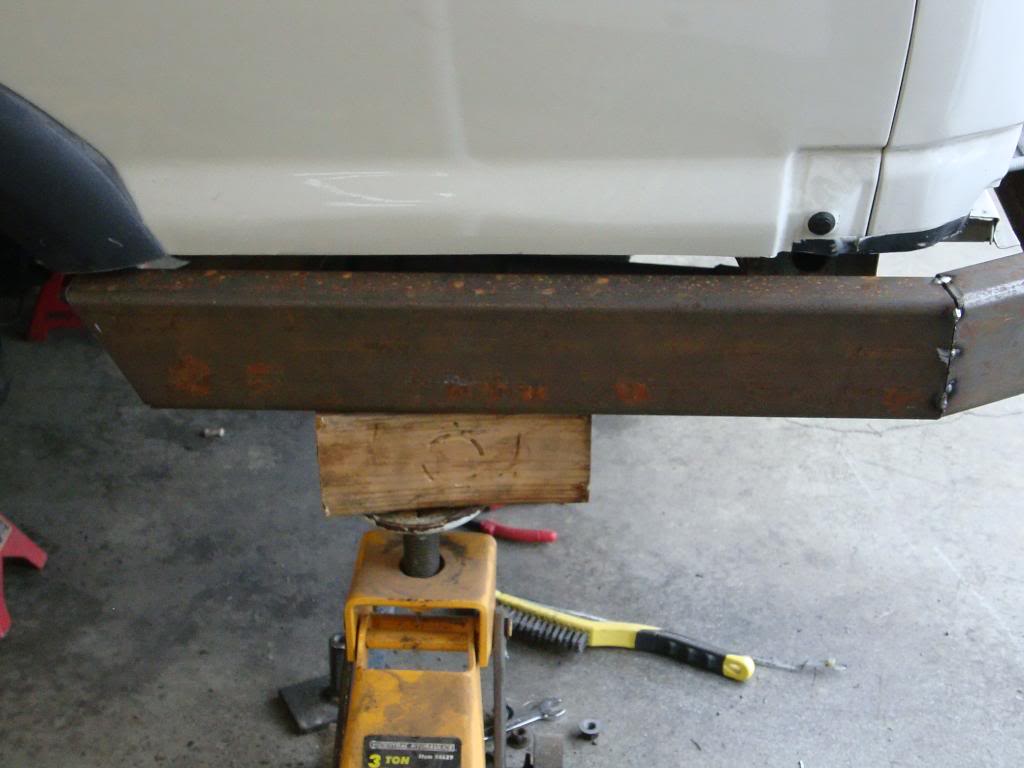
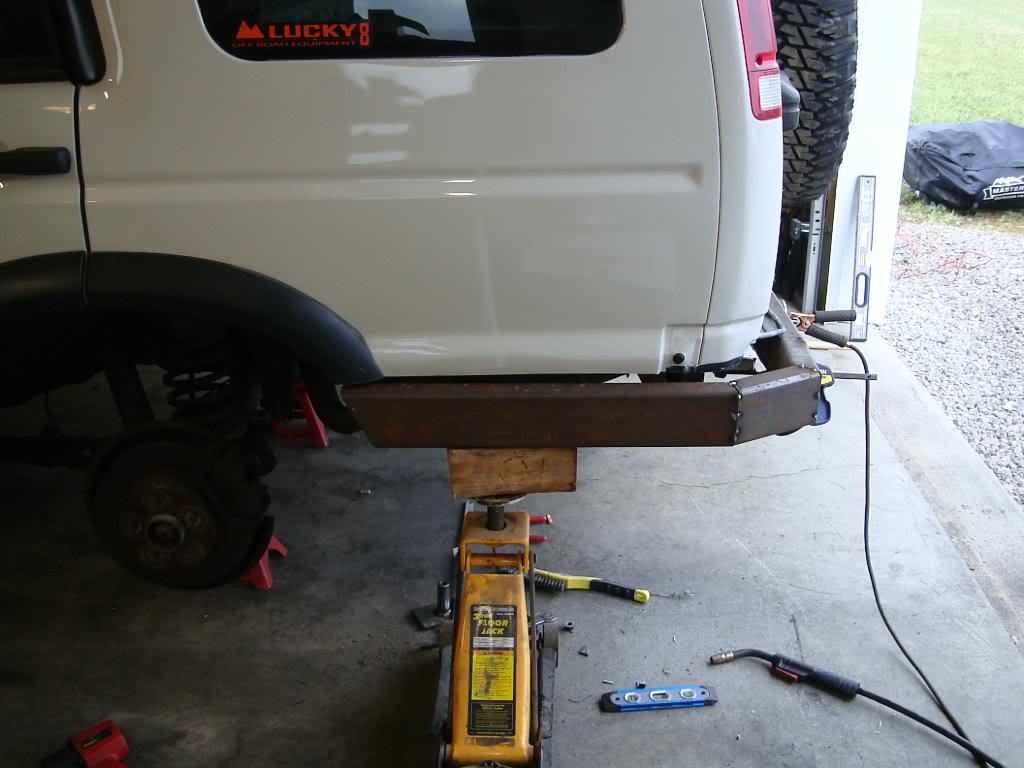
Got the fab work done last night on the rear bumper.... gonna whip together some side mounts and figure out how to incorporate the receiver to the new bumper so I can tow the camper and also have frame mounts in the center of the bumper.
Side note... make sure when your using a grinder with cut off wheels that you have good protection on... eyes, hands, leather smock. Had one explode on me last night and if I didn't have my leathers on I think it would have taken out the boys if you know what I mean... pics coming as soon.
Side note... make sure when your using a grinder with cut off wheels that you have good protection on... eyes, hands, leather smock. Had one explode on me last night and if I didn't have my leathers on I think it would have taken out the boys if you know what I mean... pics coming as soon.
#30
04-11-2013, 08:23 AM

Got the fab work done last night on the rear bumper.... gonna whip together some side mounts and figure out how to incorporate the receiver to the new bumper so I can tow the camper and also have frame mounts in the center of the bumper.
Side note... make sure when your using a grinder with cut off wheels that you have good protection on... eyes, hands, leather smock. Had one explode on me last night and if I didn't have my leathers on I think it would have taken out the boys if you know what I mean... pics coming as soon.
Side note... make sure when your using a grinder with cut off wheels that you have good protection on... eyes, hands, leather smock. Had one explode on me last night and if I didn't have my leathers on I think it would have taken out the boys if you know what I mean... pics coming as soon.