When you click on links to various merchants on this site and make a purchase, this can result in this site earning a commission. Affiliate programs and affiliations include, but are not limited to, the eBay Partner Network.
How To: Installing Wet Okole Seat Covers On Disco II
So I recently picked up some Neoprene seat covers for my 2004 Disco II from Wet Okole. They cost around $300 for the front two seats (including armrest and headrest covers) and fit quite well. The only issue I saw was the hole for the armrests were a bit big and off center but you can't really tell after installation. I was looking for waterproof seat covers that were easy to clean and durable and my google-fu indicated that Neoprene scored well on all counts. I didn't end up installing the armrest or headrest covers and but i think the final product ended up looking pretty good. First seat (I started with the passenger) took me about 2 hours but a lot of that was me figuring things out. The Wet Okole installation instructions are pretty generic (hence this post). The second seat was much quicker and only took an hour or so.
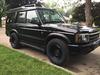
Here's my original seat:
Start by removing the headrest and seat mounted grab handles (2 per seat). Slide a small screw driver under the headrest post cover to pop a plastic snap finger and release the post cover
Once you've released the plastic post cover, push on the metal clip to release the headrest post. I took this picture after I removed the headrest to get a better view.
After removing the headrest, remove the grab handle screw (one per each grabhandle). After you remove the screw, you'll need to work the plastic tab free from the existing leather seat trim using a small screwdriver or better yet a plastic trim tool.
Once you work the plastic tab free of the seat trim, the grab handle will come right off.
Remove the armrest using an 8mm socket (moving the seat back to clear the console will make this a lot easier). In this photo, i put the bolt back in to show where it goes.
Here's a key tip, you won't be able to fish through the straps that go under the seat unless you pop free the back trim clip that secures the seat back trim. I messed with this for a half hour before i just pushed at it with a screwdriver and it popped right off. This photo shows the clip after I popped it off.
Now remove the side trim panel by unscrewing two screws.
So much for the easy part, now the PITA part of this job. Fishing the straps underneath the seat and getting them adjusted so they are tight. I'd suggest moving the seat as high as possible to give yourself as much room to work as possible. Try and eyeball an approximate length for the straps before you connect them. It's kind of a pain to pull them tight once they've been connected. I used a clothes hanger to fish the straps from front to back or back to front as i worked.
There are 2 straps under the seat pan (the part you sit on). The get pushed through the crack between the seat pan and seat back. They then loop underneath the seat and clip to straps that come out of the front. This will secure the seat cover bottom to the seat pan.
Here are the straps in the front of the seat. There are two sets for each seat. One set connects to the straps you just pushed through the seat crack. These secure the seat cover bottom. The other set connect to the seat back straps (i'll show next). These will secure the seat back cover. I couldn't tell that it made a difference which set I used to connect to the seat bottom or seat back straps. The front straps seem to be about the same length so I don't think it matters.
Once you secure the straps running from front to back (4 in all, 2 for the bottom and 2 for the back) the seat cover is pretty secure. There are also some straps running side to side but I didn't use those. The seat track mechanism gets in the way so I couldn't figure out how to get them through. The covers seem pretty secure as is however. Once the straps are secure you can replace the headrest and grabhandles. You can neatly tuck the side of the seat covers under the side trim before you replace it so it looks pretty good. Here is the final result.
I can't imagine it would be worth the extra effort to remove the seats but then again while i'd say i'm handy, i'm not a mechanic. Maybe for someone with more experience, taking the seats out isn't a big deal but i'd be afraid to try it.
I probably could have spent more time trying to maneuver the seats so that I could get the side-to-side straps buckled. Also I never bothered to reclip the seat back trim clip (photo #6). I think I would have to notch it somehow to make clearance for the straps. Right now it just dangles but it's not noticeable at all (and I almost never have people in the back seat).
So far I haven't had any sweat issues but i've only just installed them and haven't done any long drives yet. I wouldn't be surprised however if they created some breathability issues. I've seen some forum comments to that effect and based on my short experience I think they don't breathe quite as well as the leather seats. As I've only just installed them I can't comment on durability but my understanding was that neoprene was pretty durable. I'll update if I find anything more out.
CoverKings has a breathable mesh material, like some office chairs have.
Unfortunately, they have none available on their website for a D2.
I will be buying a mesh pair if I can find any.
I like how the neoprene looks, and they would be good for snow and the cold.