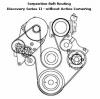
Oil Pump and Timing Chain Replacement Write Up


#27
 03-17-2016, 02:07 PM

One thing I started doing was keeping visqueen around, and last time I drained the coolant I placed a large sheet of visqueen under the truck, bunched up around the edges. It made like a pool so that all the coolant was trapped inside. After, I pulled out the visqueen and poured all the coolant into a tub. None (or not much) hit the floor. Other times I had a plastic shallow tub underneath with visqueen beneath. Much easier than cleaning cement.
#28
04-09-2016, 10:16 AM

I just finished this job, and thank you eternally for the write-up Alex_M! I followed it start to finish, and drove the Land Rover to work today, running great and no codes or lights.
drowssap — Yes, I bought an 18V DeWalt Impact driver and it made life wonderful. Indeed, those pulley bolts came right off, no trouble.
I'm going to list a few snags I ran into during this whole process and their solutions for future adventurers:
1. The oil pump housing plate is held in by those #3 Pozidriv bits, like the OP said, so buy the bit before you start this job!! I couldn't find one locally and had to order one and wait for it to come in. That's a couple more days with a vehicle out of commission for a stupid little thing that I forgot. Two of them stripped out anyway, so then I bought the ProGrip (I think it's called) screw extractor on Amazon and they came out. At first I tried an extractor from an auto shop but it sucked.
2. If your oil pump housing screws strip, the replacement you'll get is just a regular Phillips head at your local Lowe's or wherever, the specs are: 6M 6mm x 12mm flathead machine screw. Thanks JoeMama for pointing this out, helped me a ton. Now I've got all Phillips head screws so I don't have to worry about the Pozidriv in the future.
3. I zip-tied the two oil cooler lines together, down and out of the way, at the bottom passenger side by where the front cover goes in, because they kept snagging on the front cover oil filter housing when I went to replace it. This screwed up my front cover replacement multiple times, knocking my inner oil pump gear out of place by making it hit the crank at the wrong angle from catching on the front cover. Had to keep taking the front cover back off and reinserting the oil pump gear. So zip-tie those cooler lines out of the way and your life will be loads easier.
4. Getting the front cover back on with the inner oil pump gear not snagging and getting knocked out took me a couple hours, and loads of frustration. I figured out, if you turn the gears so they're lined to slide onto the woodruff key, if you were to put the front cover on straight, then turn them an inch counterclockwise, the gear will catch when you're rocking the front cover back and forth to slide it on.
5. My crossmember bolts were stripped, so I got the oil pan out by lifting the truck by the crossmember, then turning the oil pan around 180 degrees so the shallow end came out first.
Those are all the tips I can think of. I also had a dowel pin from the block to the front cover that had been snapped off by previous mechanics and stuck back in, without bothering to replace it, so I had to wait a few days for that to come in.
Good luck, and thanks again Alex_M!
The following users liked this post:
Roont (02-14-2024)
#30
05-02-2016, 03:23 PM

Did mine this weekend. Could not of done it without this write up!
I had big oil consumption,oil light would take forever to go out and horrible tapping on acceleration! Broke the tiny nipple on the radiator and had to get one from the junk yard but the sound is still there! Damn. The outer oil pump was cracked in one place and the timing chain was pretty slack. So it sounds like the cam! oil light stays on for about 5-10 seconds but everything does sound better but........
Thanks alot for the write up. Maybe a bit more on the direction of the 36mm fan nut and what a pig the oil cooler lines are.