
Pontiac Blower Motor Swap - $20-35


Thread Starter
|
Camel Trophy
Joined: Aug 2014
Posts: 4,743
Likes: 985
From: Southwestern Virginia
Hey guys! Back at it again after a year's hiatus.
With winter coming up quickly, I decided to go ahead and swap out my factory blower motor and retrofit a "Pontiac" unit. The one I ordered is actually from an 01-03 Chevy Impala. You can get one from (I believe from what I've seen on eBay) an Impala, Monte Carlo, Pontiac Grand Prix, and a Buick Century. They're all over eBay for dirt cheap.
If you've never heard of this, the benefits are more steady air flow, quieter operation, and stronger air.
I would like to go ahead and apologize. These pictures are kinda dark. They looked a lot brighter on my camera.
This is a pretty simple write up and a pretty simple job. Up next will be my panhard conversion using all factory parts. I've already finished it, just need to upload the pictures and type up the write up.
So lets get started! I didn't take pictures of removing the factory blower because... well, I forgot. There are a bunch of write ups and videos on replacing the blower, so if you don't know how to remove the blower I recommend following one of those for blower removal. Once you've got it removed come on back over and I'll show you the rest.
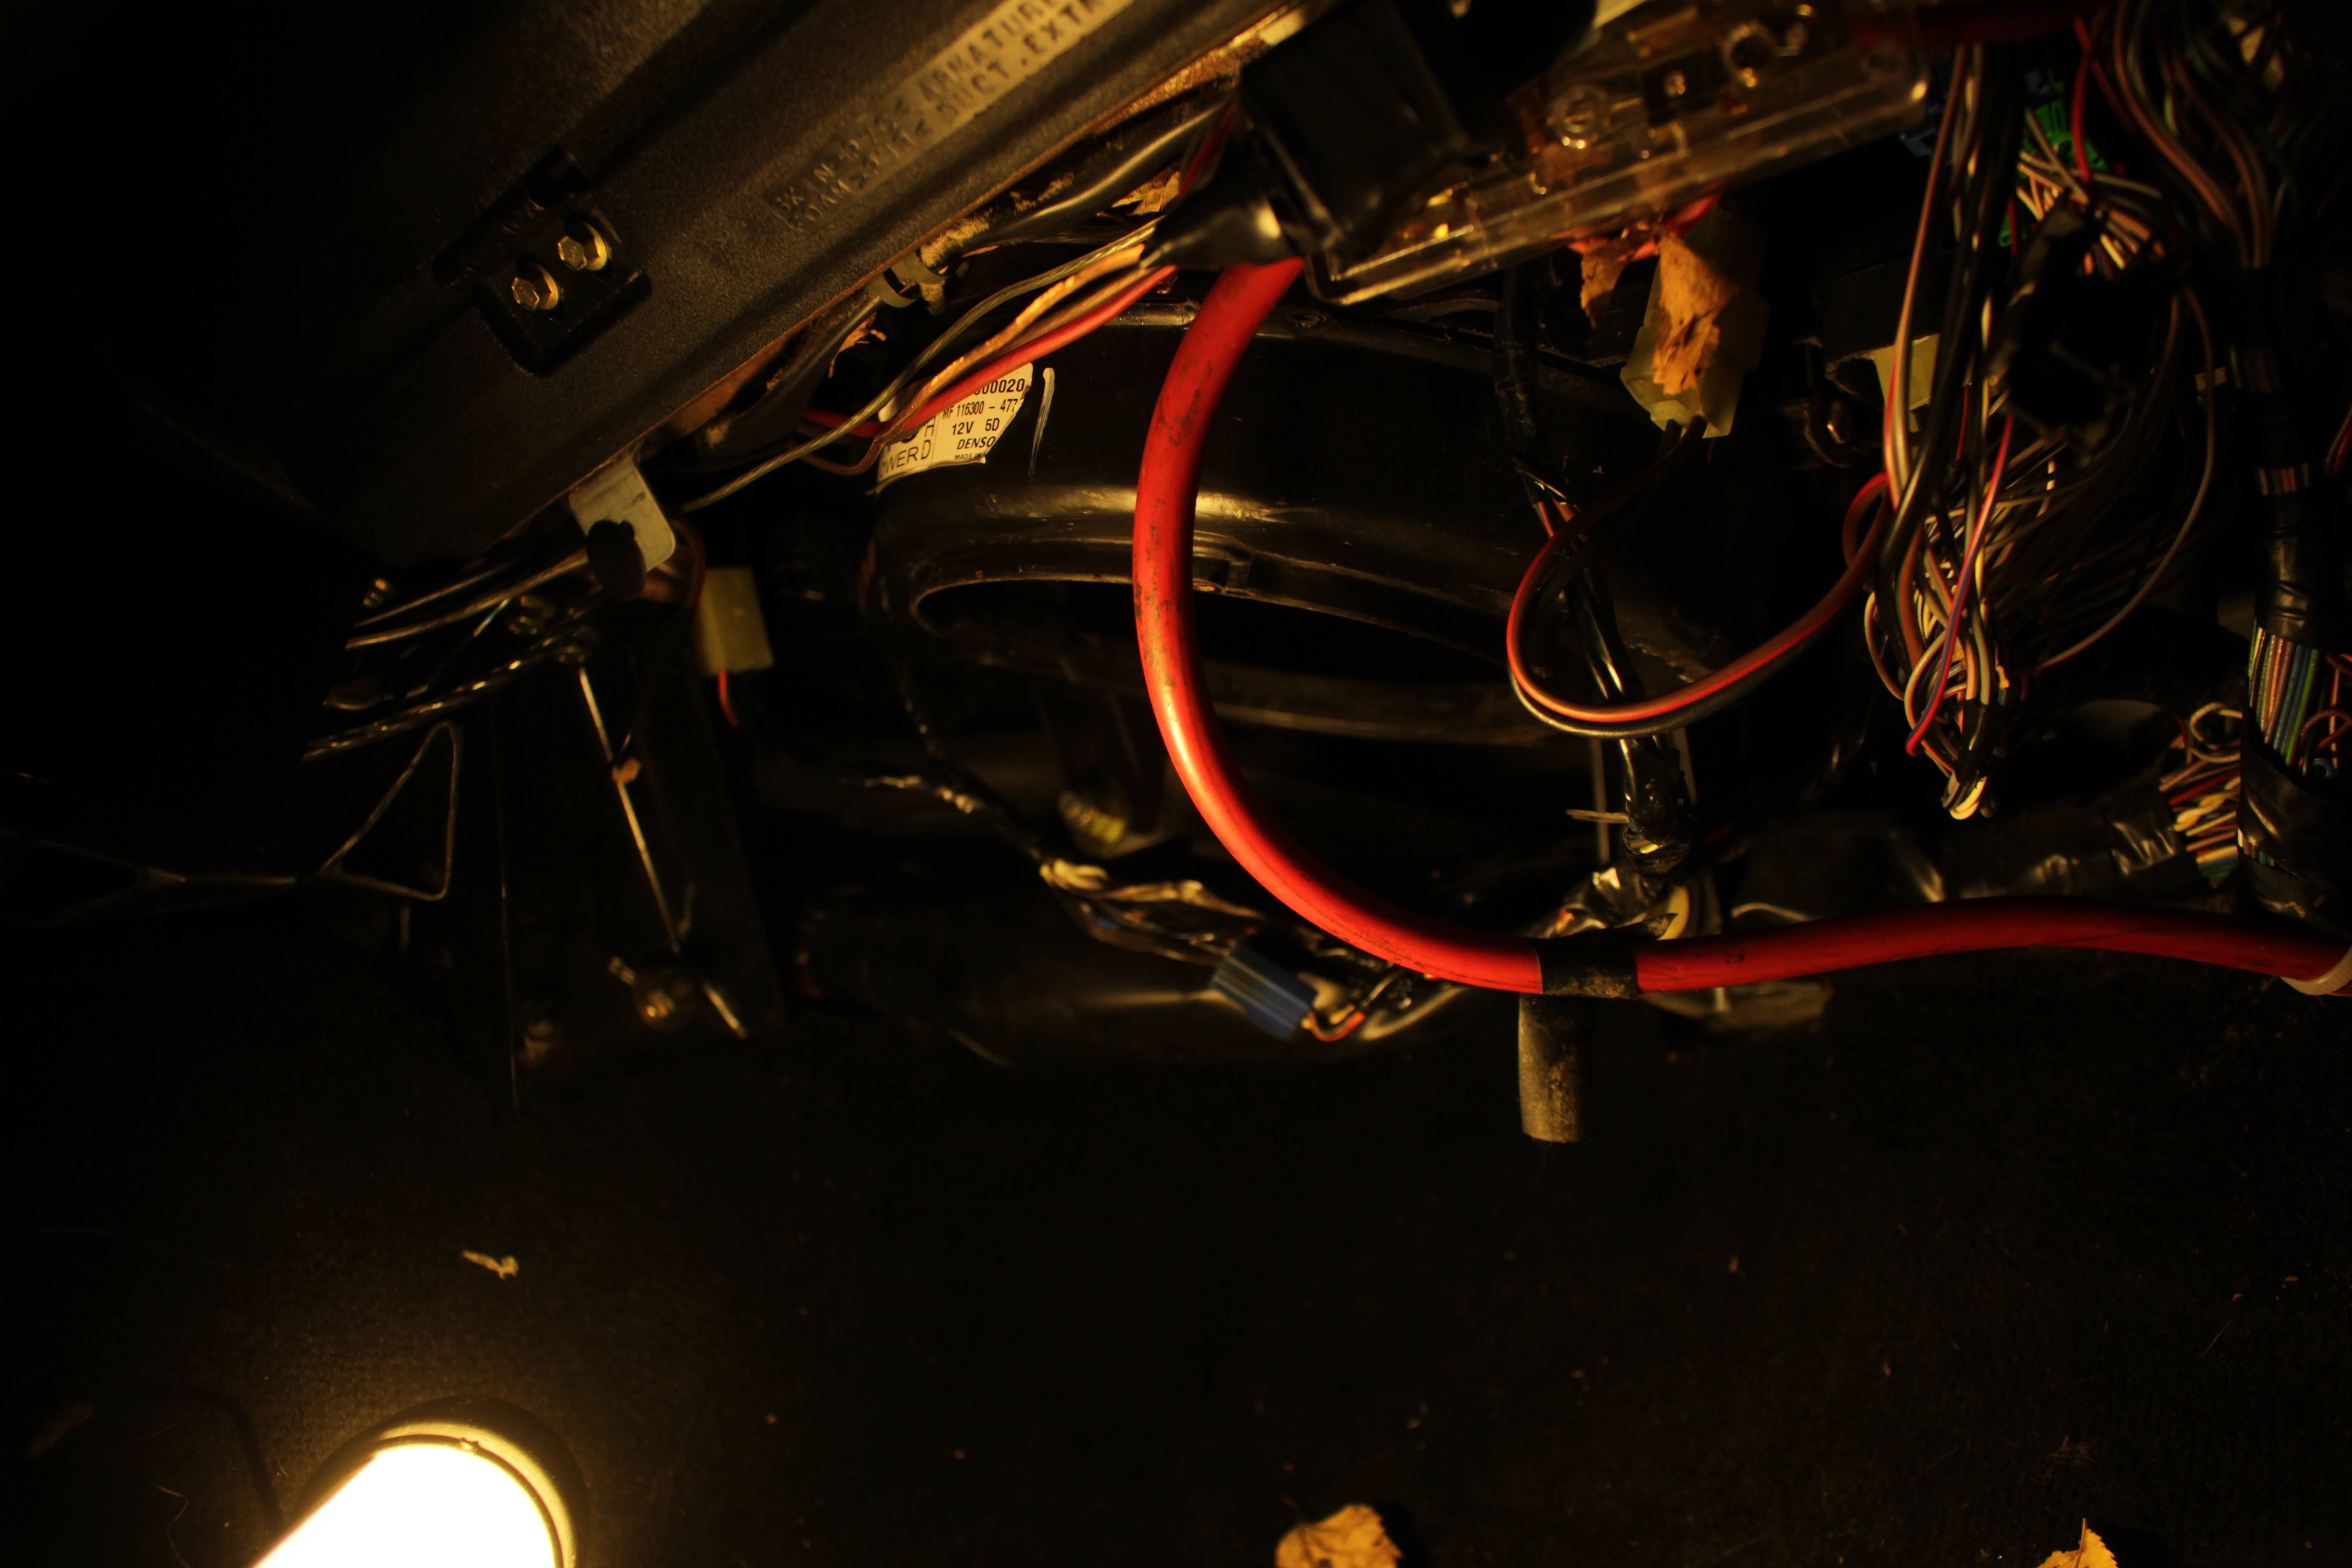
Once you have your factory blower out, all you need off of it is the plug. cut that off and toss the rest wherever you want.
Take that end and strip the wire ends back about 3/16" and set it aside for a minute.
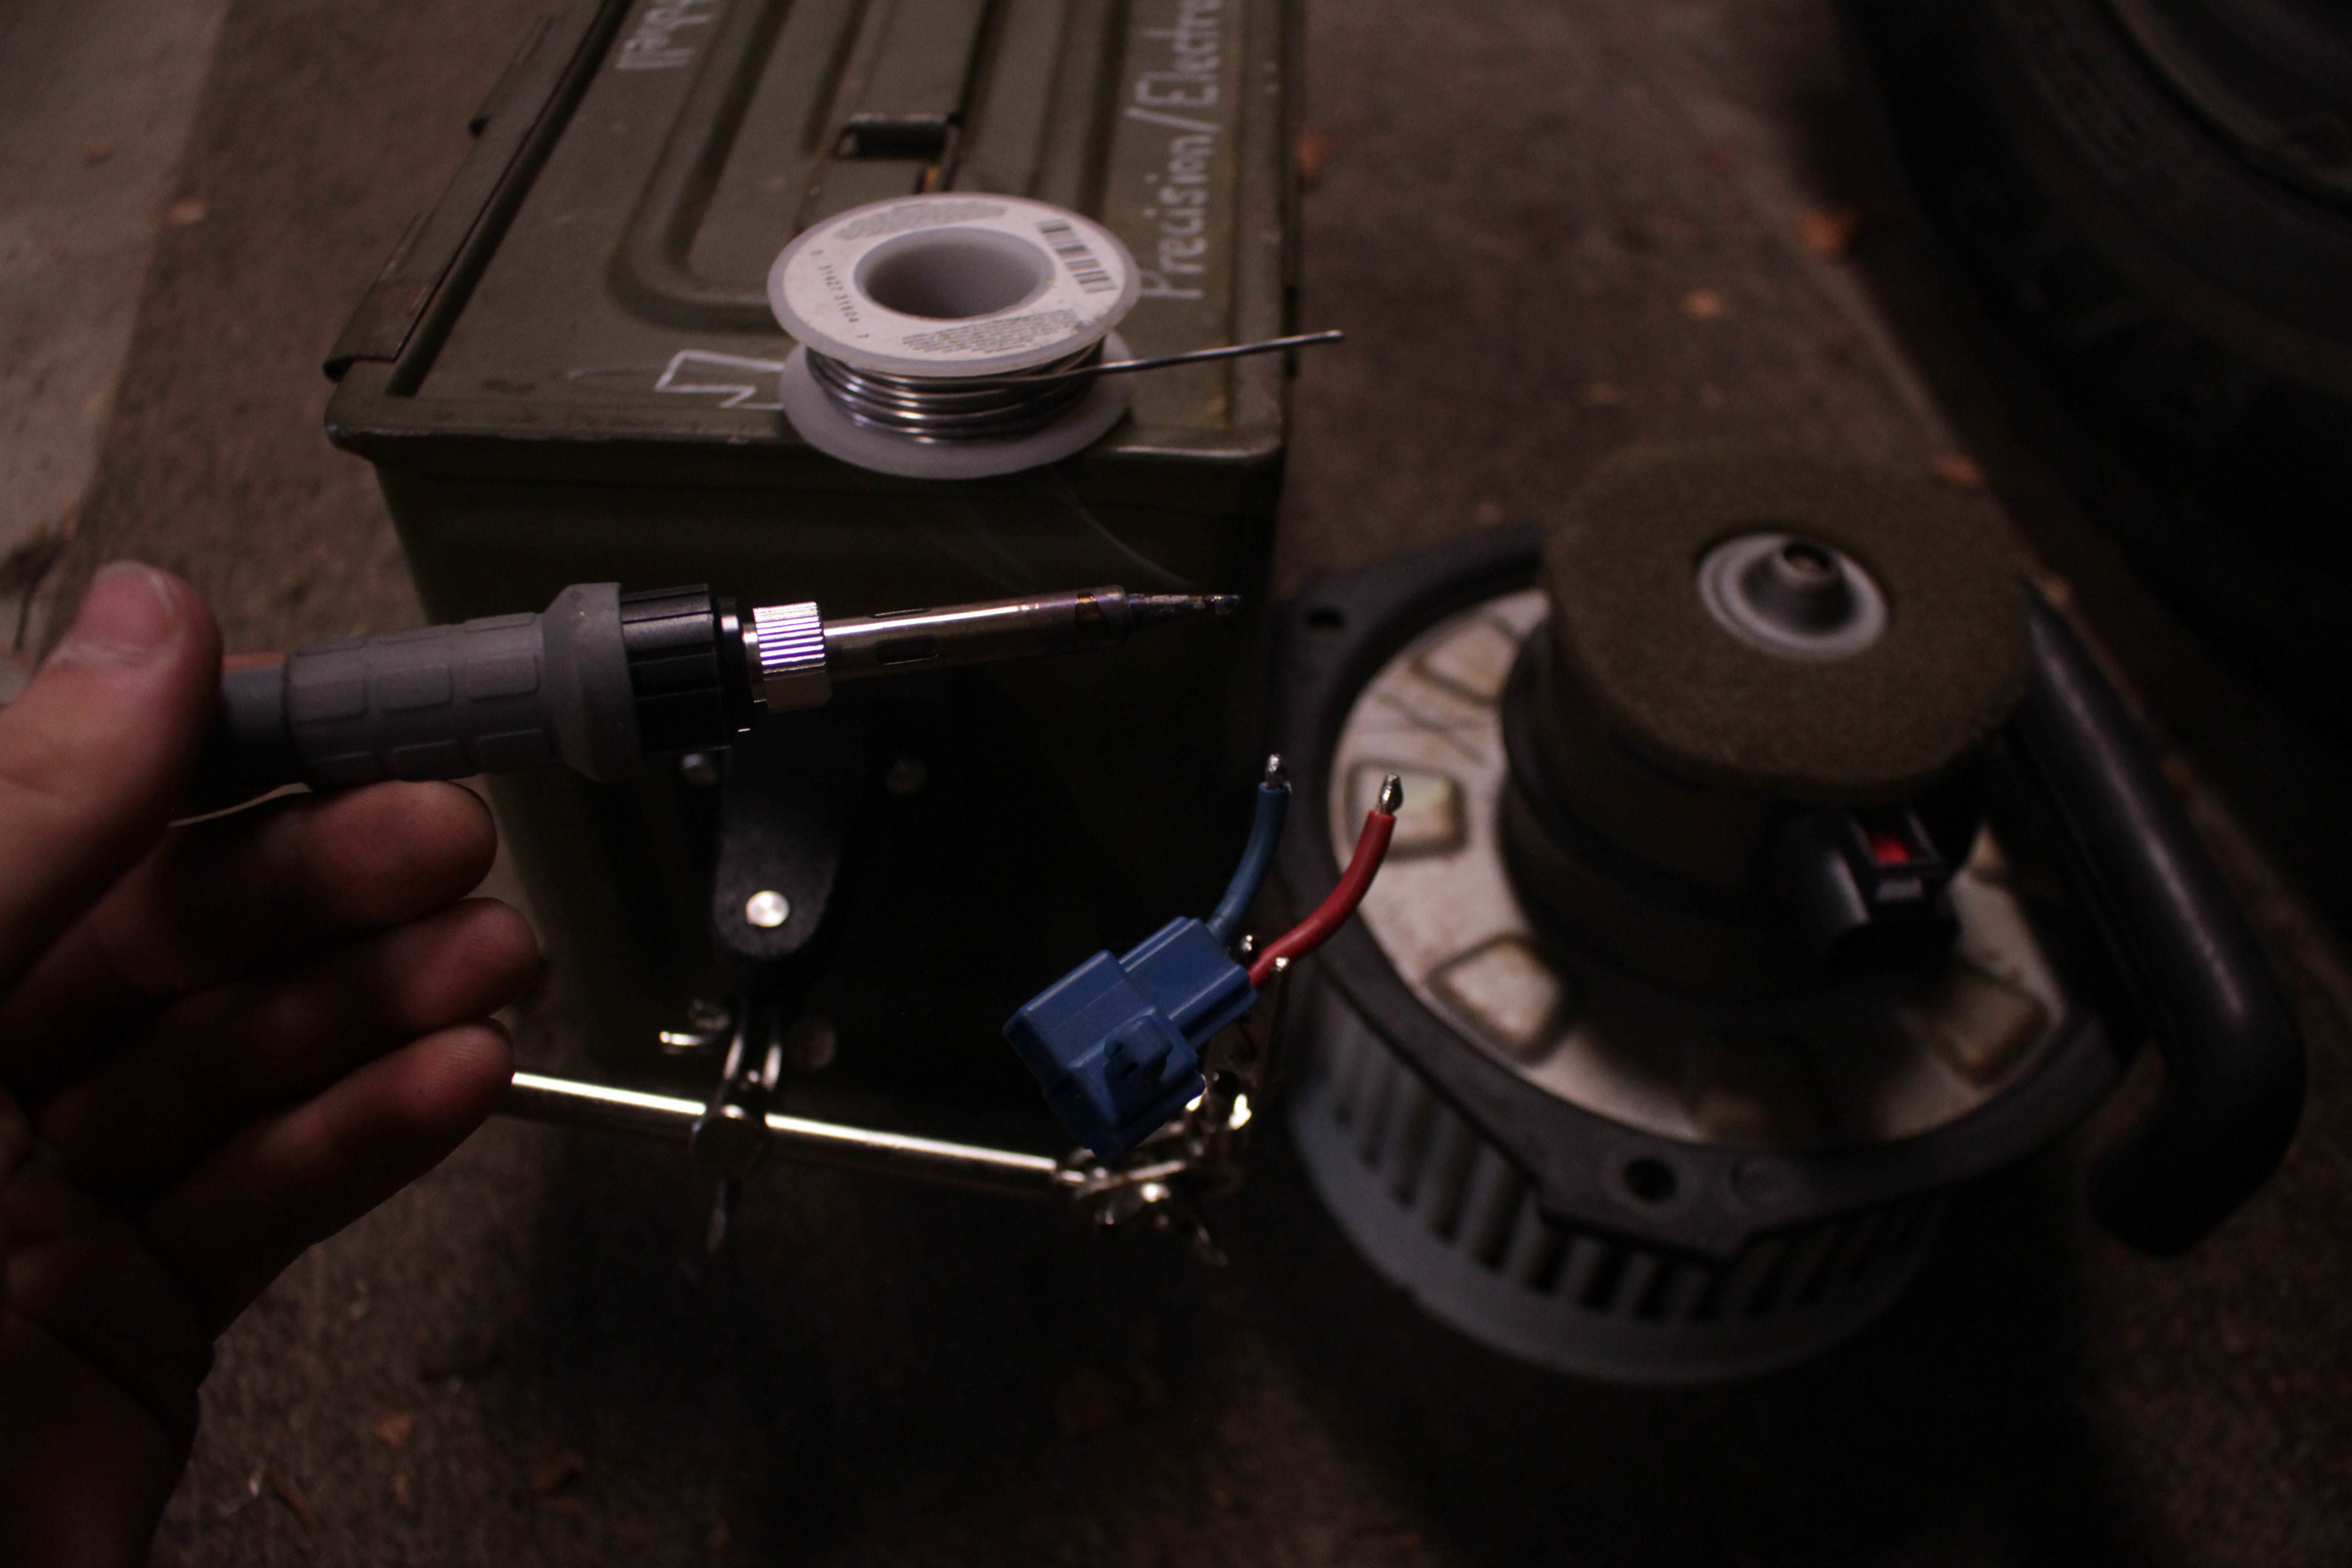
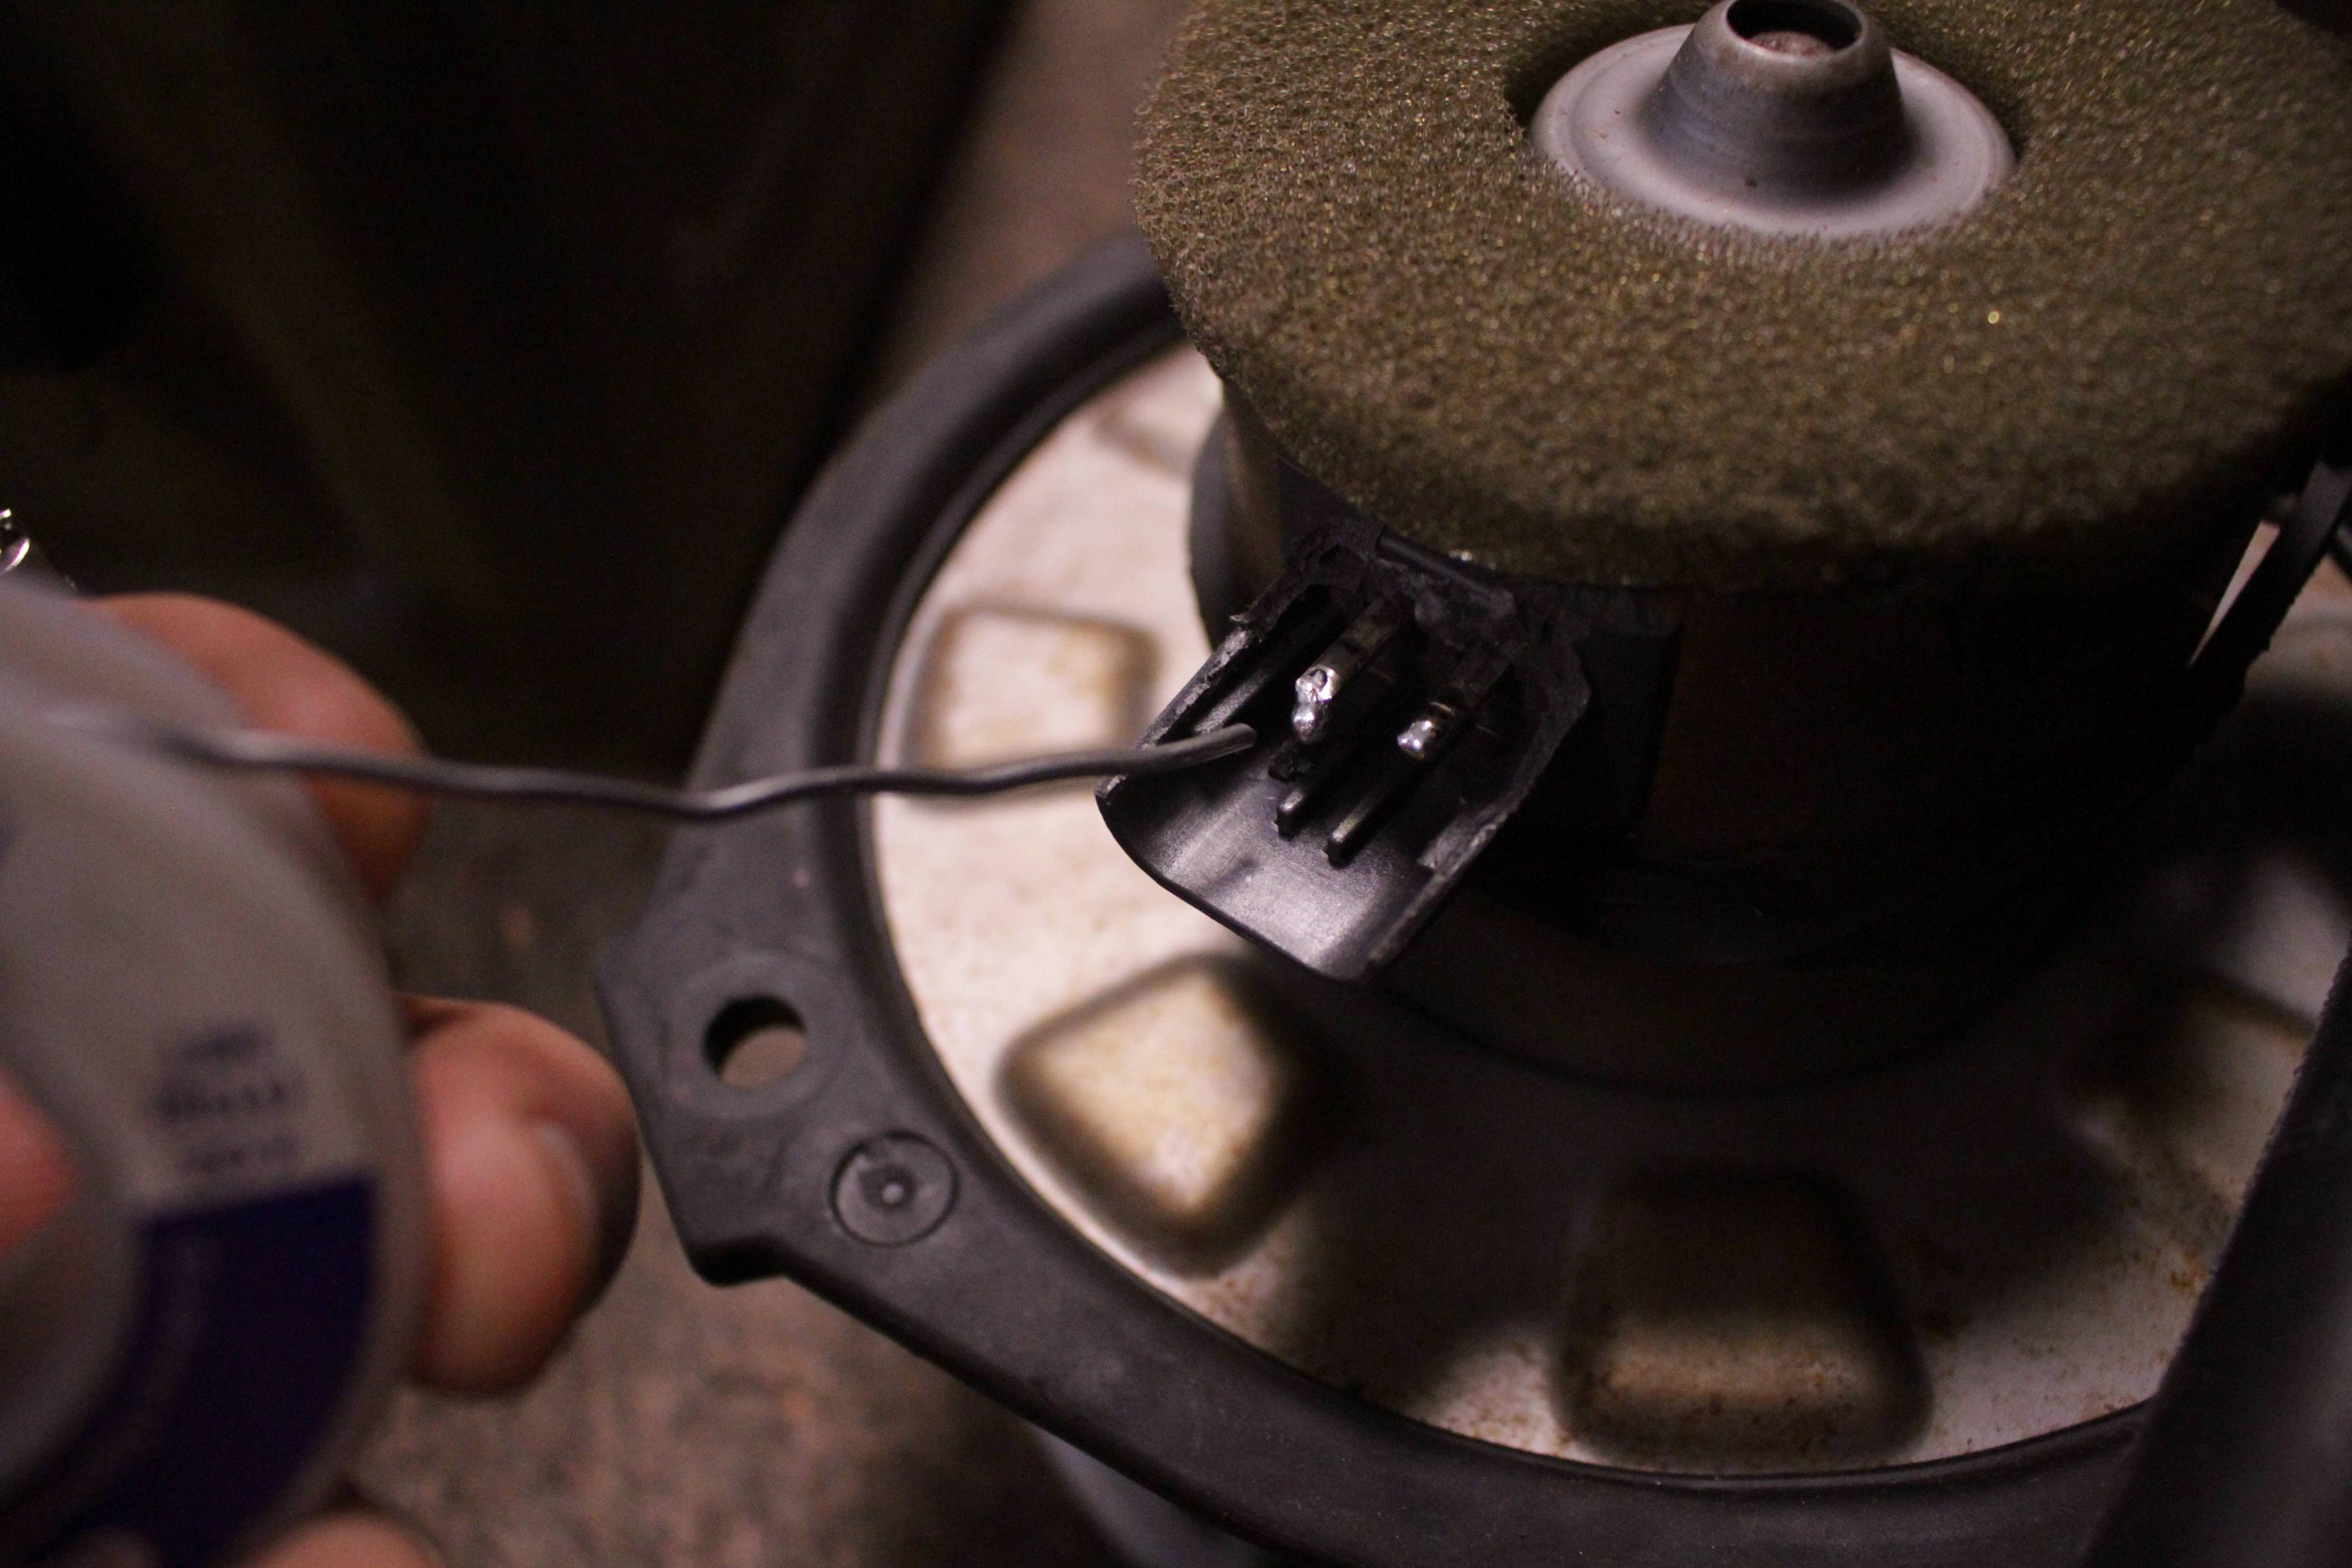
Go ahead and grab the replacement blower and a pair of wire cutters or something. You're going to want to go to where it would plug in and break some of the plastic off so you can get at the prongs.

Once you've got yourself about half of it broken off, grab the plug again and your soldering iron. If you've got a set of helping hands they help a ton. Clip your plug off of the factory blower into them. Go ahead and tin the stripped wire ends as well as the prongs on the blower plug you just opened up.
If you plan on keeping the factory blower around, I recommend going ahead and stripping those wires back a little and tinning those ends too. That will keep the wires from corroding and if you ever use it for something it will be ready.
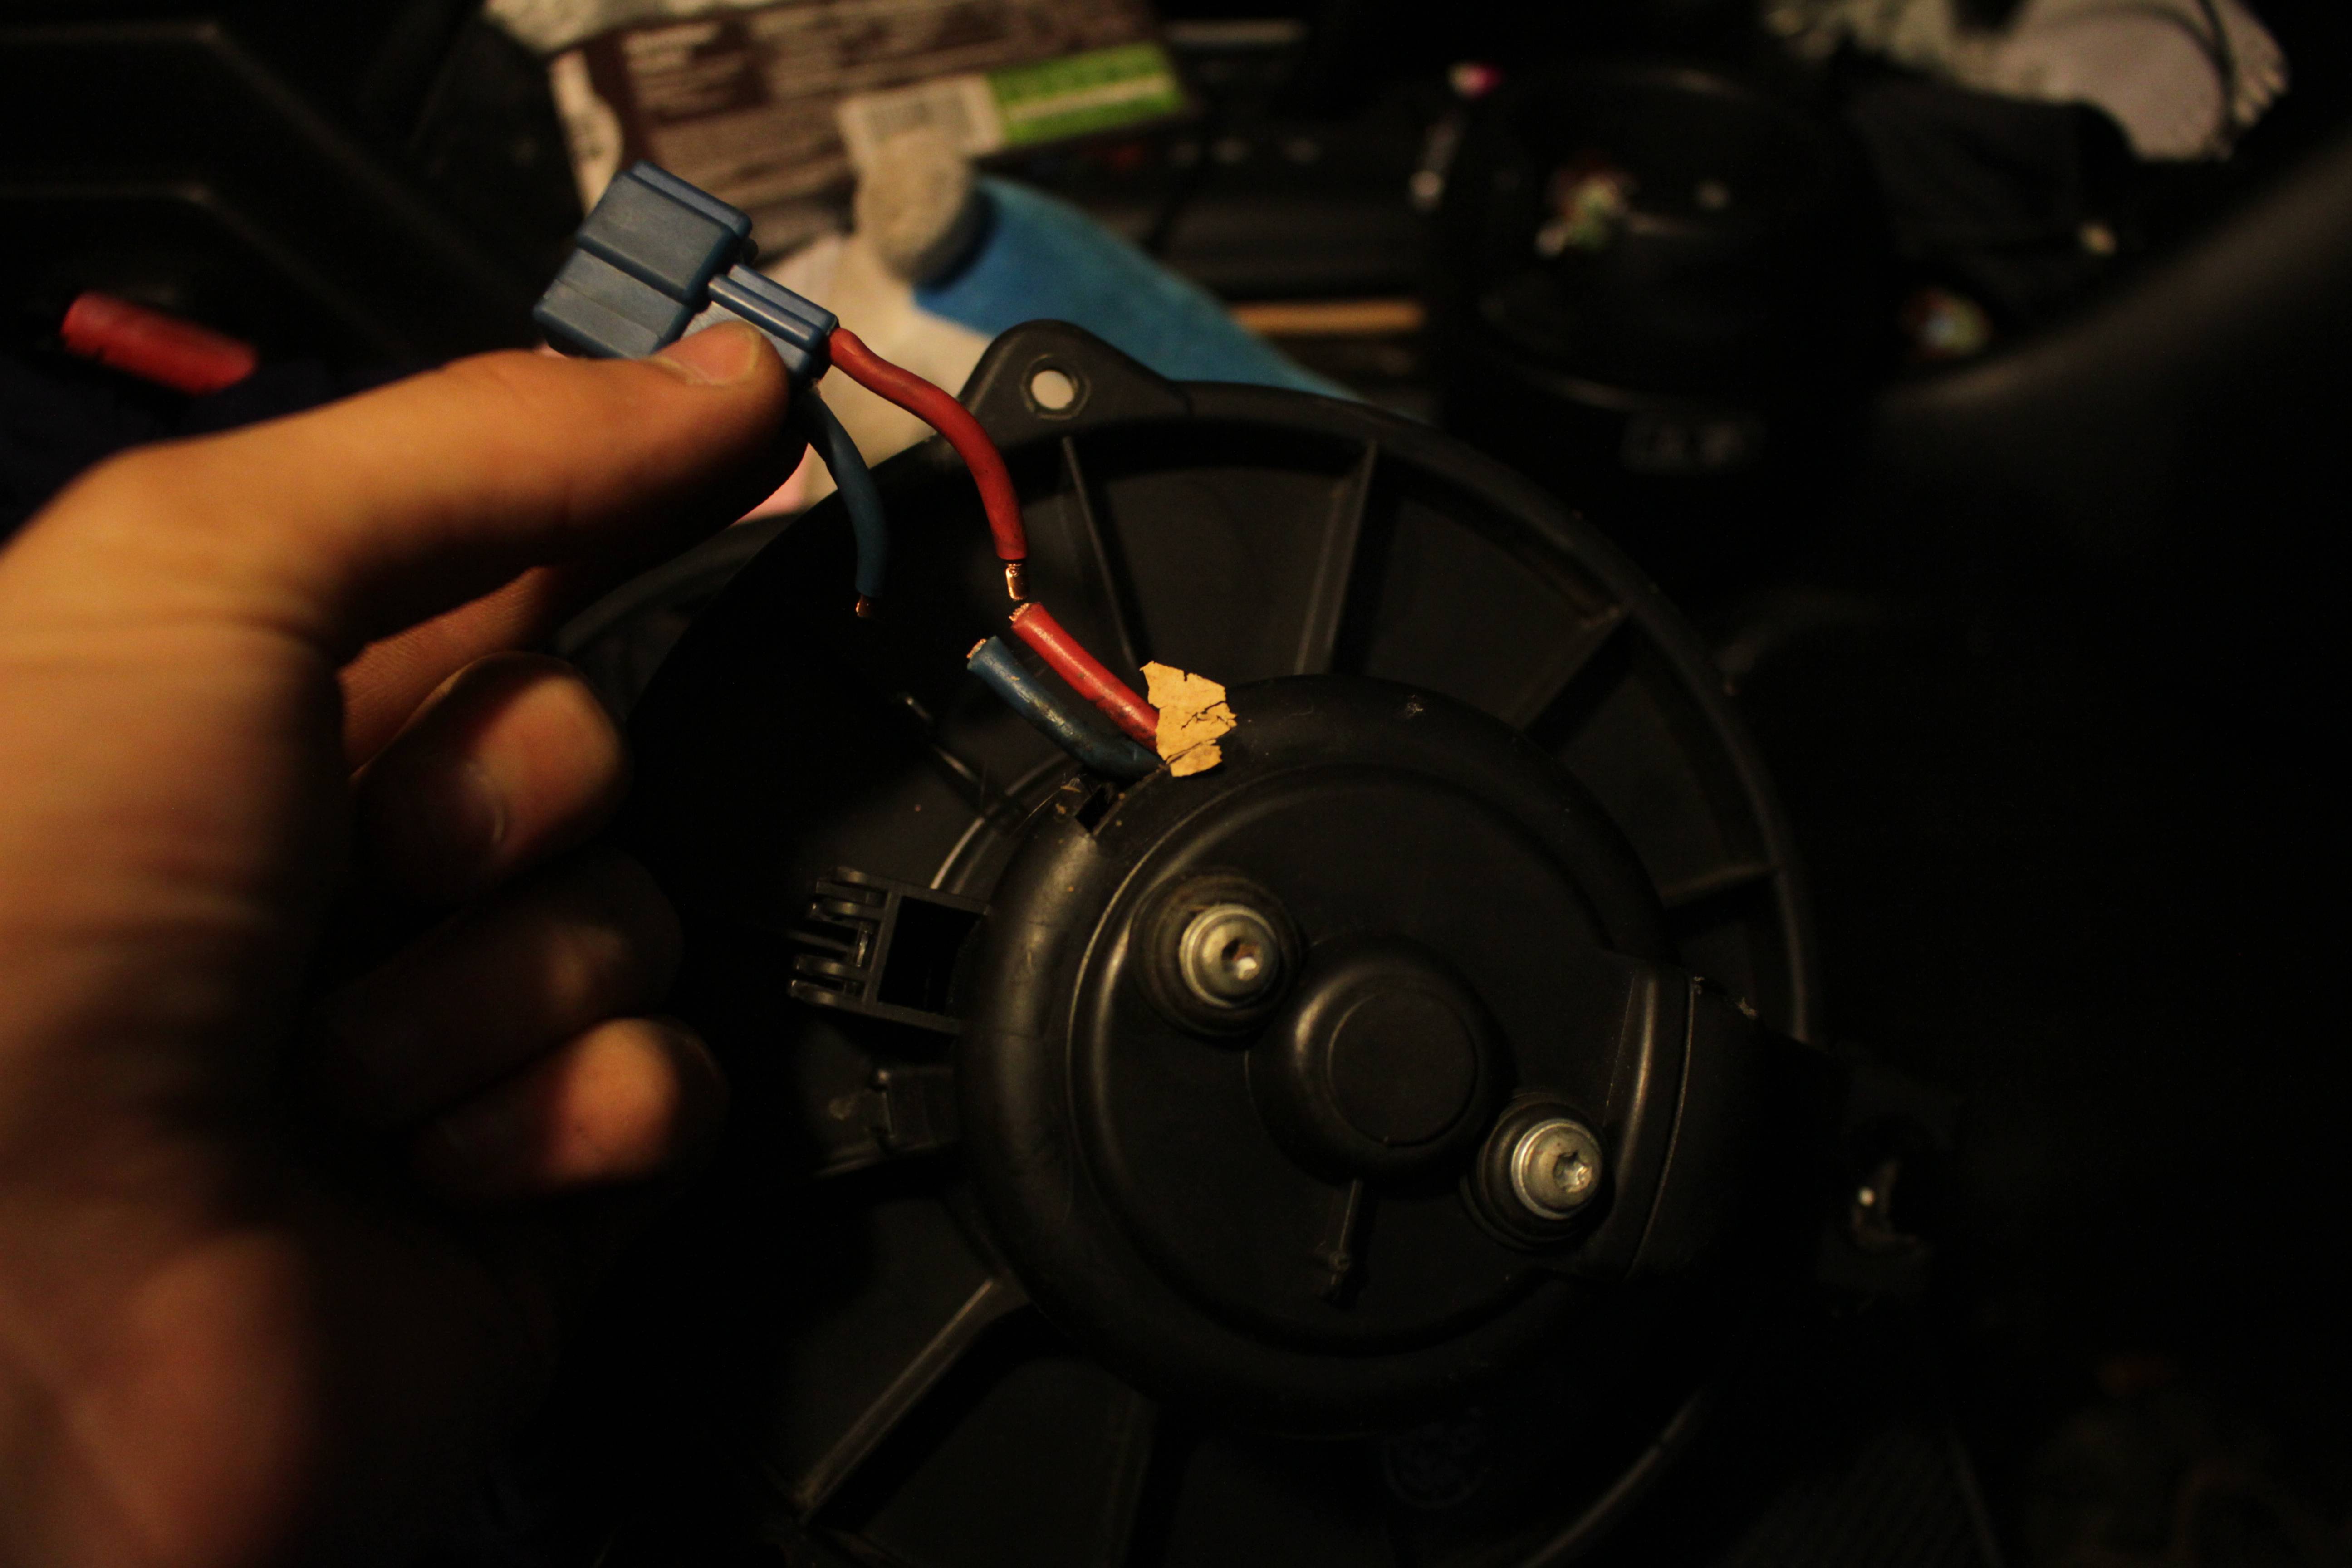
Now, go ahead and solder the factory lead onto the new blower how you see here. Be sure to get the wires on the correct side as shown or it will spin backwards.
You'll want to plug it in and check it first. If it's working correctly then grab your epoxy. This is dual purpose; firstly it acts to insulate the electrical connection. Secondly it reinforces the soldered connection so it doesn't accidentally pull off or vibrate off.
This is the epoxy I used, but pretty well any two part epoxy should work.
Now grab your factory blower again. The squirrel cage on the factory blower is a little smaller than the new one. I just laid them next to each other and marked the approximate height it needed to be trimmed to. I marked it a touch taller than the factory one, but if I had it to do again I would've marked it just a touch taller still.
You can also see in this picture that there's grey RTV on the new blower. Do not try sealing it with RTV; it's not necessary and that crap gets everywhere. Just trust me.

Now take the blower back in the truck and plug it in. Set it where the squirrel cage won't touch anything. Grab a sharpie, set it next to your mark, and turn it on to mark all the way around. This doesn't need to be a complete line, just enough to see it while the blower is on.
Now grab your hacksaw. Hold onto the motor section of the blower and turn it on. Set your hacksaw on the line and she'll cut through all on her own with ease.
Once that's done, pull it out and clean up some of the burrs with a pocket knife or something. Just takes a second. Be careful not to break the cage. If yours is like mine it will be a little brittle.
I also cut this piece of rubber I had. There's a gap in the mounting ring for the blower. I forgot to grab a picture, but if you look you'll see it. I cut it as shown and epoxied it in place to make the ring level all the way around so the blower will seal.

Now you're ready for final install! Slip it up in the factory location.
For mounting, I just used some self tapping screws. Fairly long ones actually. Just make sure they're not long enough to hit the squirrel cage once it's mounted.
Clock the blower around where it can plug in, and where one of the blower holes also line up with one of the factory mounting holes. I actually ended up using a #8 screw with a washer in that location. Then just shoot two self tapping screws up through the other two blower mounting holes.
As always, if you all have any questions or comments please post them below! I try to stick around and answer any questions/respond to any concerns I can. Hope someone finds this helpful!
With winter coming up quickly, I decided to go ahead and swap out my factory blower motor and retrofit a "Pontiac" unit. The one I ordered is actually from an 01-03 Chevy Impala. You can get one from (I believe from what I've seen on eBay) an Impala, Monte Carlo, Pontiac Grand Prix, and a Buick Century. They're all over eBay for dirt cheap.
If you've never heard of this, the benefits are more steady air flow, quieter operation, and stronger air.
I would like to go ahead and apologize. These pictures are kinda dark. They looked a lot brighter on my camera.
This is a pretty simple write up and a pretty simple job. Up next will be my panhard conversion using all factory parts. I've already finished it, just need to upload the pictures and type up the write up.
So lets get started! I didn't take pictures of removing the factory blower because... well, I forgot. There are a bunch of write ups and videos on replacing the blower, so if you don't know how to remove the blower I recommend following one of those for blower removal. Once you've got it removed come on back over and I'll show you the rest.
Once you have your factory blower out, all you need off of it is the plug. cut that off and toss the rest wherever you want.
Take that end and strip the wire ends back about 3/16" and set it aside for a minute.
Go ahead and grab the replacement blower and a pair of wire cutters or something. You're going to want to go to where it would plug in and break some of the plastic off so you can get at the prongs.
Once you've got yourself about half of it broken off, grab the plug again and your soldering iron. If you've got a set of helping hands they help a ton. Clip your plug off of the factory blower into them. Go ahead and tin the stripped wire ends as well as the prongs on the blower plug you just opened up.
If you plan on keeping the factory blower around, I recommend going ahead and stripping those wires back a little and tinning those ends too. That will keep the wires from corroding and if you ever use it for something it will be ready.
Now, go ahead and solder the factory lead onto the new blower how you see here. Be sure to get the wires on the correct side as shown or it will spin backwards.
You'll want to plug it in and check it first. If it's working correctly then grab your epoxy. This is dual purpose; firstly it acts to insulate the electrical connection. Secondly it reinforces the soldered connection so it doesn't accidentally pull off or vibrate off.
This is the epoxy I used, but pretty well any two part epoxy should work.
Now grab your factory blower again. The squirrel cage on the factory blower is a little smaller than the new one. I just laid them next to each other and marked the approximate height it needed to be trimmed to. I marked it a touch taller than the factory one, but if I had it to do again I would've marked it just a touch taller still.
You can also see in this picture that there's grey RTV on the new blower. Do not try sealing it with RTV; it's not necessary and that crap gets everywhere. Just trust me.
Now take the blower back in the truck and plug it in. Set it where the squirrel cage won't touch anything. Grab a sharpie, set it next to your mark, and turn it on to mark all the way around. This doesn't need to be a complete line, just enough to see it while the blower is on.
Now grab your hacksaw. Hold onto the motor section of the blower and turn it on. Set your hacksaw on the line and she'll cut through all on her own with ease.
Once that's done, pull it out and clean up some of the burrs with a pocket knife or something. Just takes a second. Be careful not to break the cage. If yours is like mine it will be a little brittle.
I also cut this piece of rubber I had. There's a gap in the mounting ring for the blower. I forgot to grab a picture, but if you look you'll see it. I cut it as shown and epoxied it in place to make the ring level all the way around so the blower will seal.
Now you're ready for final install! Slip it up in the factory location.
For mounting, I just used some self tapping screws. Fairly long ones actually. Just make sure they're not long enough to hit the squirrel cage once it's mounted.
Clock the blower around where it can plug in, and where one of the blower holes also line up with one of the factory mounting holes. I actually ended up using a #8 screw with a washer in that location. Then just shoot two self tapping screws up through the other two blower mounting holes.
As always, if you all have any questions or comments please post them below! I try to stick around and answer any questions/respond to any concerns I can. Hope someone finds this helpful!
Last edited by Alex_M; Nov 3, 2017 at 09:31 PM.
Thread Starter
|
Camel Trophy
Joined: Aug 2014
Posts: 4,743
Likes: 985
From: Southwestern Virginia
Side question; anyone interested in a post showing what's in my various toolboxes? I'm thinking about doing one to show guys what I have and why both to help newer guys and to get feedback, and because it's a good excuse to sort them.

Thread Starter
|
Camel Trophy
Joined: Aug 2014
Posts: 4,743
Likes: 985
From: Southwestern Virginia
I say yes. For me it's the difference between having enough heat to keep me alive and having enough heat to be comfortable. Honestly though, even if it were just for quieter operation I would do it again.


1st Gear
Joined: Aug 2023
Posts: 1
Likes: 0
Hey guys! Back at it again after a year's hiatus.
With winter coming up quickly, I decided to go ahead and swap out my factory blower motor and retrofit a "Pontiac" unit. The one I ordered is actually from an 01-03 Chevy Impala. You can get one from (I believe from what I've seen on eBay) an Impala, Monte Carlo, Pontiac Grand Prix, and a Buick Century. They're all over eBay for dirt cheap.
If you've never heard of this, the benefits are more steady air flow, quieter operation, and stronger air.
I would like to go ahead and apologize. These pictures are kinda dark. They looked a lot brighter on my camera.
This is a pretty simple write up and a pretty simple job. Up next will be my panhard conversion using all factory parts. I've already finished it, just need to upload the pictures and type up the write up.
So lets get started! I didn't take pictures of removing the factory blower because... well, I forgot. There are a bunch of write ups and videos on replacing the blower, so if you don't know how to remove the blower I recommend following one of those for blower removal. Once you've got it removed come on back over and I'll show you the rest.
Attachment 55998
Once you have your factory blower out, all you need off of it is the plug. cut that off and toss the rest wherever you want.
Take that end and strip the wire ends back about 3/16" and set it aside for a minute.
Attachment 55999
Go ahead and grab the replacement blower and a pair of wire cutters or something. You're going to want to go to where it would plug in and break some of the plastic off so you can get at the prongs.
Attachment 56000
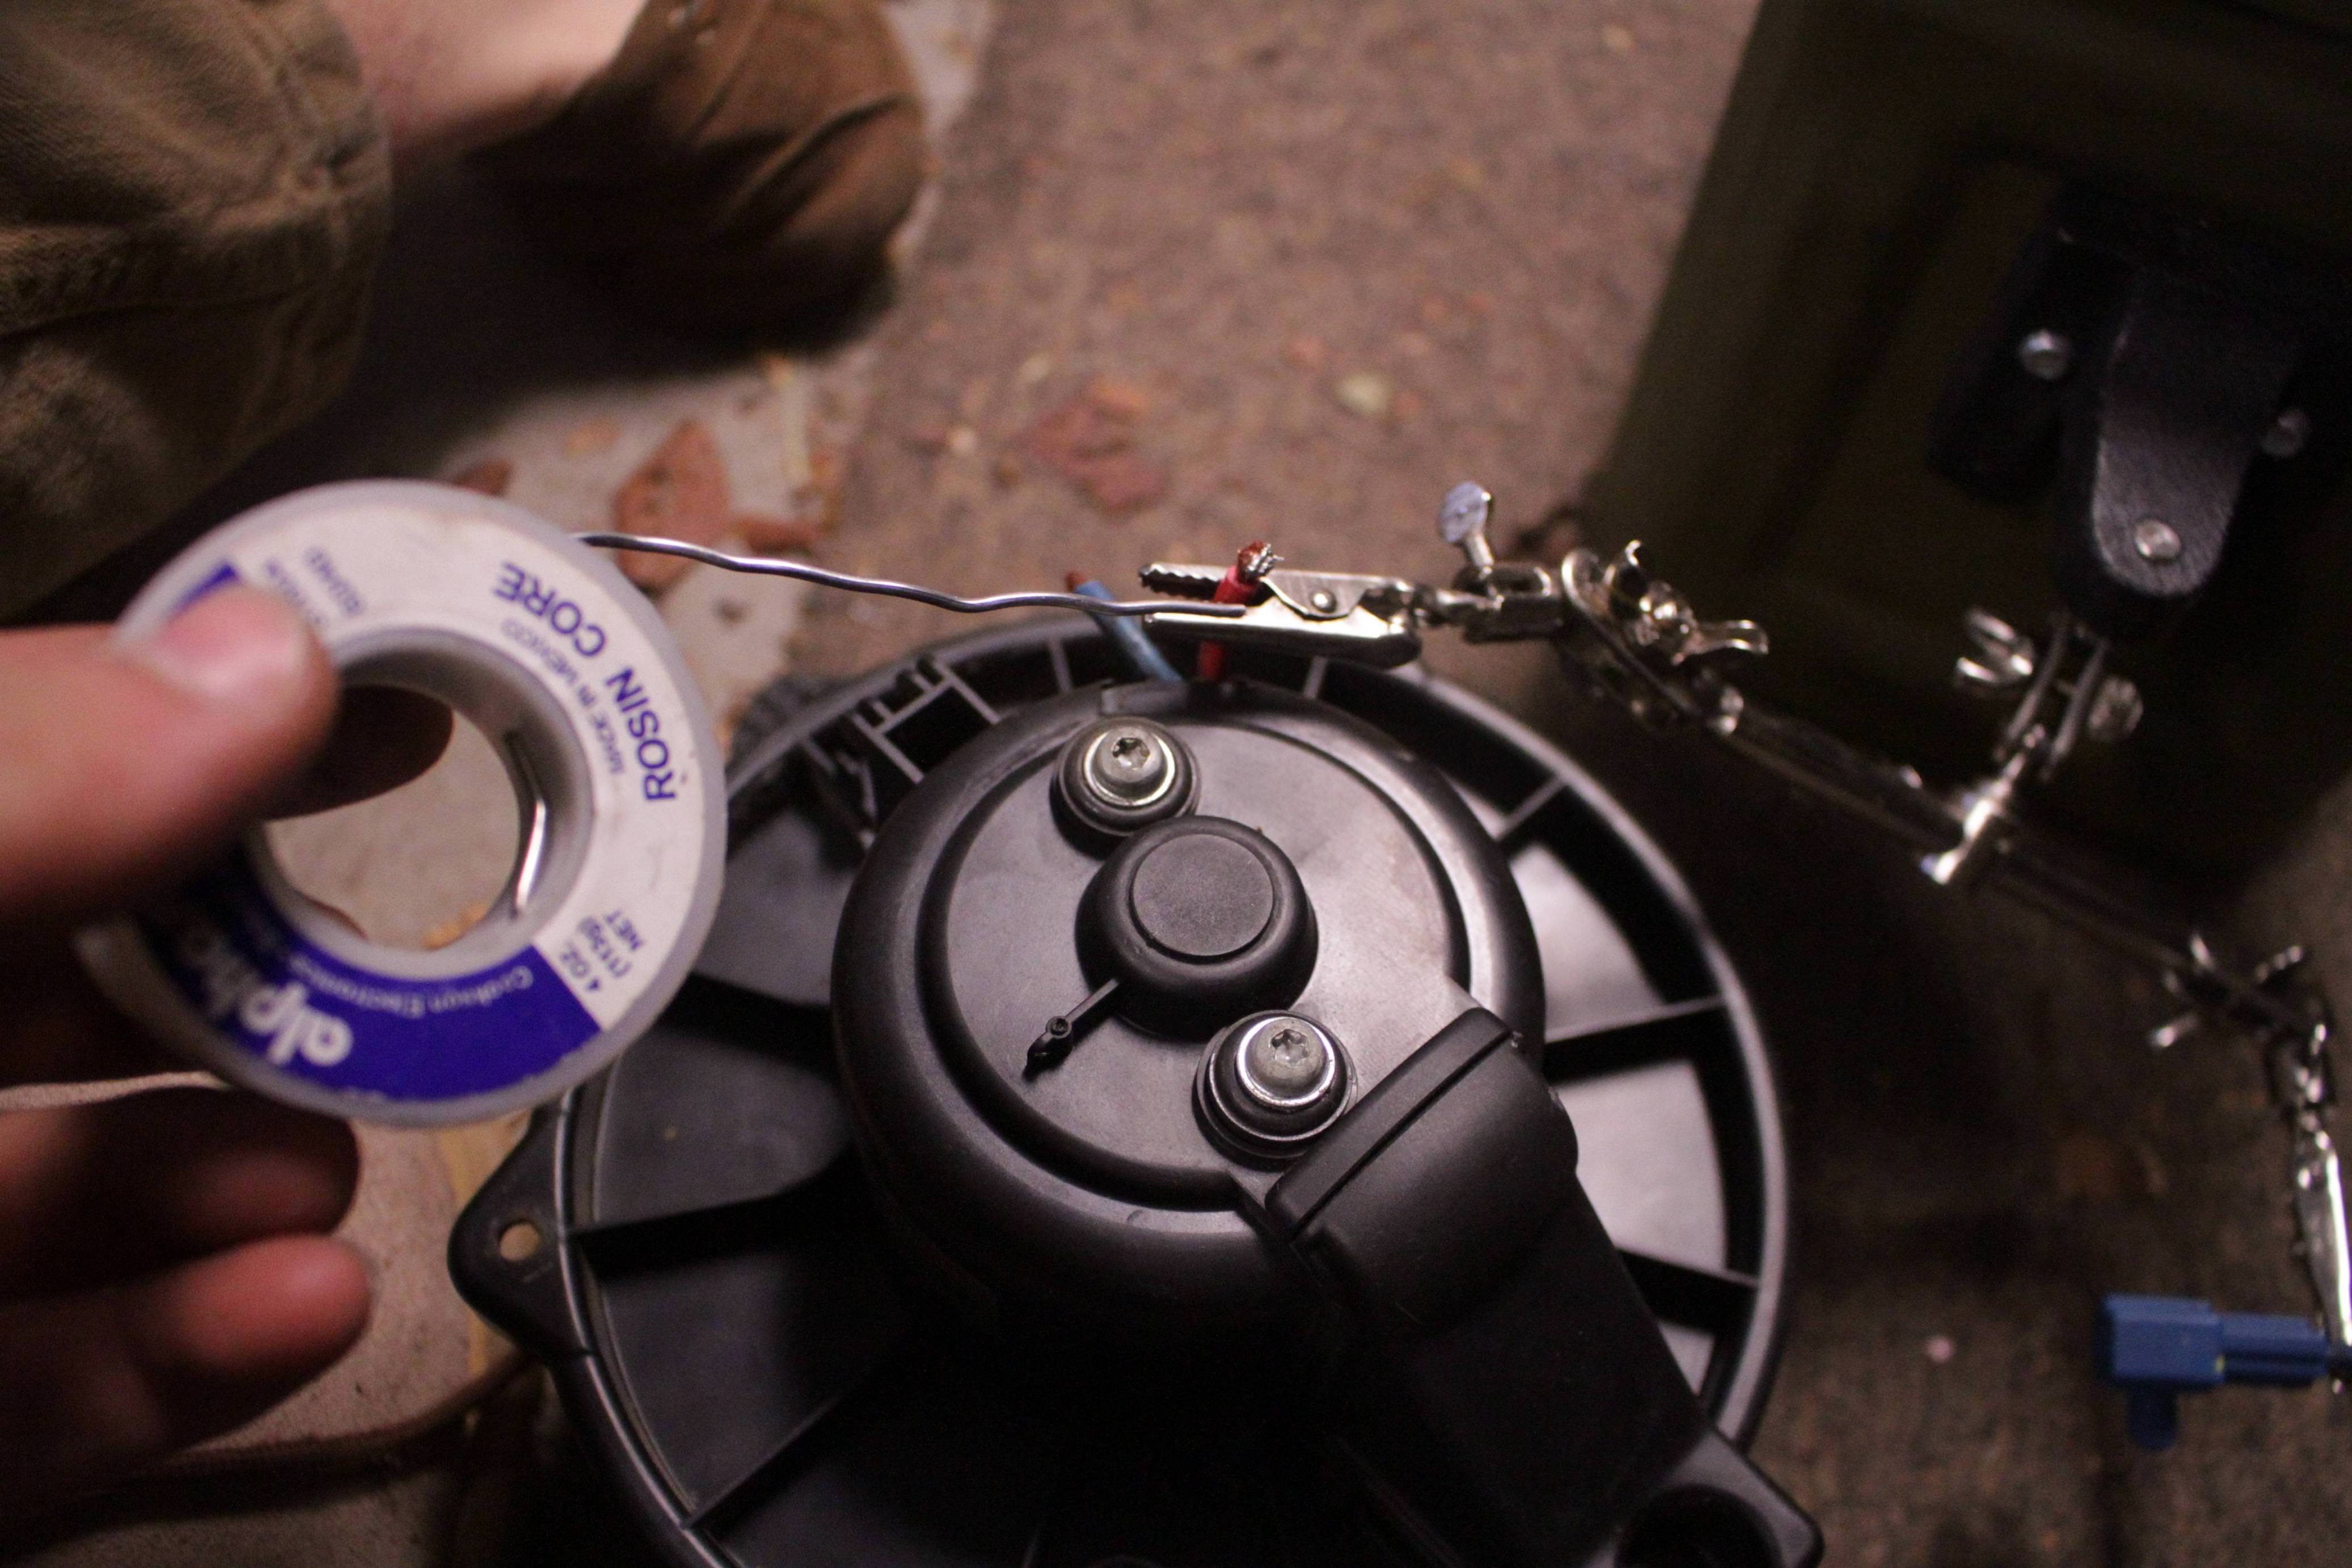
Once you've got yourself about half of it broken off, grab the plug again and your soldering iron. If you've got a set of helping hands they help a ton. Clip your plug off of the factory blower into them. Go ahead and tin the stripped wire ends as well as the prongs on the blower plug you just opened up.
Attachment 56001
Attachment 56002
If you plan on keeping the factory blower around, I recommend going ahead and stripping those wires back a little and tinning those ends too. That will keep the wires from corroding and if you ever use it for something it will be ready.
Attachment 56003
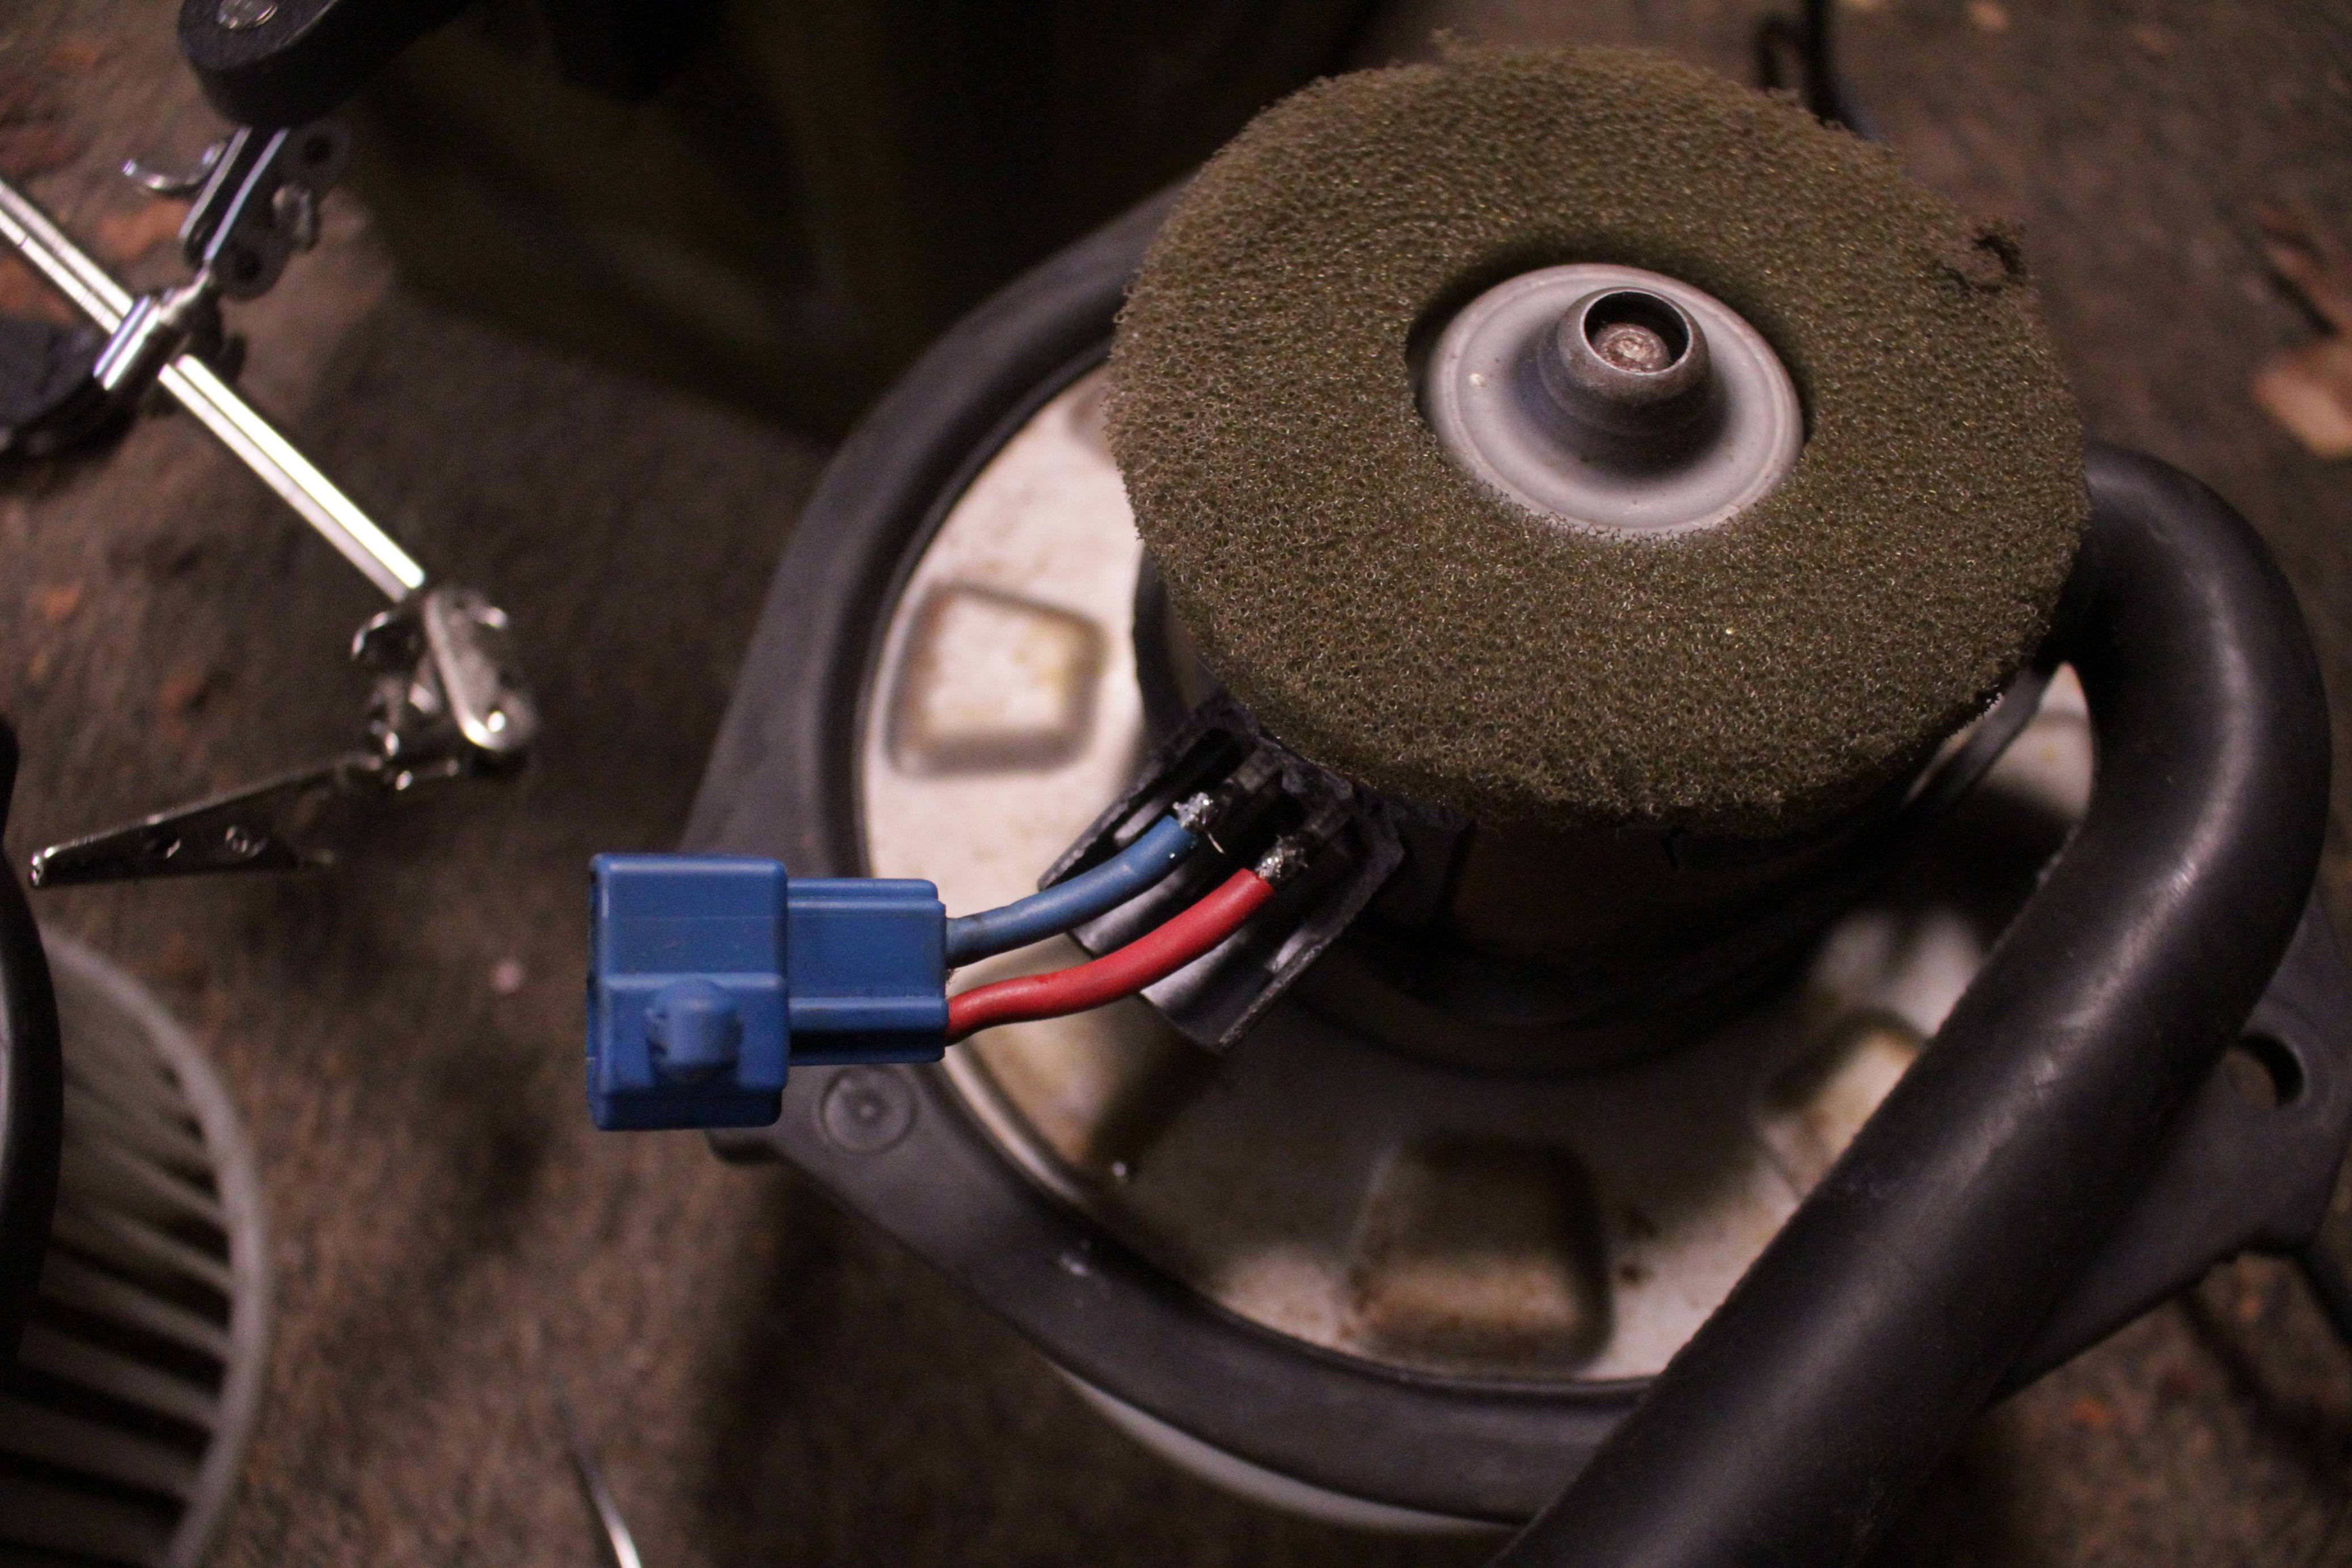
Now, go ahead and solder the factory lead onto the new blower how you see here. Be sure to get the wires on the correct side as shown or it will spin backwards.
Attachment 56004
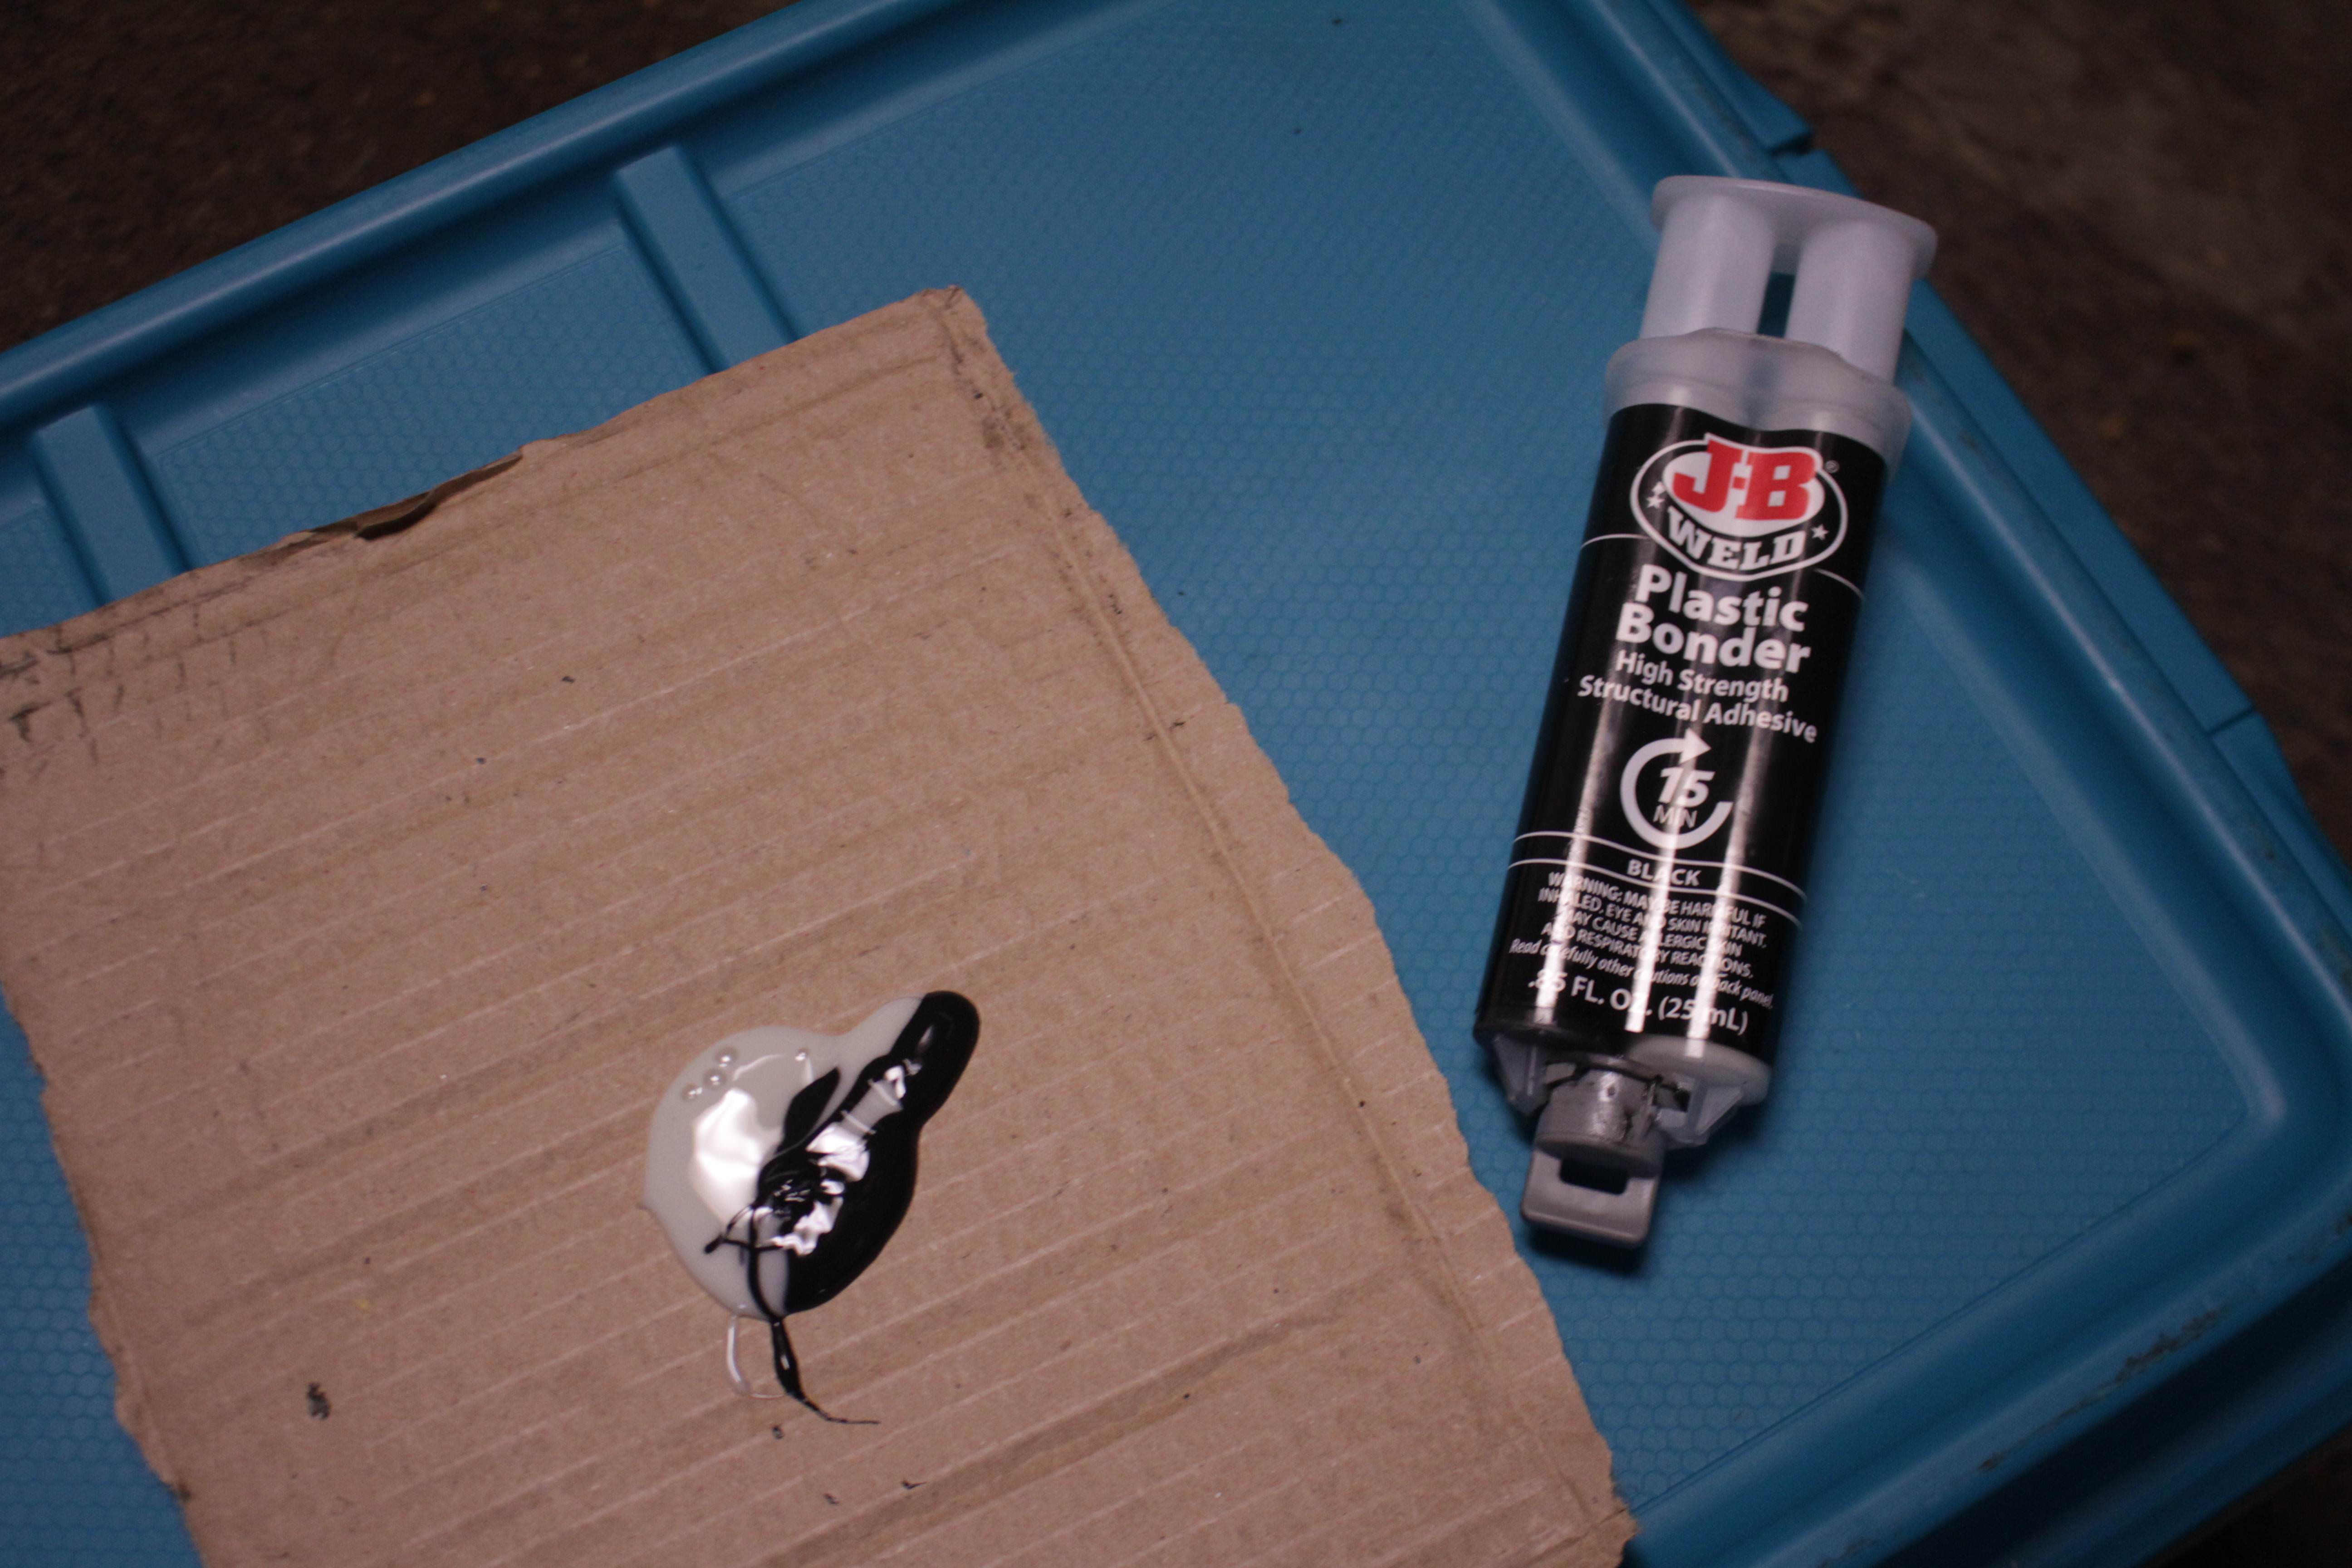
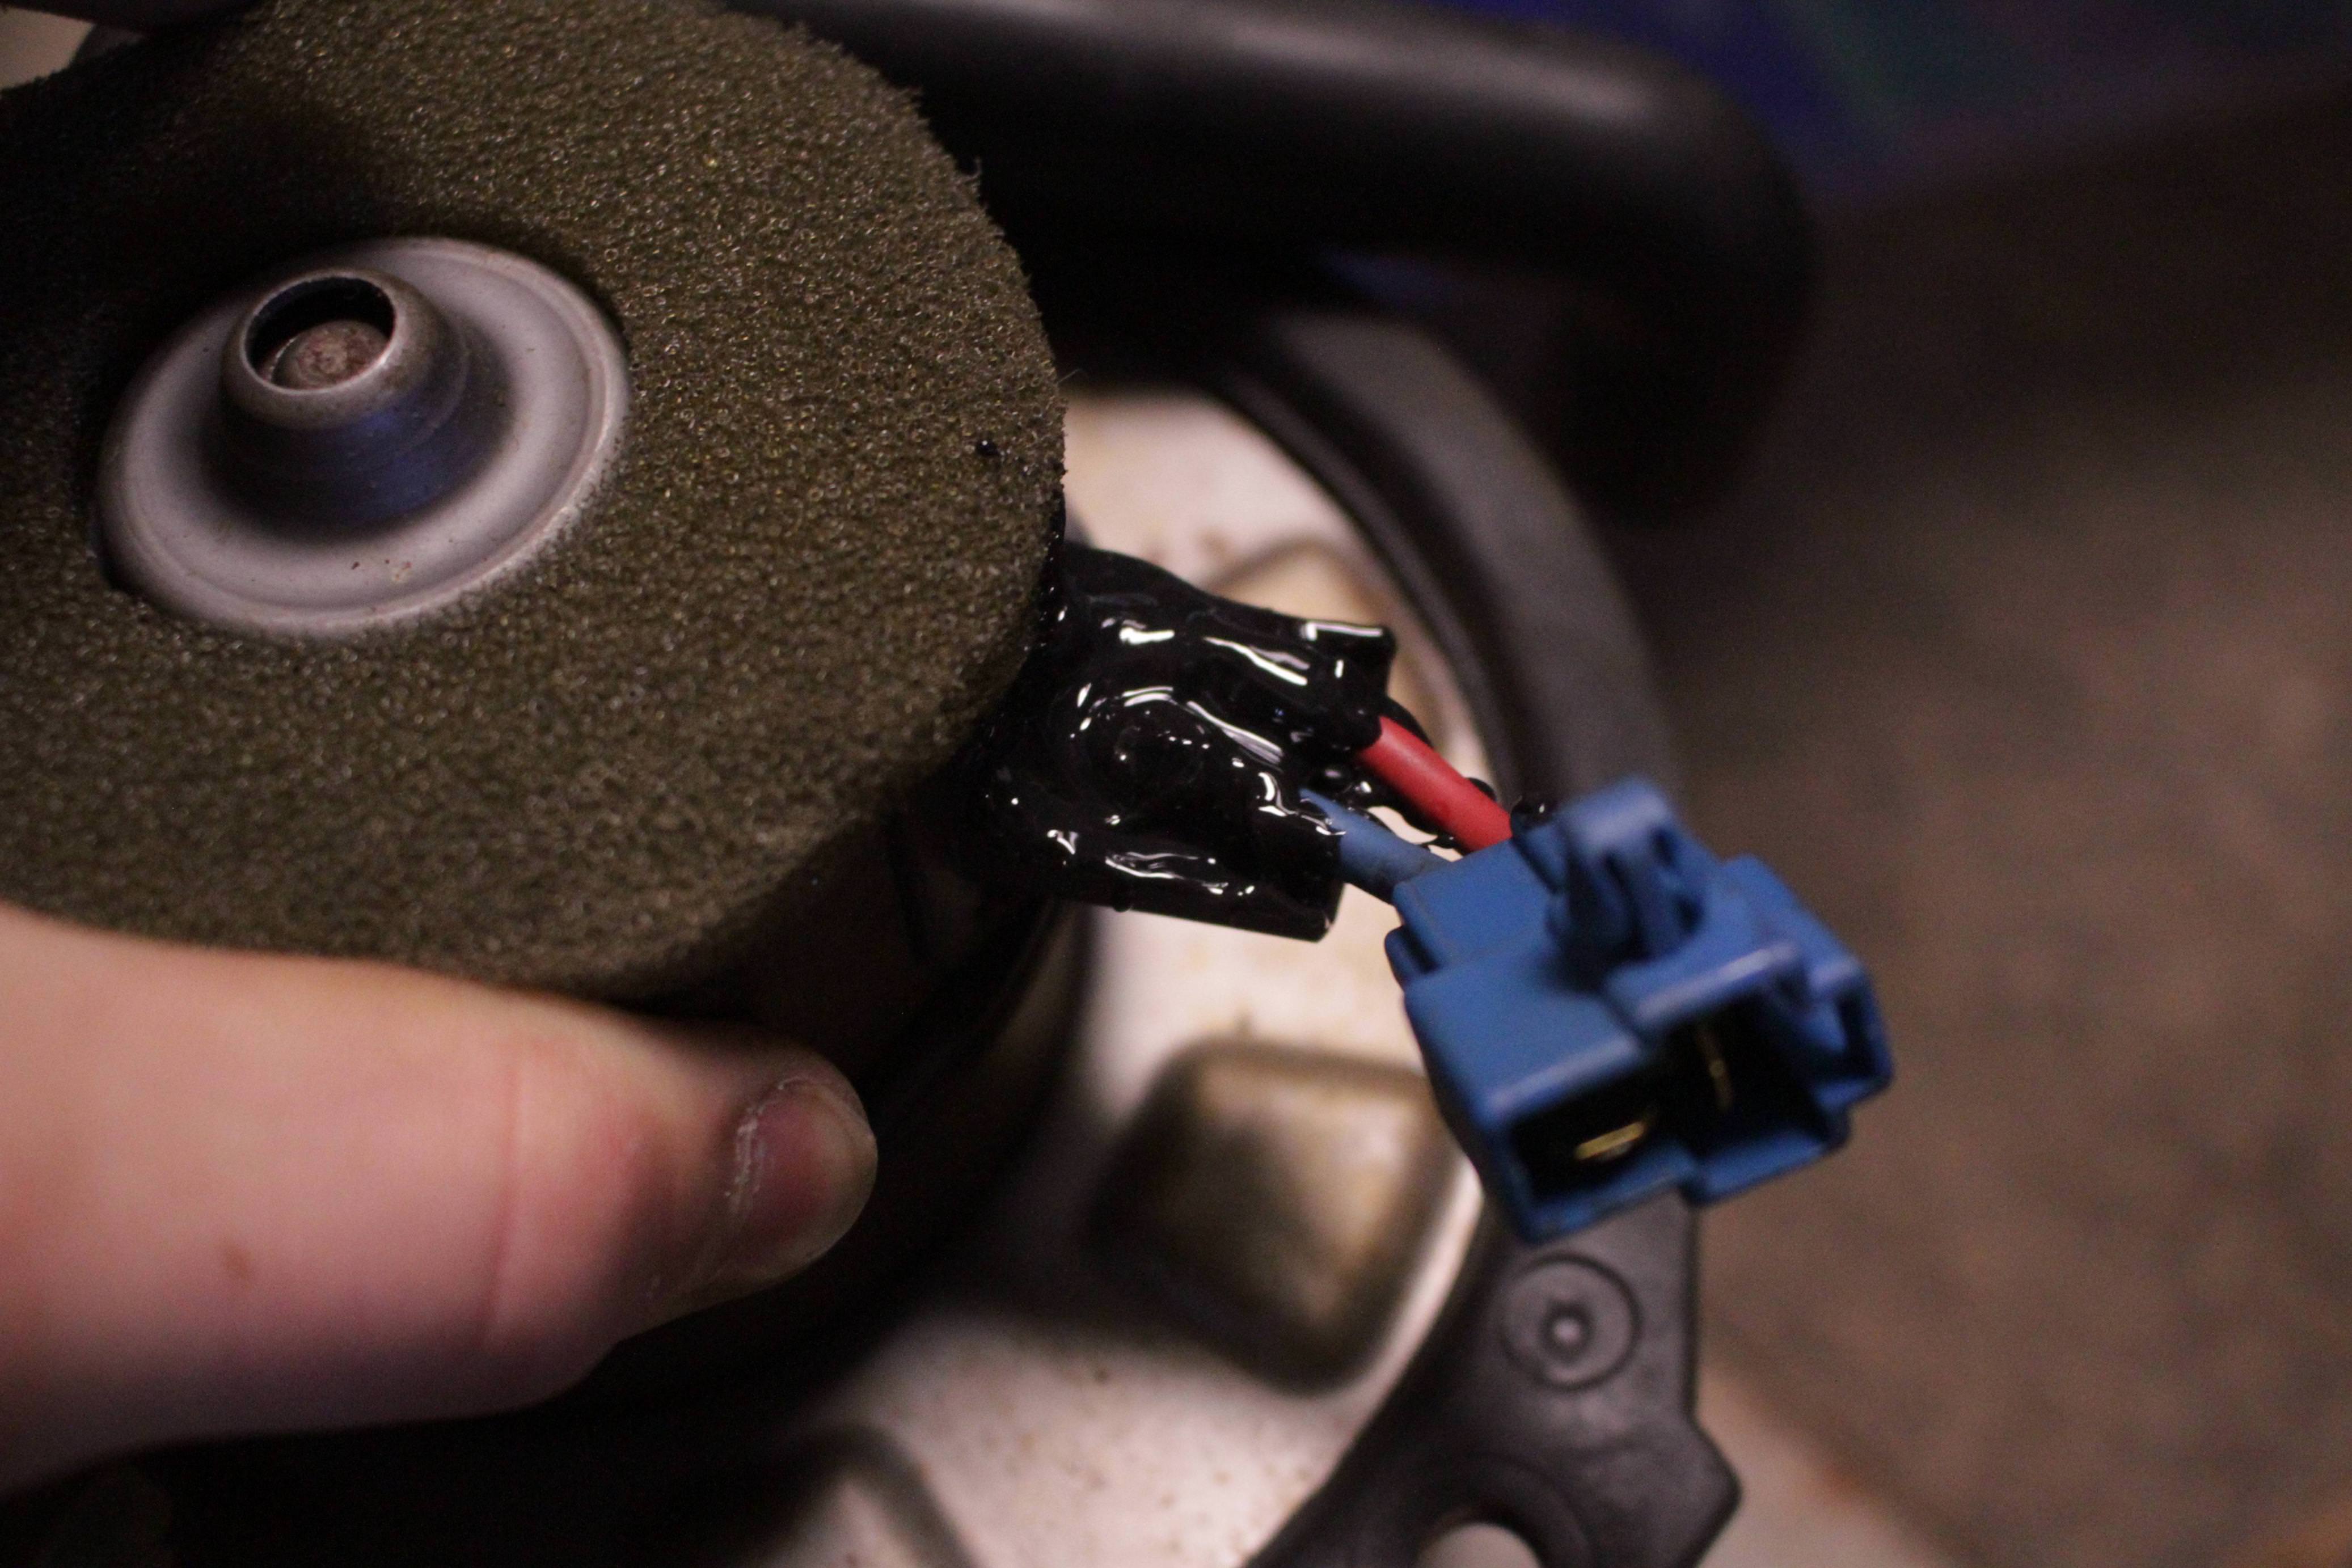
You'll want to plug it in and check it first. If it's working correctly then grab your epoxy. This is dual purpose; firstly it acts to insulate the electrical connection. Secondly it reinforces the soldered connection so it doesn't accidentally pull off or vibrate off.
This is the epoxy I used, but pretty well any two part epoxy should work.
Attachment 56005
Attachment 56006
Now grab your factory blower again. The squirrel cage on the factory blower is a little smaller than the new one. I just laid them next to each other and marked the approximate height it needed to be trimmed to. I marked it a touch taller than the factory one, but if I had it to do again I would've marked it just a touch taller still.
You can also see in this picture that there's grey RTV on the new blower. Do not try sealing it with RTV; it's not necessary and that crap gets everywhere. Just trust me.
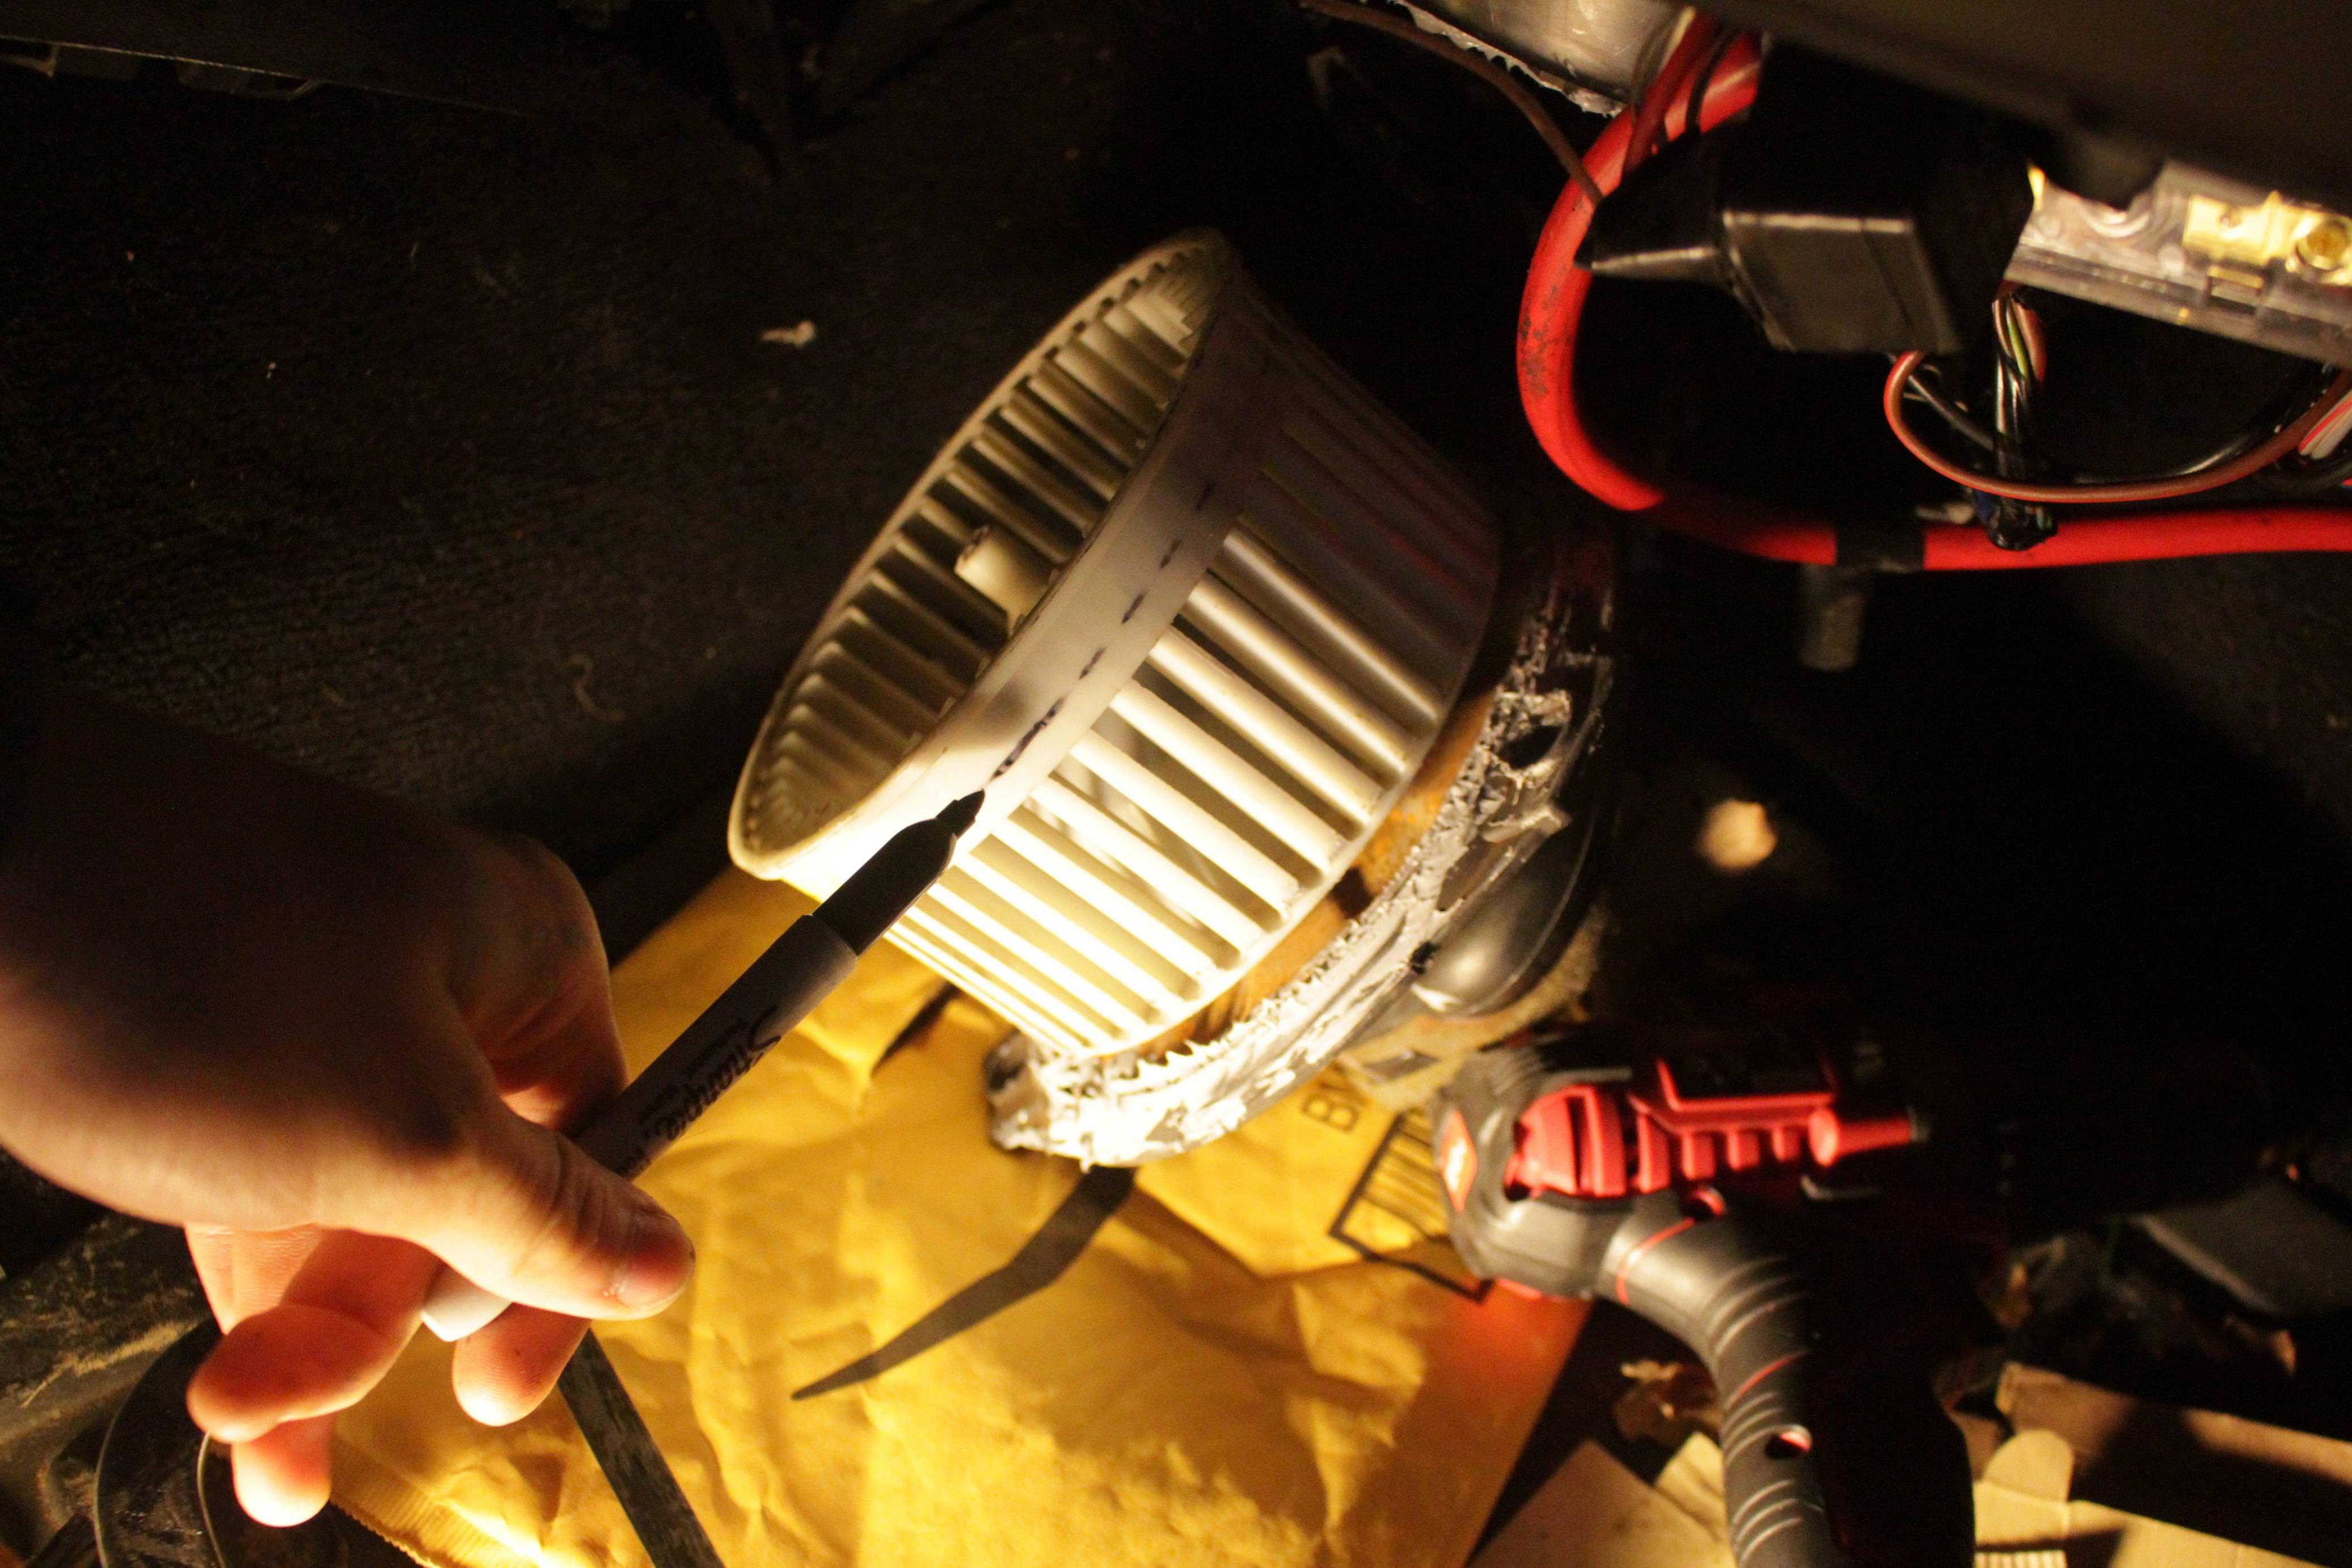
Now take the blower back in the truck and plug it in. Set it where the squirrel cage won't touch anything. Grab a sharpie, set it next to your mark, and turn it on to mark all the way around. This doesn't need to be a complete line, just enough to see it while the blower is on.
Attachment 56007
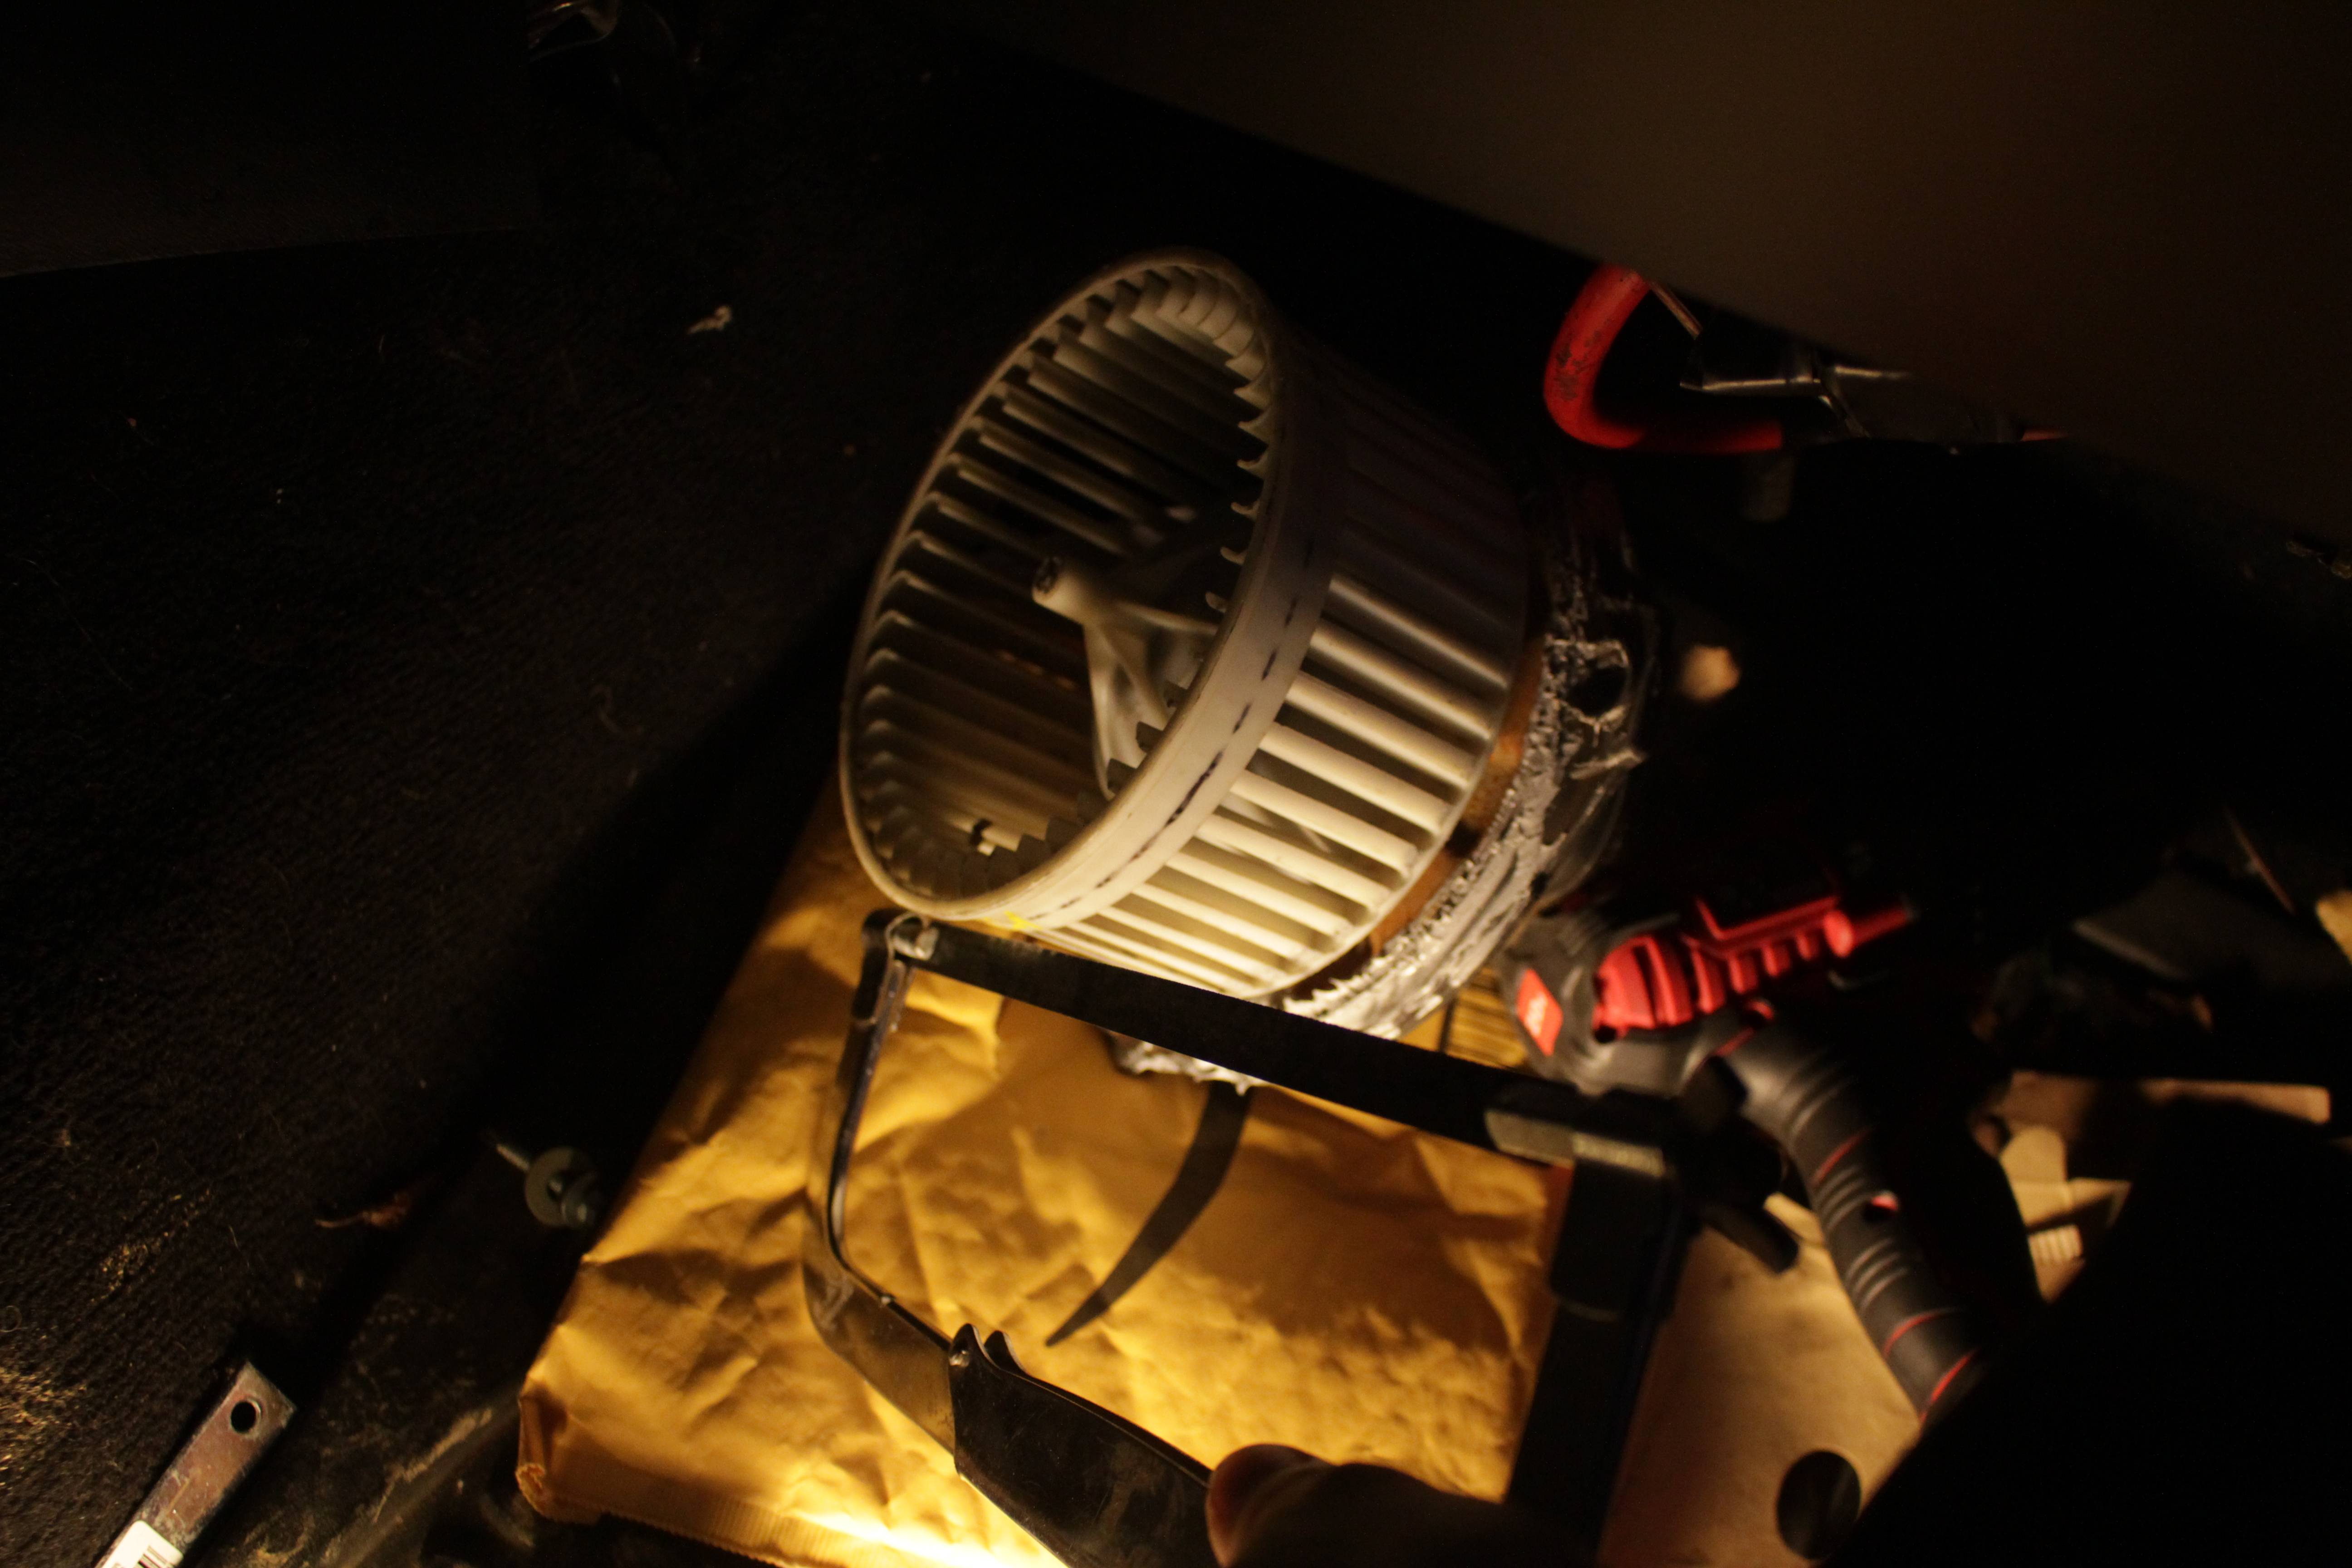
Now grab your hacksaw. Hold onto the motor section of the blower and turn it on. Set your hacksaw on the line and she'll cut through all on her own with ease.
Attachment 56008
Attachment 56009
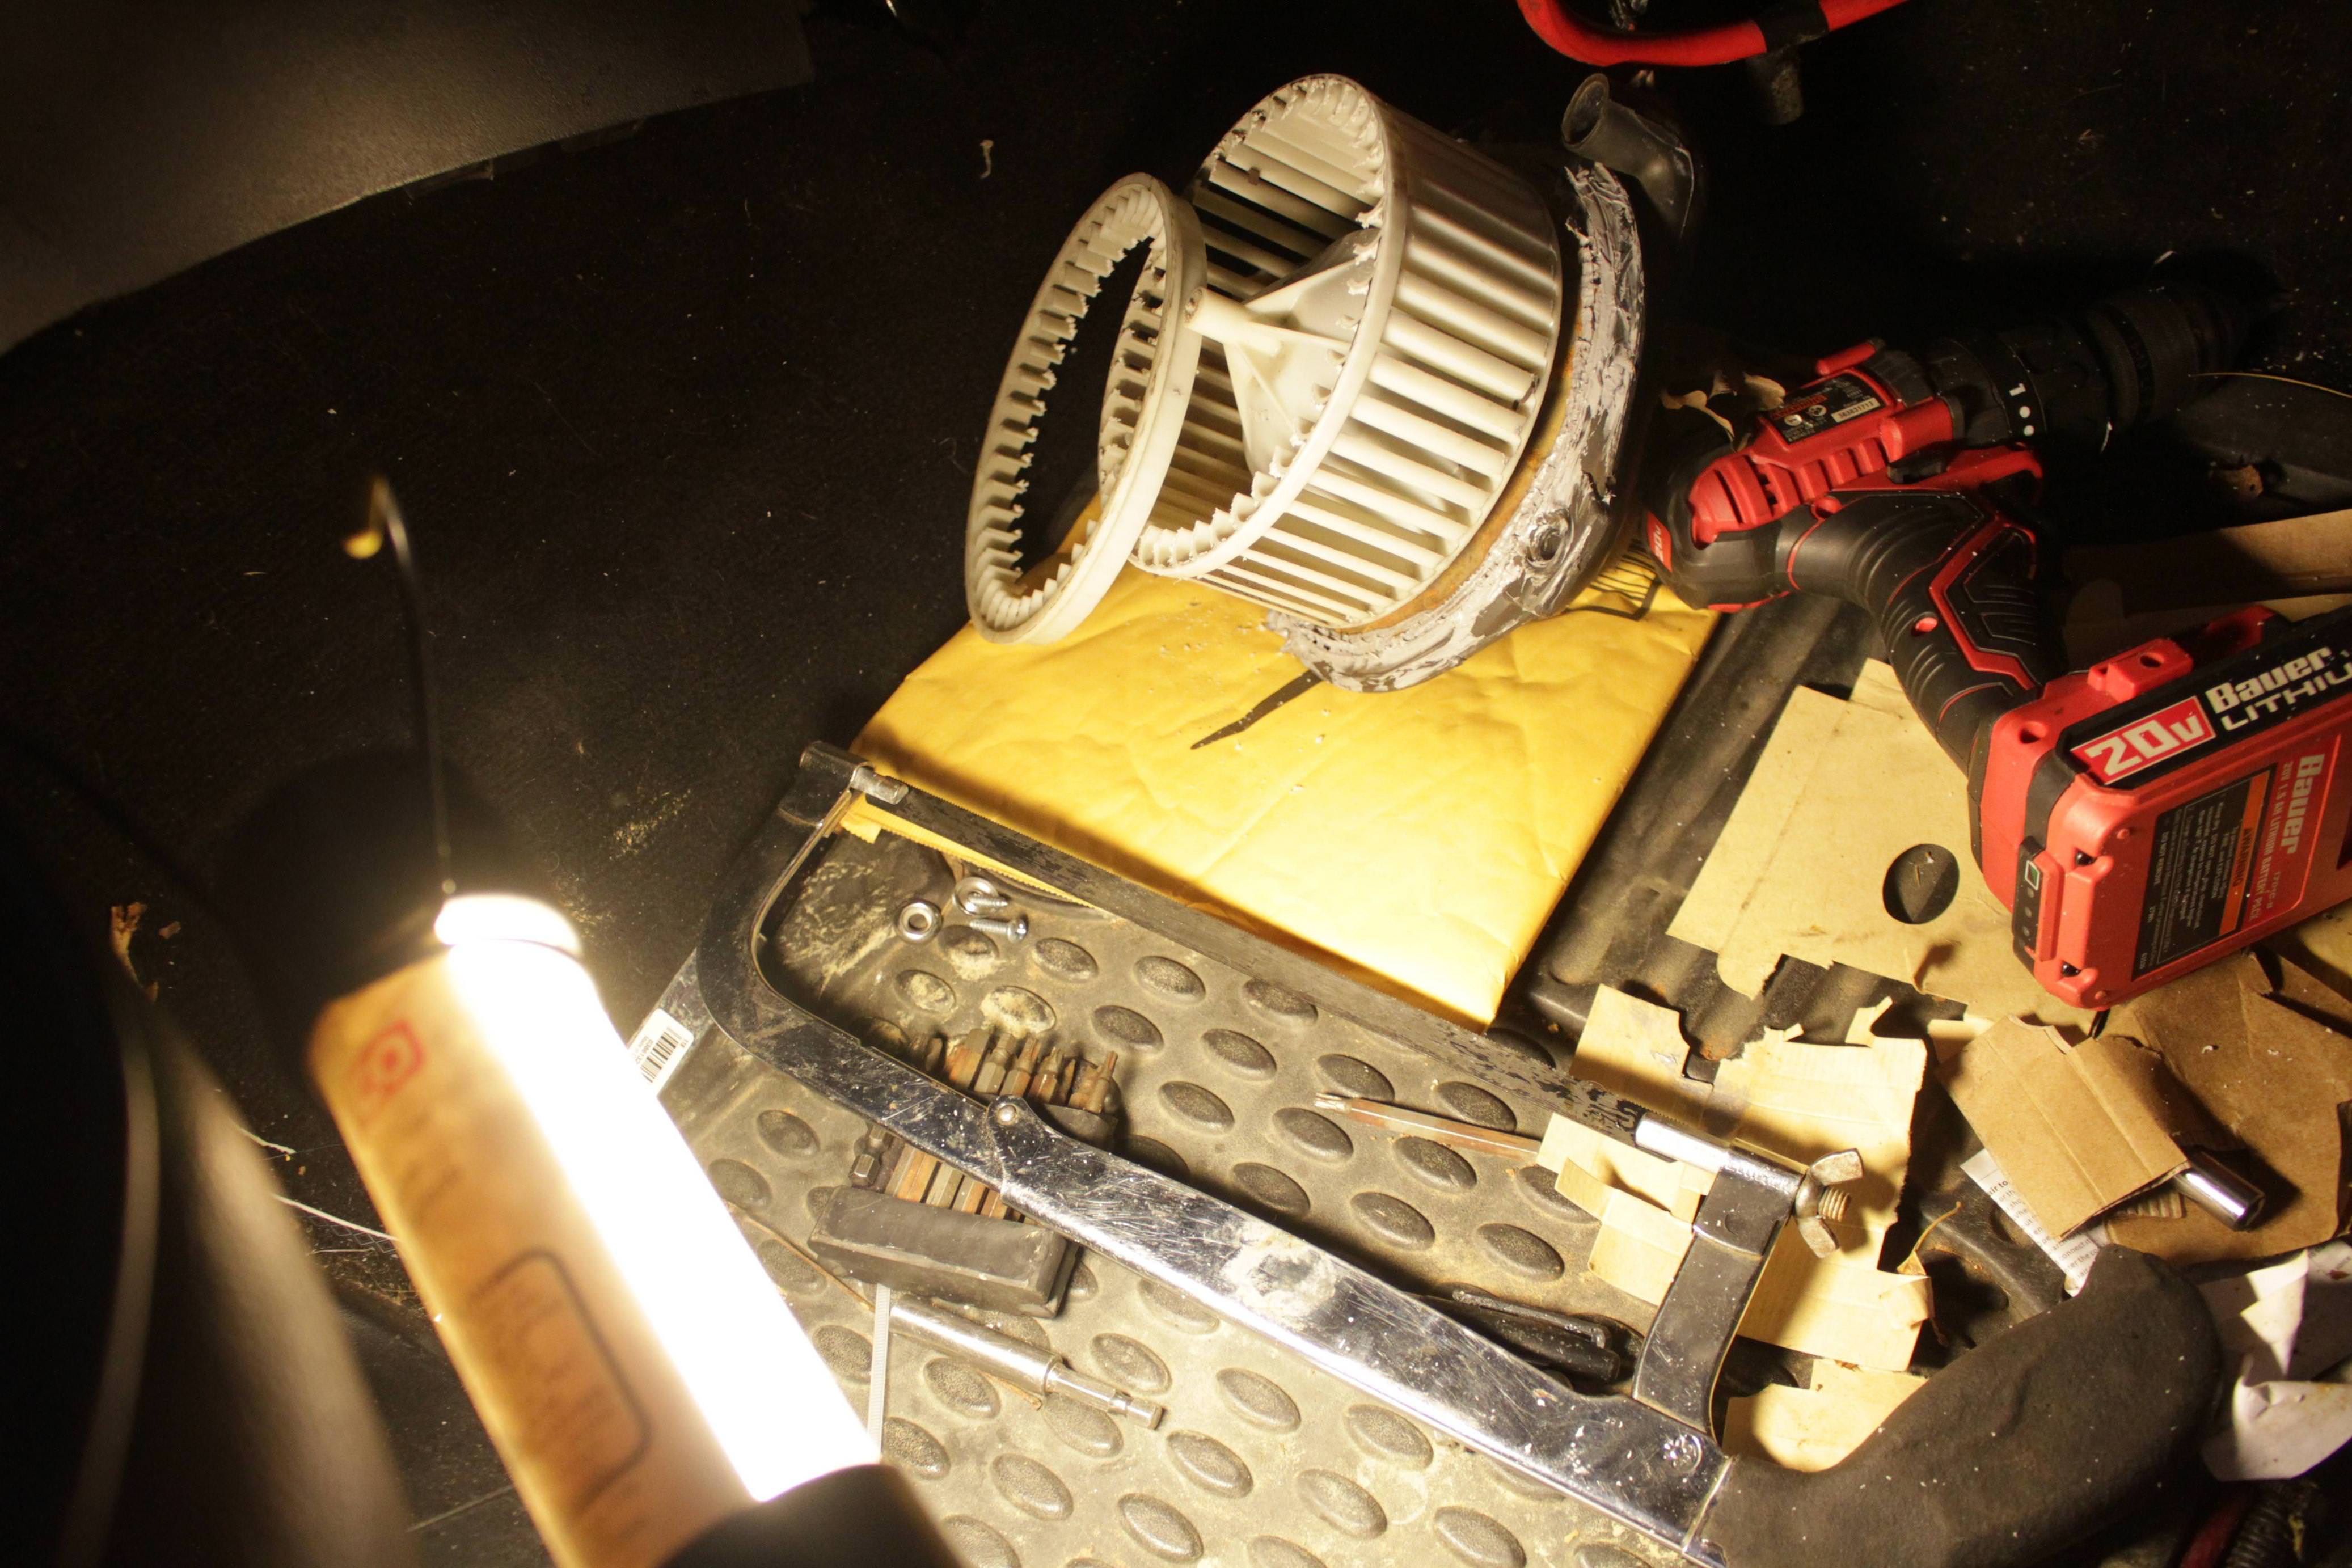
Once that's done, pull it out and clean up some of the burrs with a pocket knife or something. Just takes a second. Be careful not to break the cage. If yours is like mine it will be a little brittle.
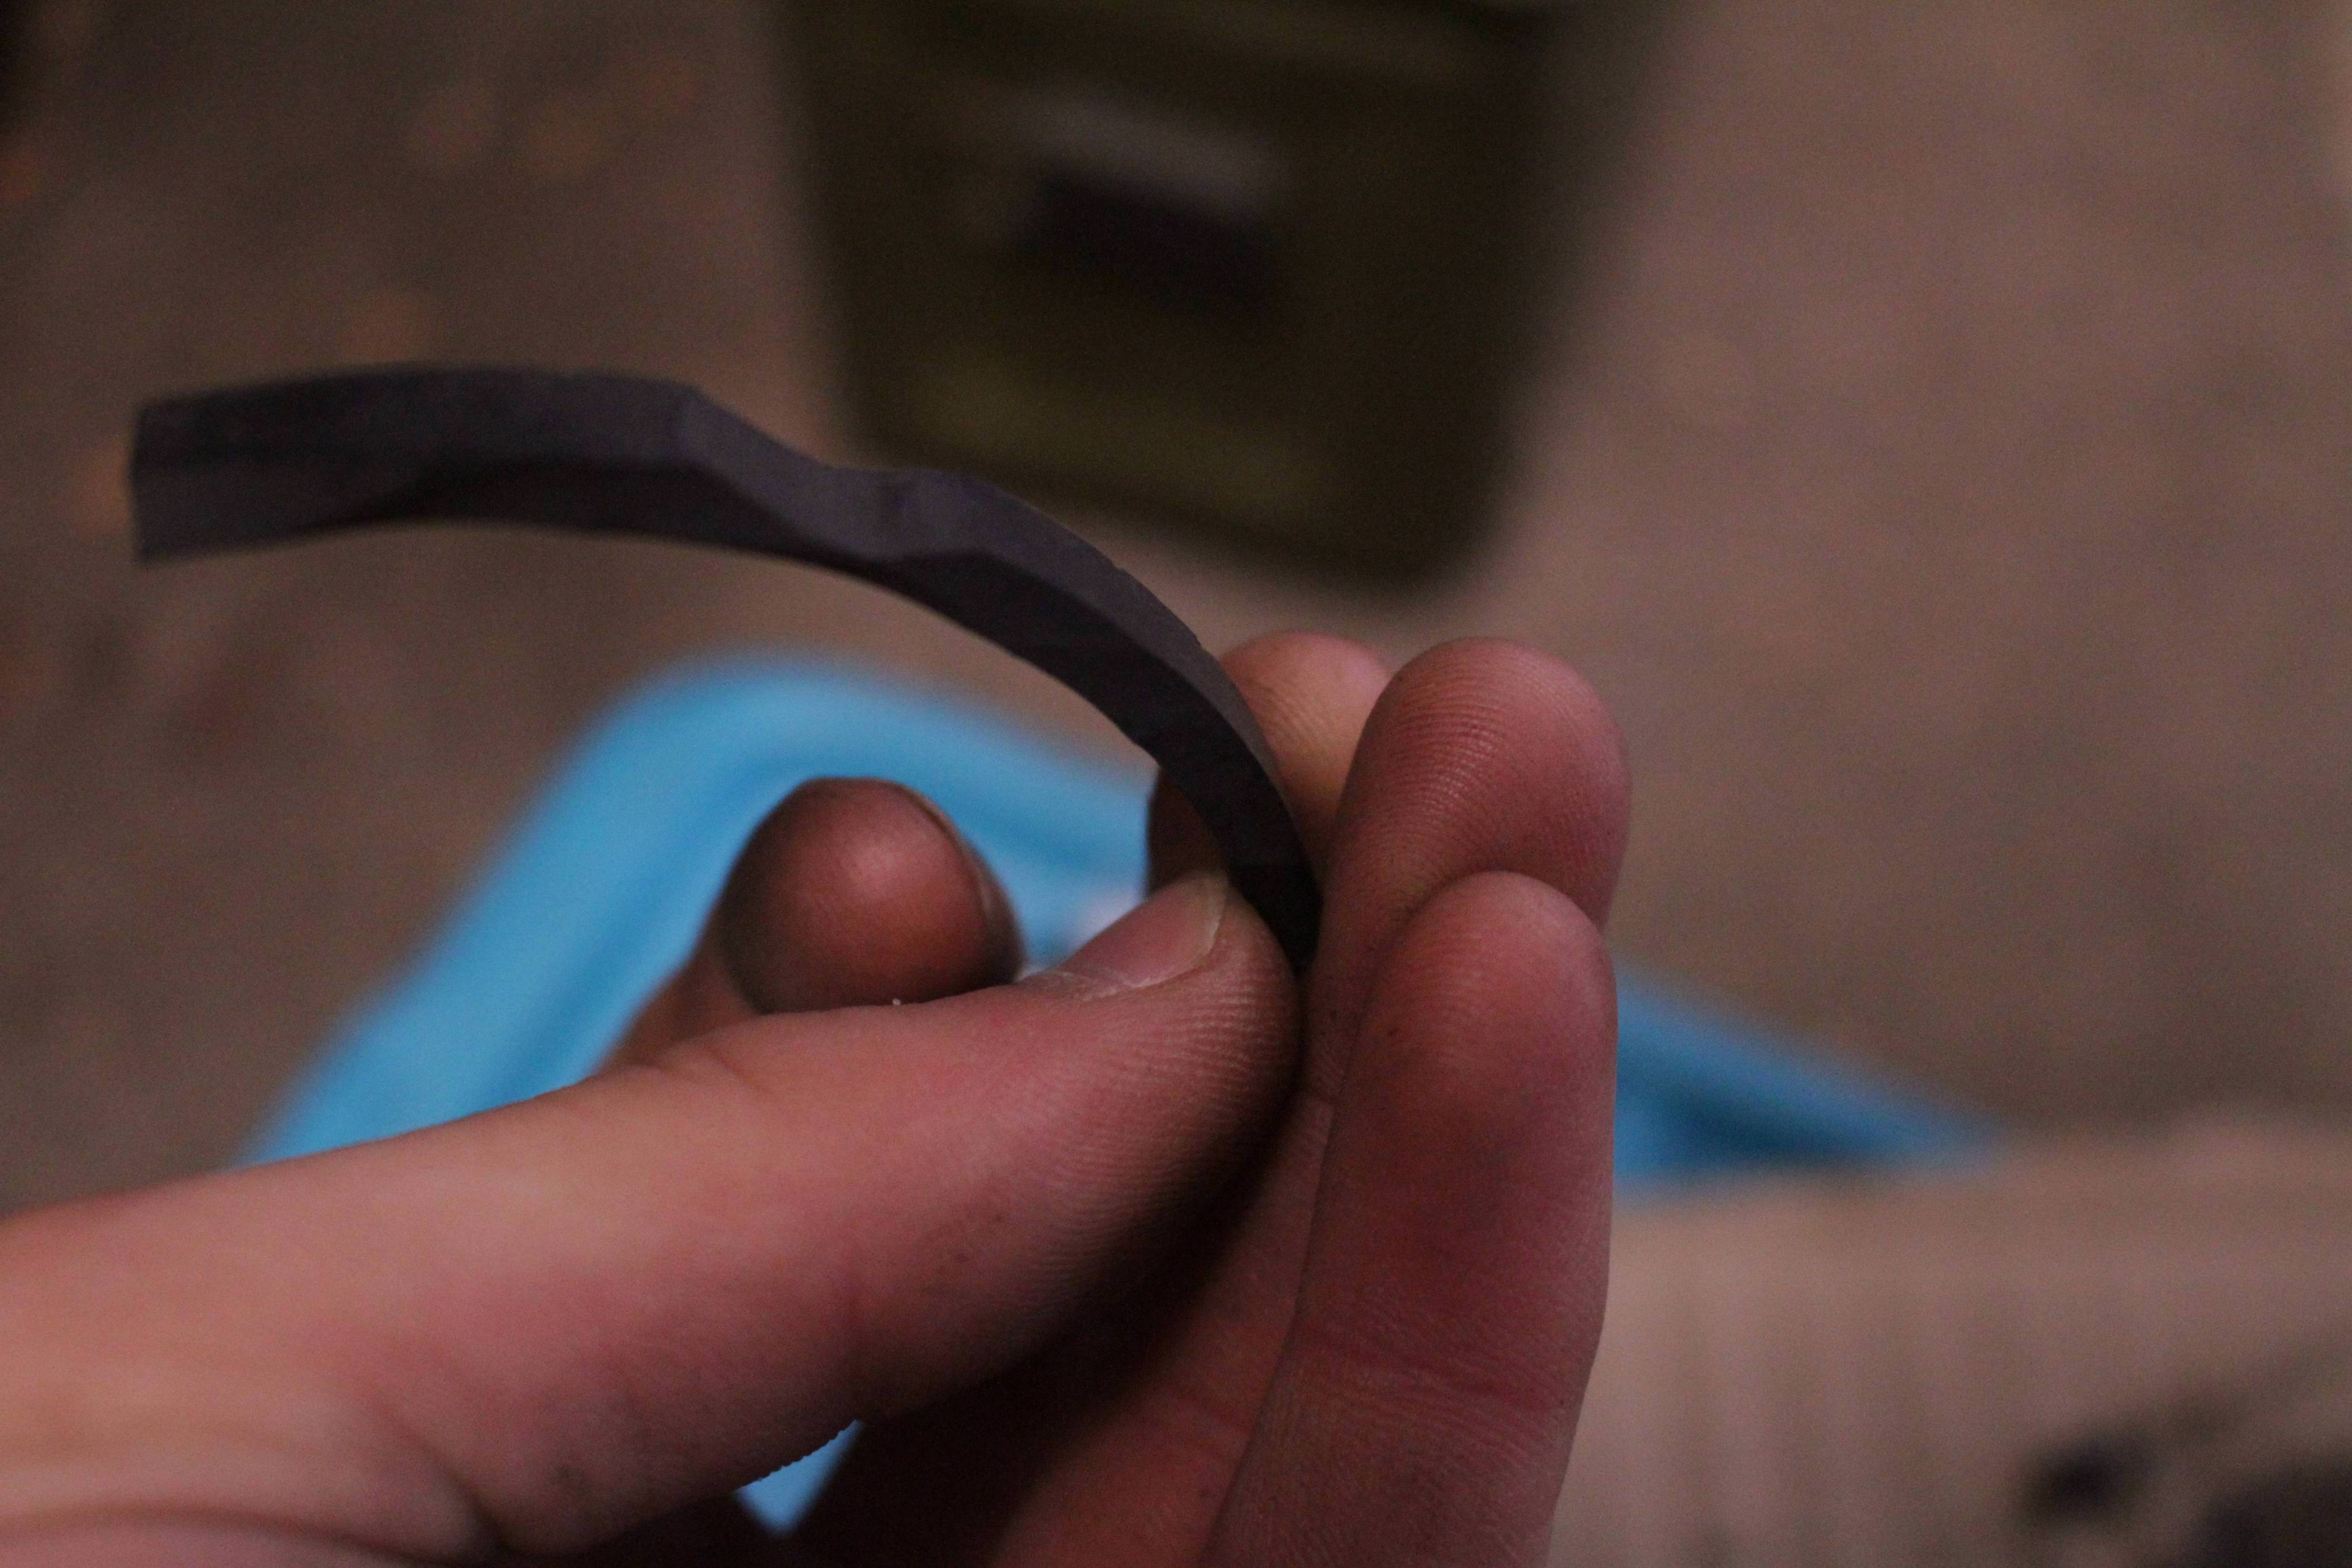
I also cut this piece of rubber I had. There's a gap in the mounting ring for the blower. I forgot to grab a picture, but if you look you'll see it. I cut it as shown and epoxied it in place to make the ring level all the way around so the blower will seal.
Attachment 56010
Attachment 56011
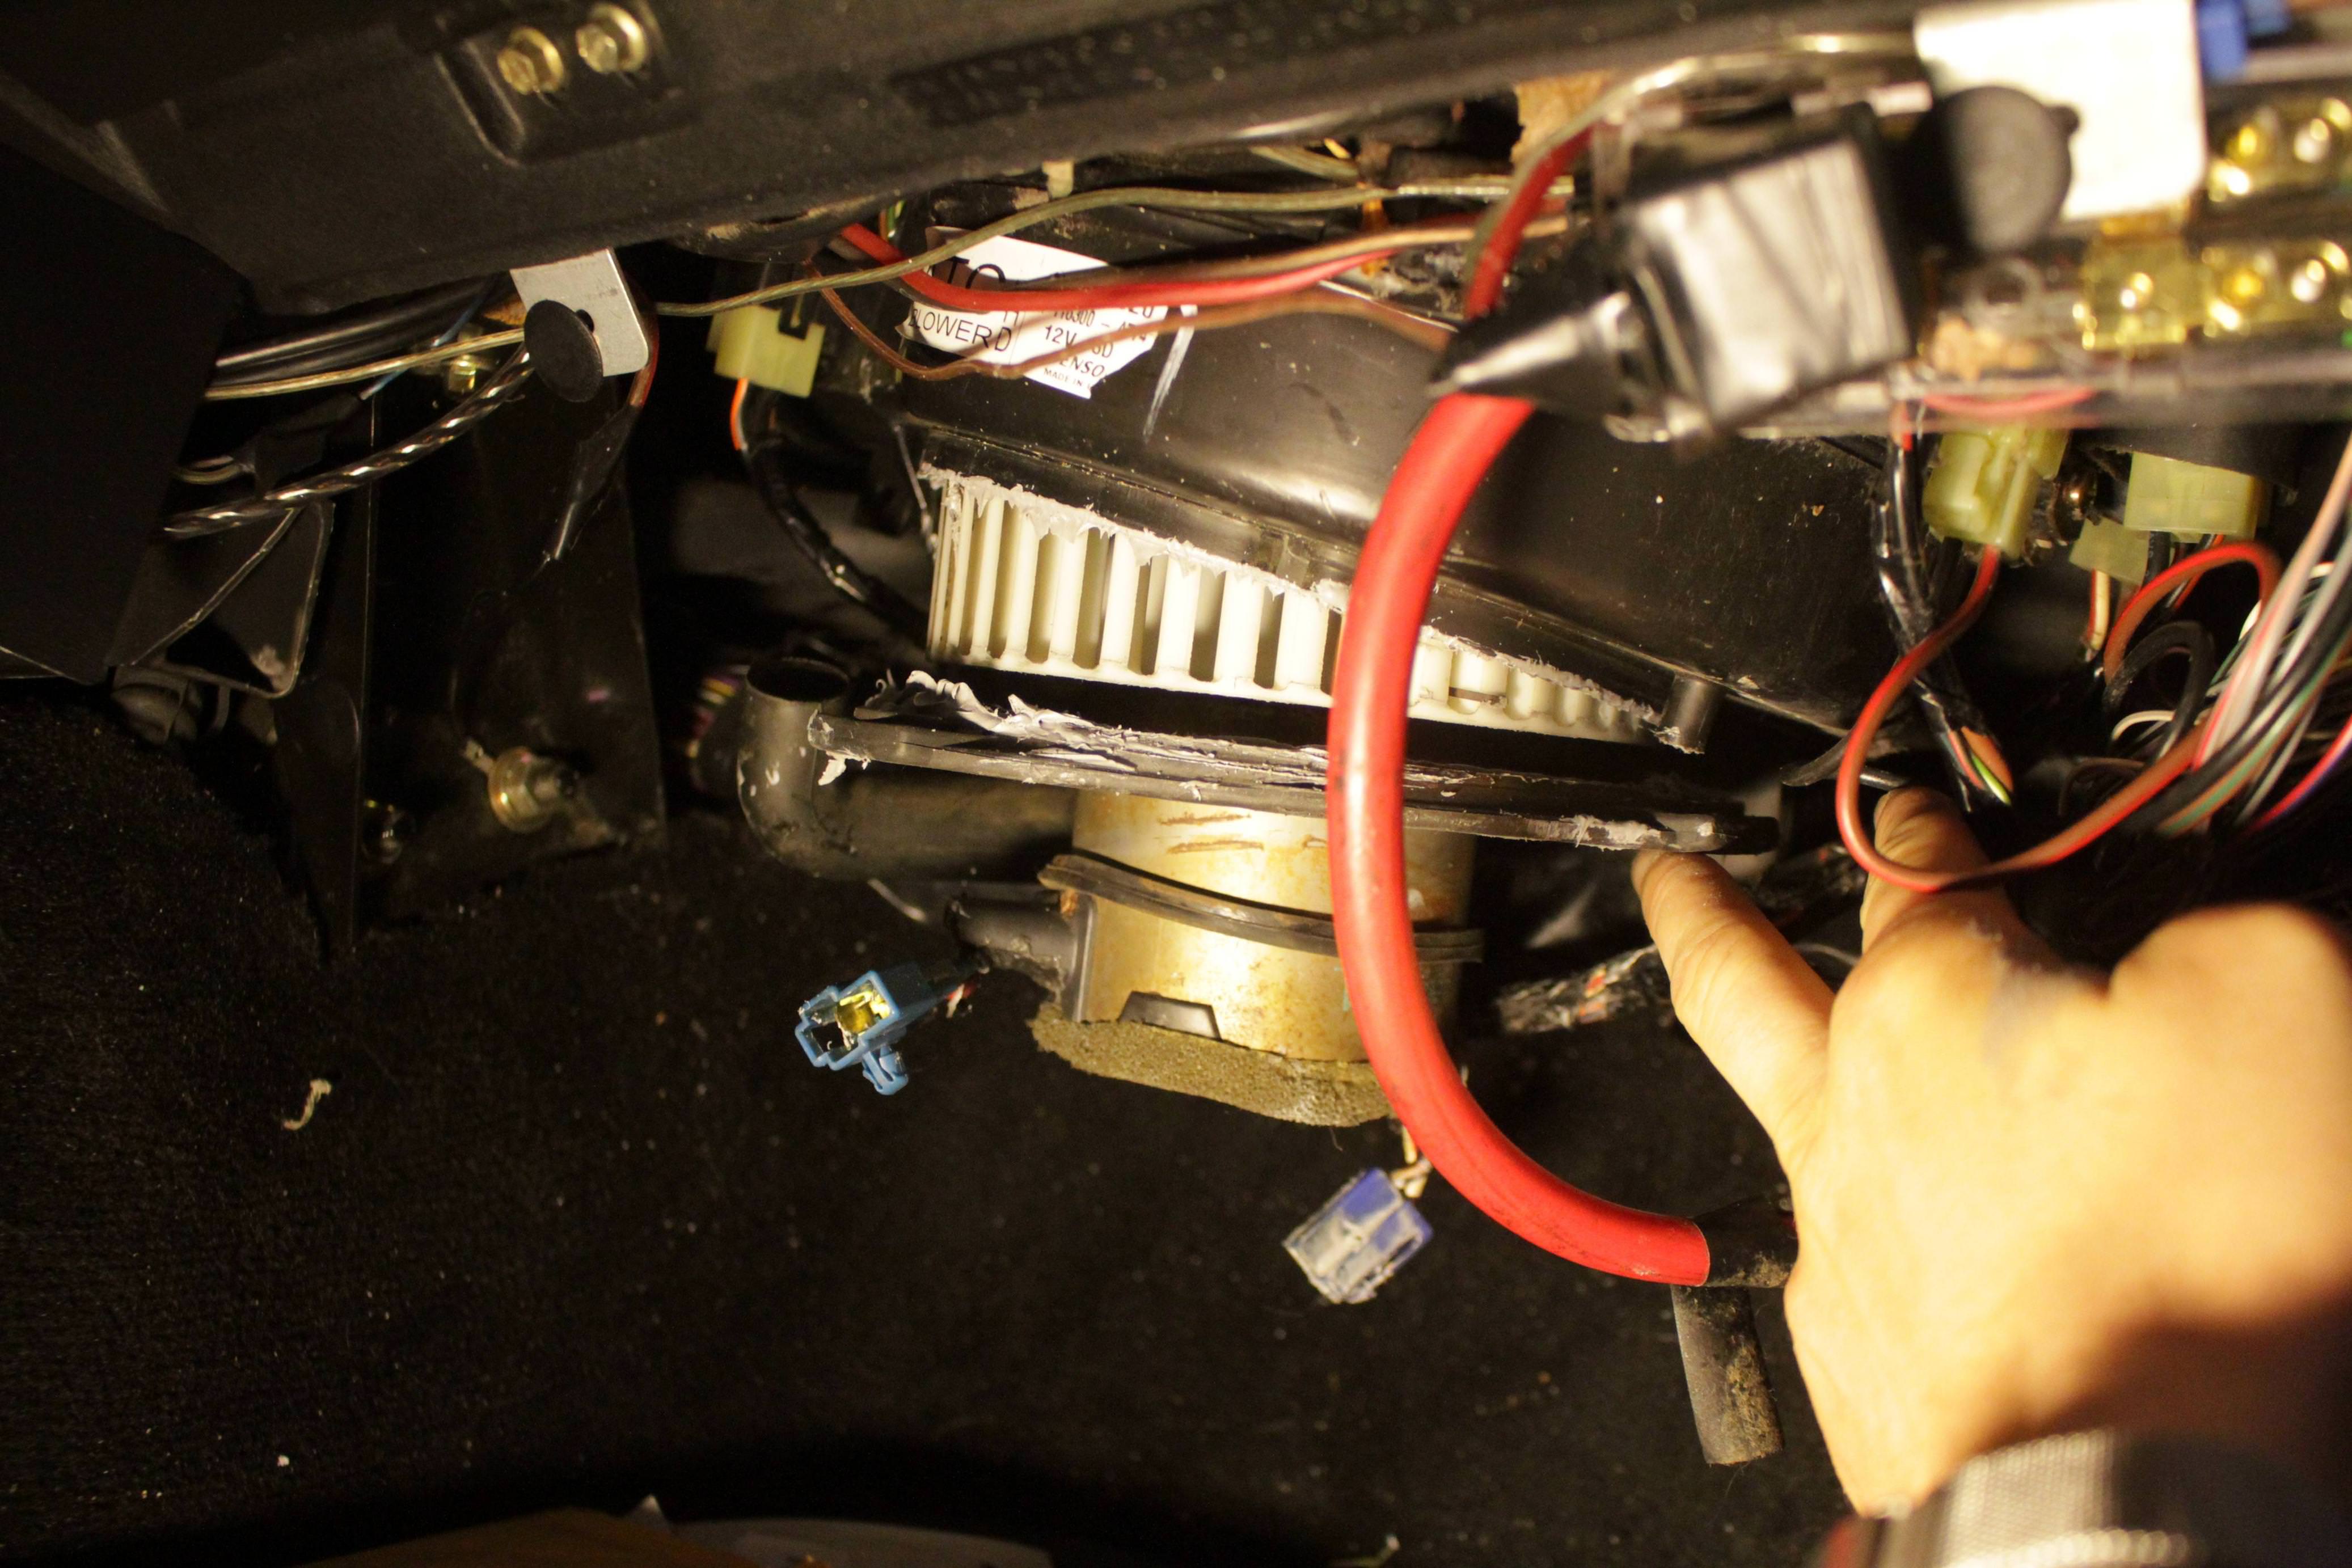
Now you're ready for final install! Slip it up in the factory location.
Attachment 56012
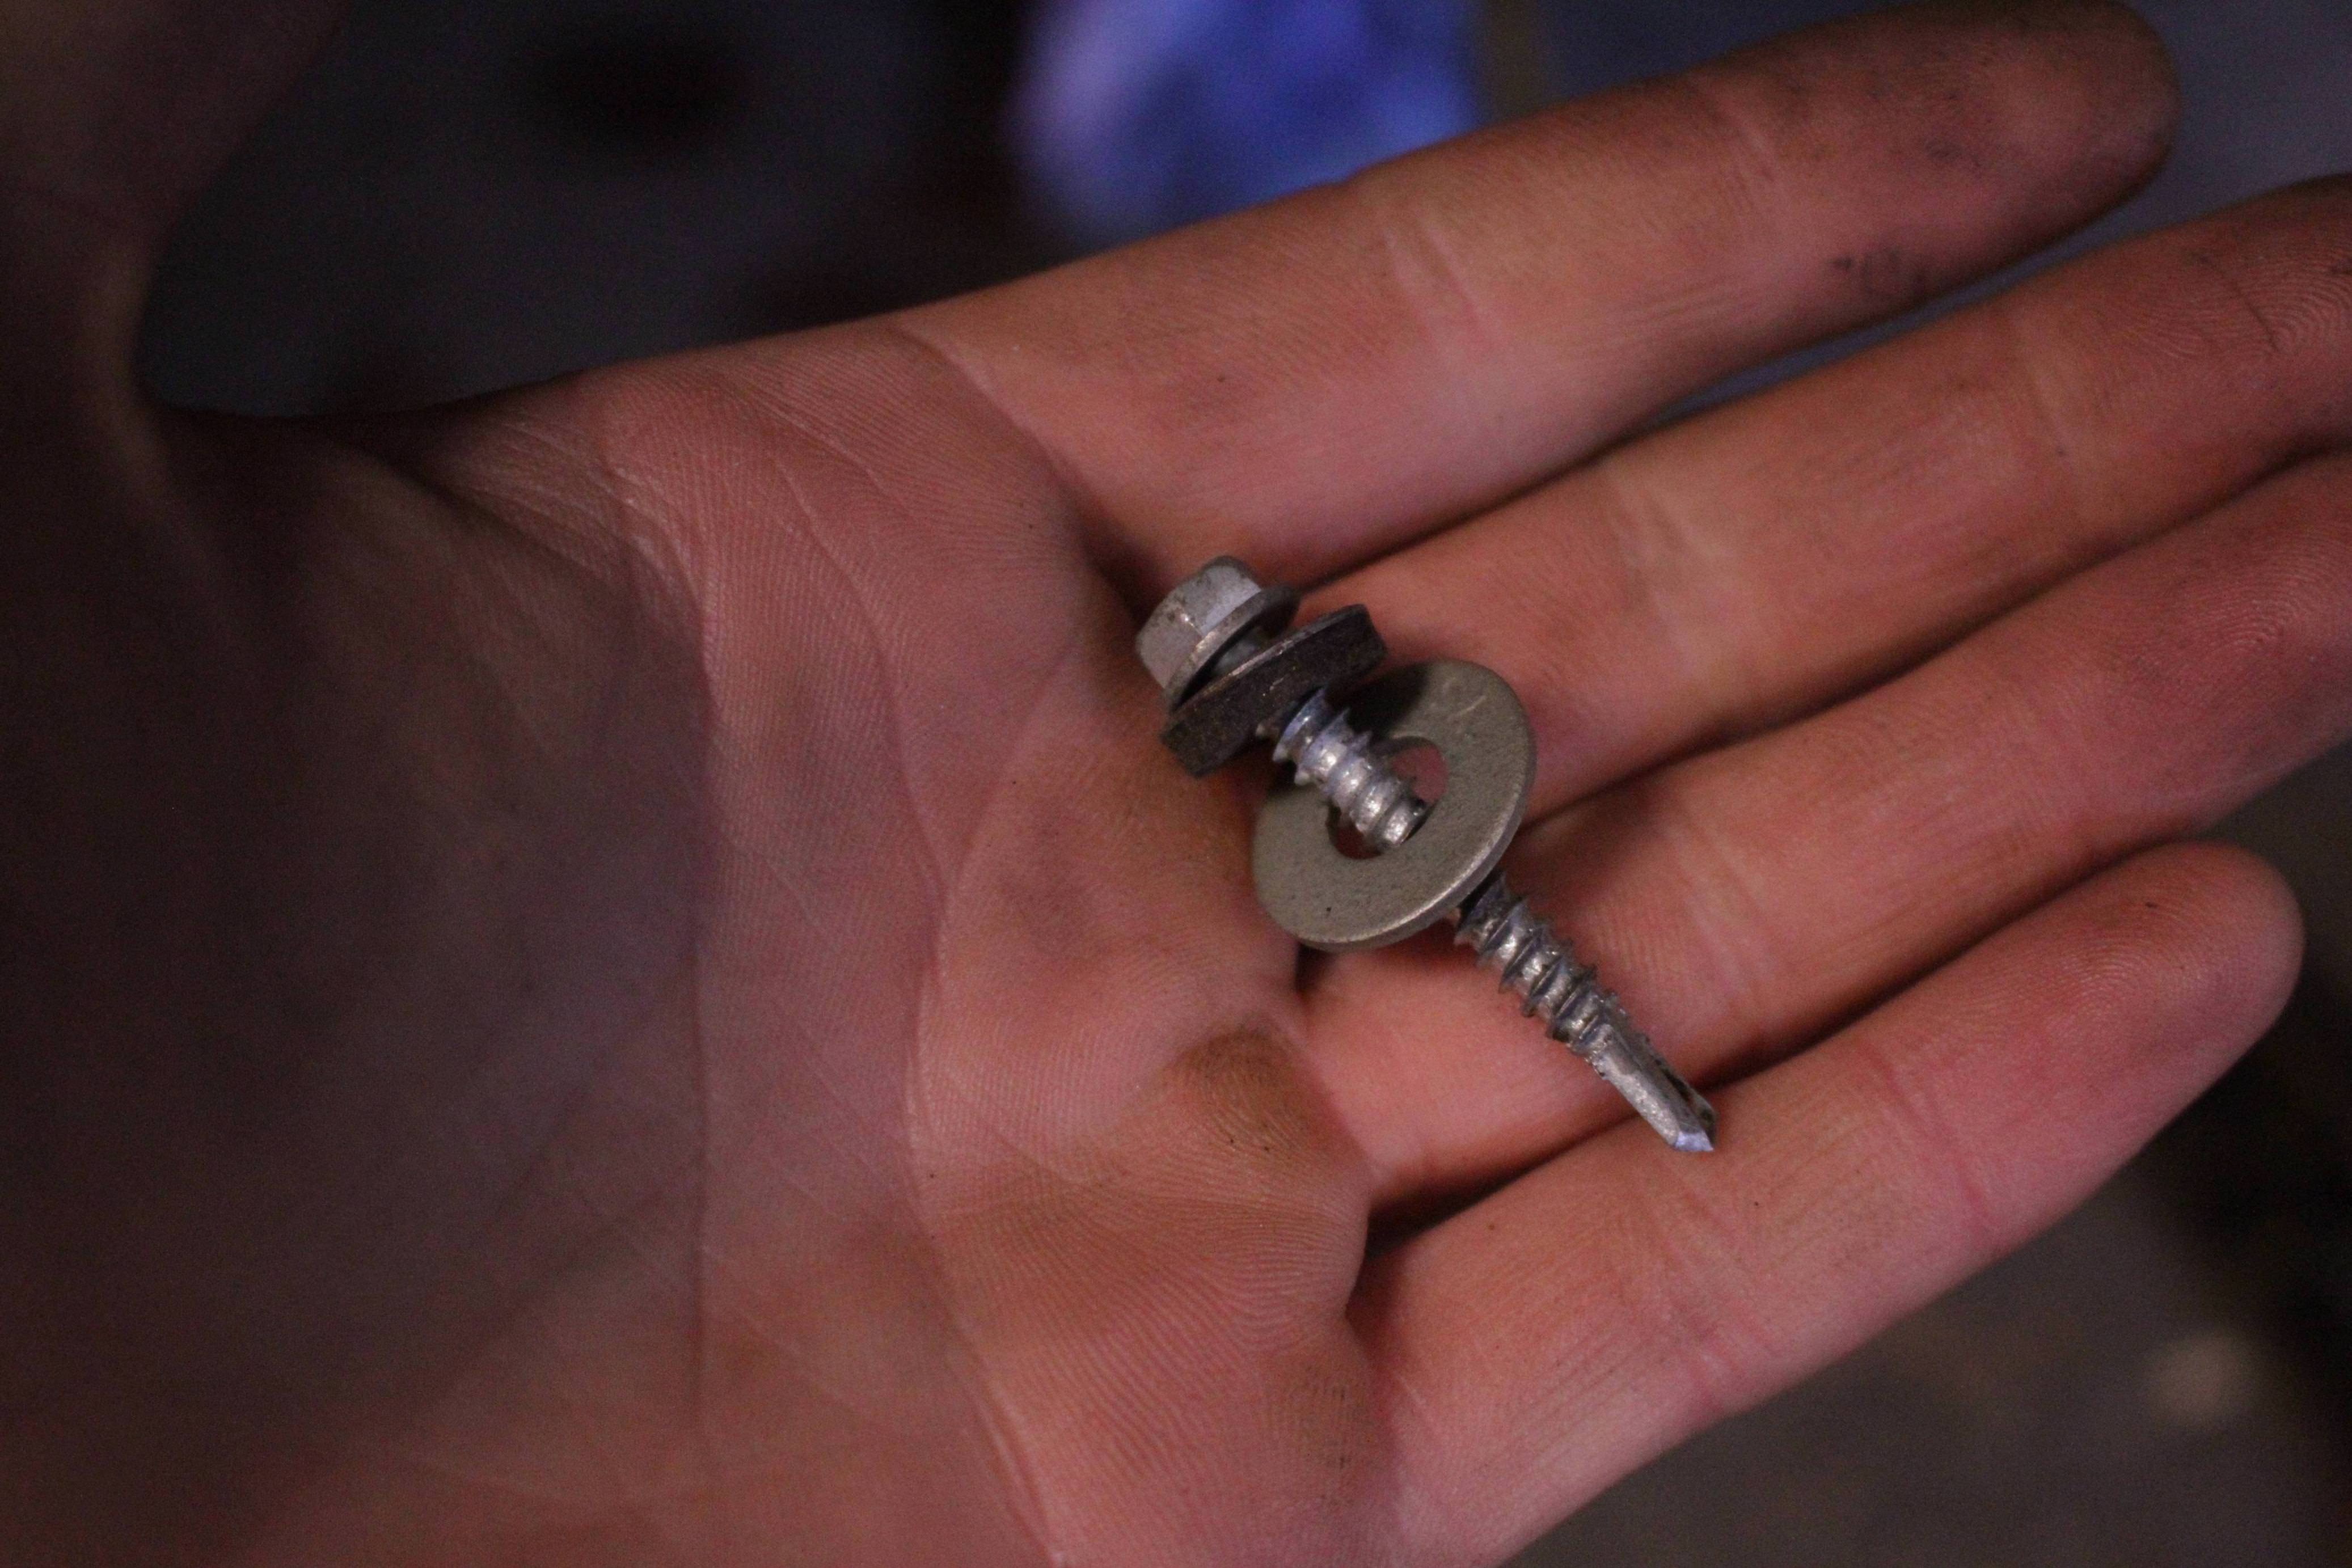
For mounting, I just used some self tapping screws. Fairly long ones actually. Just make sure they're not long enough to hit the squirrel cage once it's mounted.
Attachment 56013
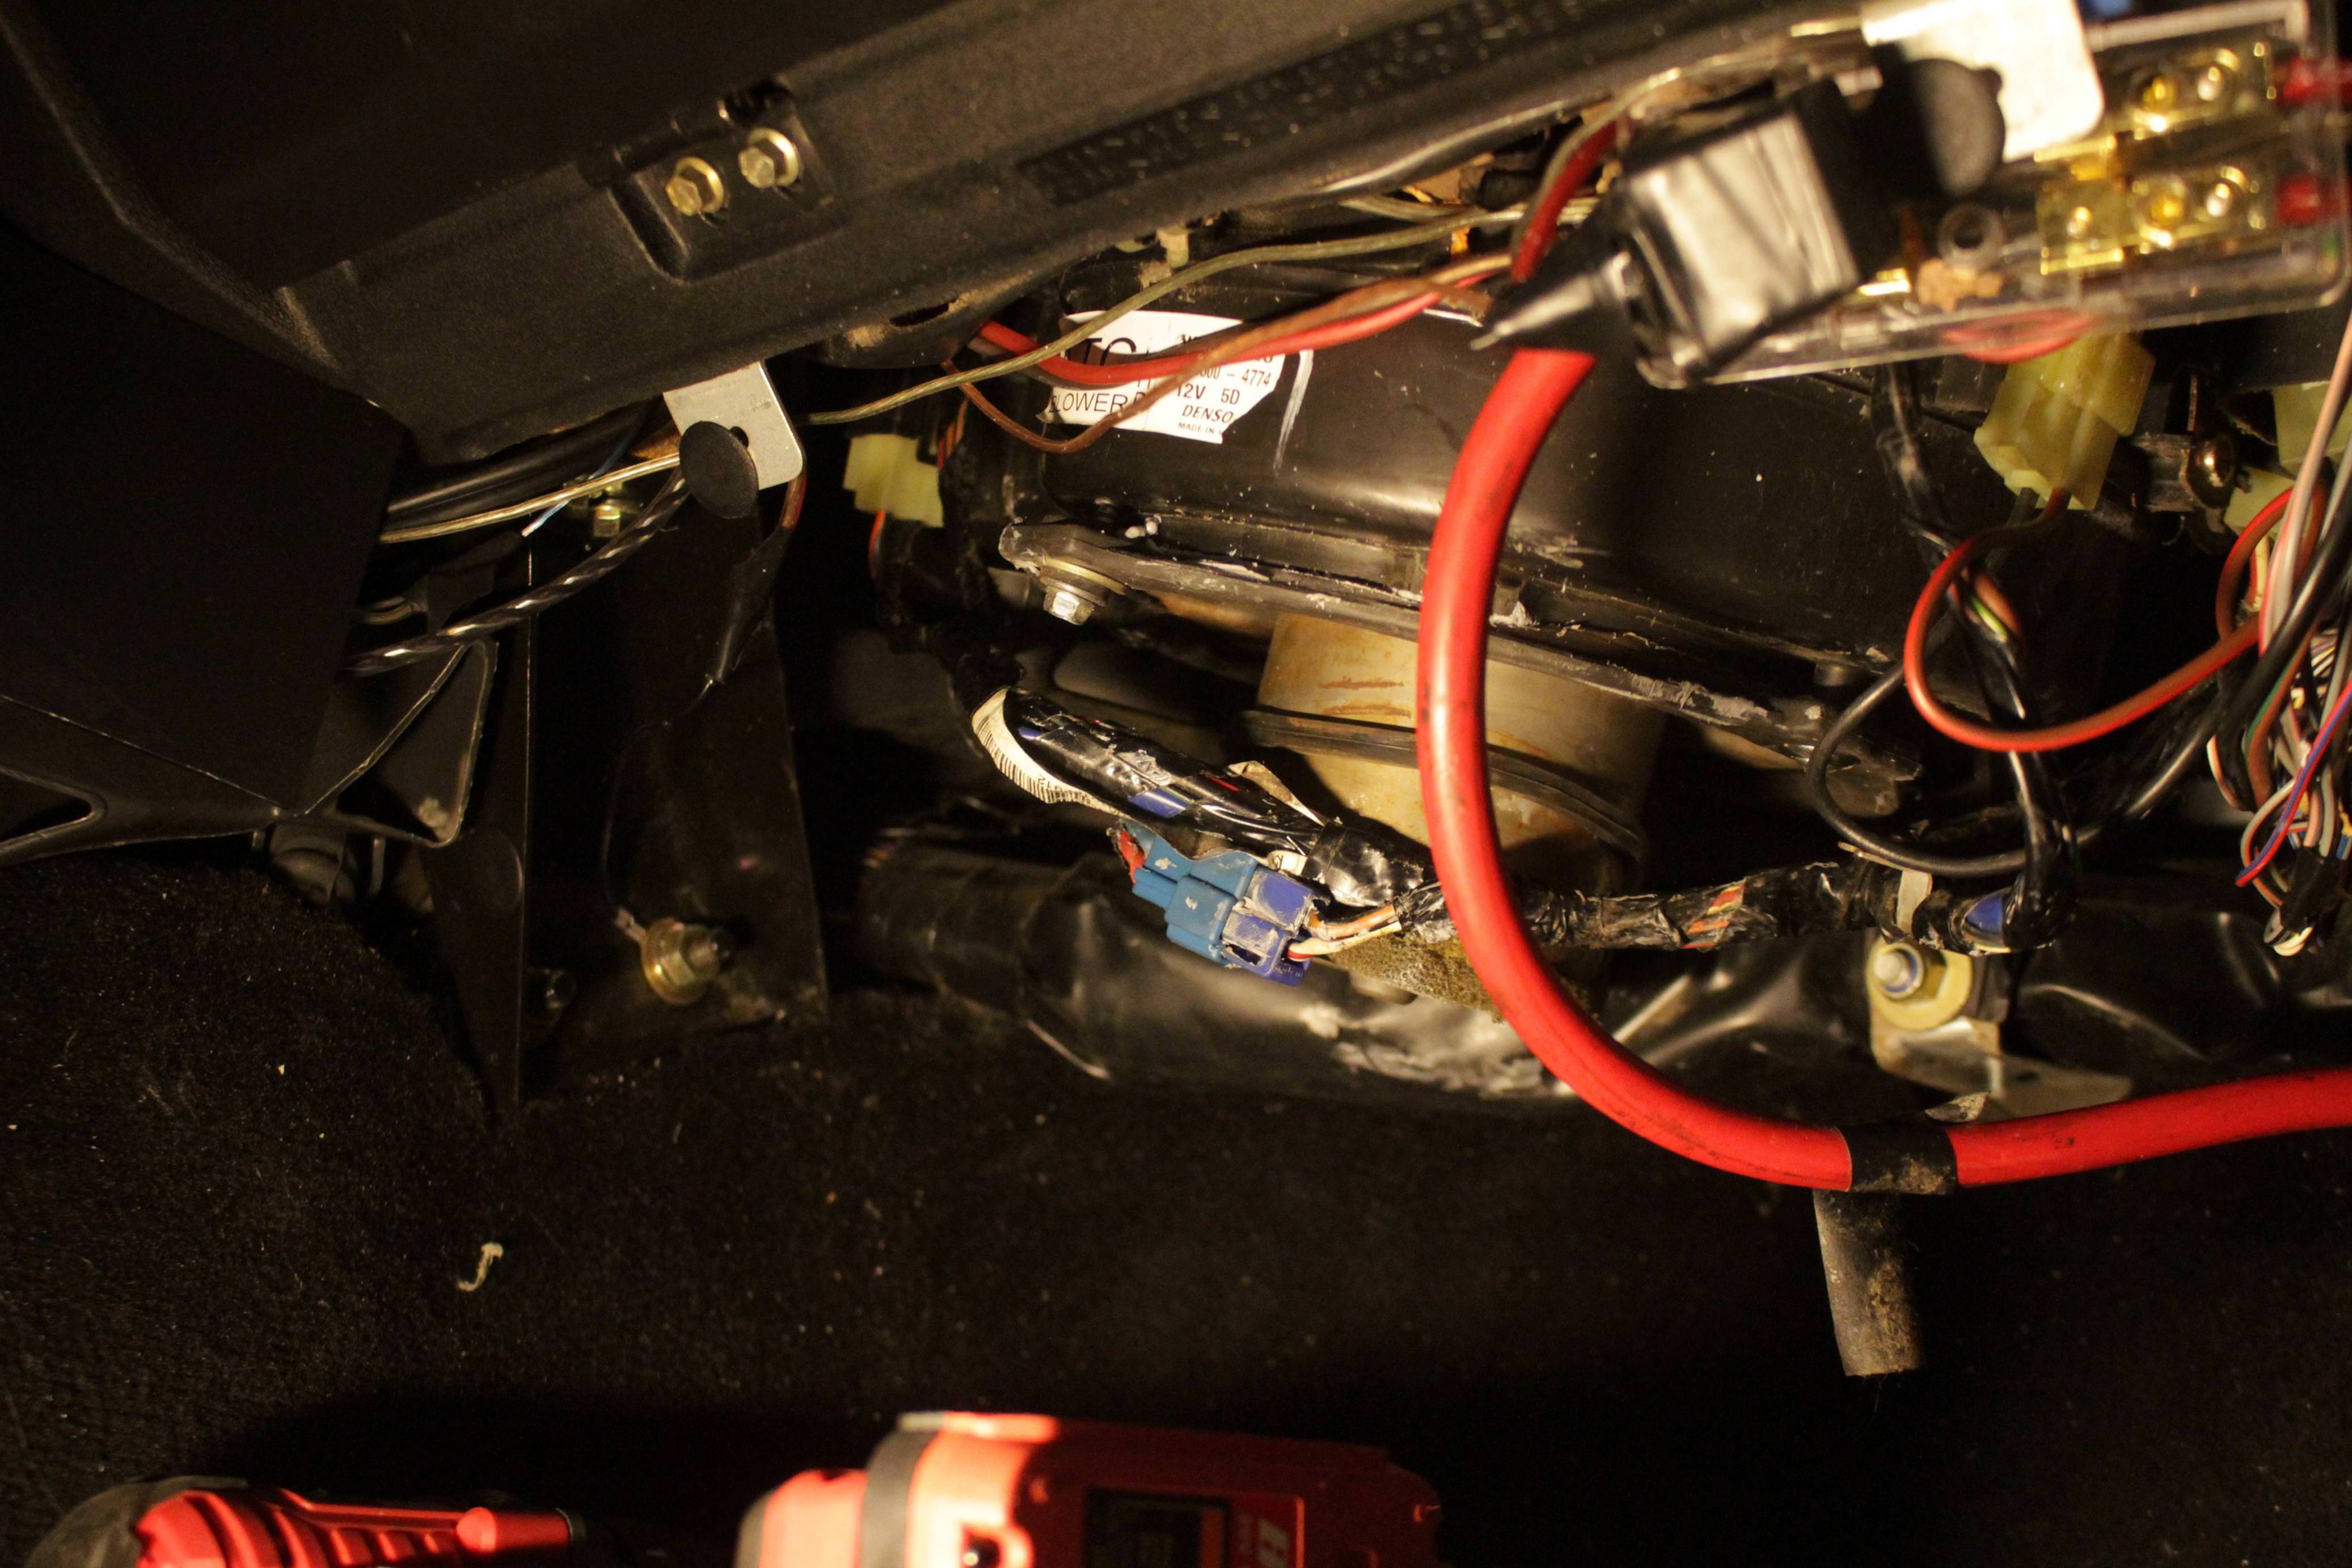
Clock the blower around where it can plug in, and where one of the blower holes also line up with one of the factory mounting holes. I actually ended up using a #8 screw with a washer in that location. Then just shoot two self tapping screws up through the other two blower mounting holes.
Attachment 56014
As always, if you all have any questions or comments please post them below! I try to stick around and answer any questions/respond to any concerns I can. Hope someone finds this helpful!
With winter coming up quickly, I decided to go ahead and swap out my factory blower motor and retrofit a "Pontiac" unit. The one I ordered is actually from an 01-03 Chevy Impala. You can get one from (I believe from what I've seen on eBay) an Impala, Monte Carlo, Pontiac Grand Prix, and a Buick Century. They're all over eBay for dirt cheap.
If you've never heard of this, the benefits are more steady air flow, quieter operation, and stronger air.
I would like to go ahead and apologize. These pictures are kinda dark. They looked a lot brighter on my camera.
This is a pretty simple write up and a pretty simple job. Up next will be my panhard conversion using all factory parts. I've already finished it, just need to upload the pictures and type up the write up.
So lets get started! I didn't take pictures of removing the factory blower because... well, I forgot. There are a bunch of write ups and videos on replacing the blower, so if you don't know how to remove the blower I recommend following one of those for blower removal. Once you've got it removed come on back over and I'll show you the rest.
Attachment 55998
Once you have your factory blower out, all you need off of it is the plug. cut that off and toss the rest wherever you want.
Take that end and strip the wire ends back about 3/16" and set it aside for a minute.
Attachment 55999
Go ahead and grab the replacement blower and a pair of wire cutters or something. You're going to want to go to where it would plug in and break some of the plastic off so you can get at the prongs.
Attachment 56000
Once you've got yourself about half of it broken off, grab the plug again and your soldering iron. If you've got a set of helping hands they help a ton. Clip your plug off of the factory blower into them. Go ahead and tin the stripped wire ends as well as the prongs on the blower plug you just opened up.
Attachment 56001
Attachment 56002
If you plan on keeping the factory blower around, I recommend going ahead and stripping those wires back a little and tinning those ends too. That will keep the wires from corroding and if you ever use it for something it will be ready.
Attachment 56003
Now, go ahead and solder the factory lead onto the new blower how you see here. Be sure to get the wires on the correct side as shown or it will spin backwards.
Attachment 56004
You'll want to plug it in and check it first. If it's working correctly then grab your epoxy. This is dual purpose; firstly it acts to insulate the electrical connection. Secondly it reinforces the soldered connection so it doesn't accidentally pull off or vibrate off.
This is the epoxy I used, but pretty well any two part epoxy should work.
Attachment 56005
Attachment 56006
Now grab your factory blower again. The squirrel cage on the factory blower is a little smaller than the new one. I just laid them next to each other and marked the approximate height it needed to be trimmed to. I marked it a touch taller than the factory one, but if I had it to do again I would've marked it just a touch taller still.
You can also see in this picture that there's grey RTV on the new blower. Do not try sealing it with RTV; it's not necessary and that crap gets everywhere. Just trust me.
Now take the blower back in the truck and plug it in. Set it where the squirrel cage won't touch anything. Grab a sharpie, set it next to your mark, and turn it on to mark all the way around. This doesn't need to be a complete line, just enough to see it while the blower is on.
Attachment 56007
Now grab your hacksaw. Hold onto the motor section of the blower and turn it on. Set your hacksaw on the line and she'll cut through all on her own with ease.
Attachment 56008
Attachment 56009
Once that's done, pull it out and clean up some of the burrs with a pocket knife or something. Just takes a second. Be careful not to break the cage. If yours is like mine it will be a little brittle.
I also cut this piece of rubber I had. There's a gap in the mounting ring for the blower. I forgot to grab a picture, but if you look you'll see it. I cut it as shown and epoxied it in place to make the ring level all the way around so the blower will seal.
Attachment 56010
Attachment 56011
Now you're ready for final install! Slip it up in the factory location.
Attachment 56012
For mounting, I just used some self tapping screws. Fairly long ones actually. Just make sure they're not long enough to hit the squirrel cage once it's mounted.
Attachment 56013
Clock the blower around where it can plug in, and where one of the blower holes also line up with one of the factory mounting holes. I actually ended up using a #8 screw with a washer in that location. Then just shoot two self tapping screws up through the other two blower mounting holes.
Attachment 56014
As always, if you all have any questions or comments please post them below! I try to stick around and answer any questions/respond to any concerns I can. Hope someone finds this helpful!
Thanks so much!

Thread
Thread Starter
Forum
Replies
Last Post