
Small Modification Write Ups + Index of Mods (Alex_M)
#131
 02-06-2018, 11:11 PM


This is just a small post for what I believe to be a better temperature in-line thermostat. The 180* was running too cool; cool enough to throw a low temp code. The next bump up is a 195* for a small block thermostat, but you can get an LS thermostat in a 187* which has proven a happy medium for me. Requires slight modification to work, but I've been happily running one for a month+.
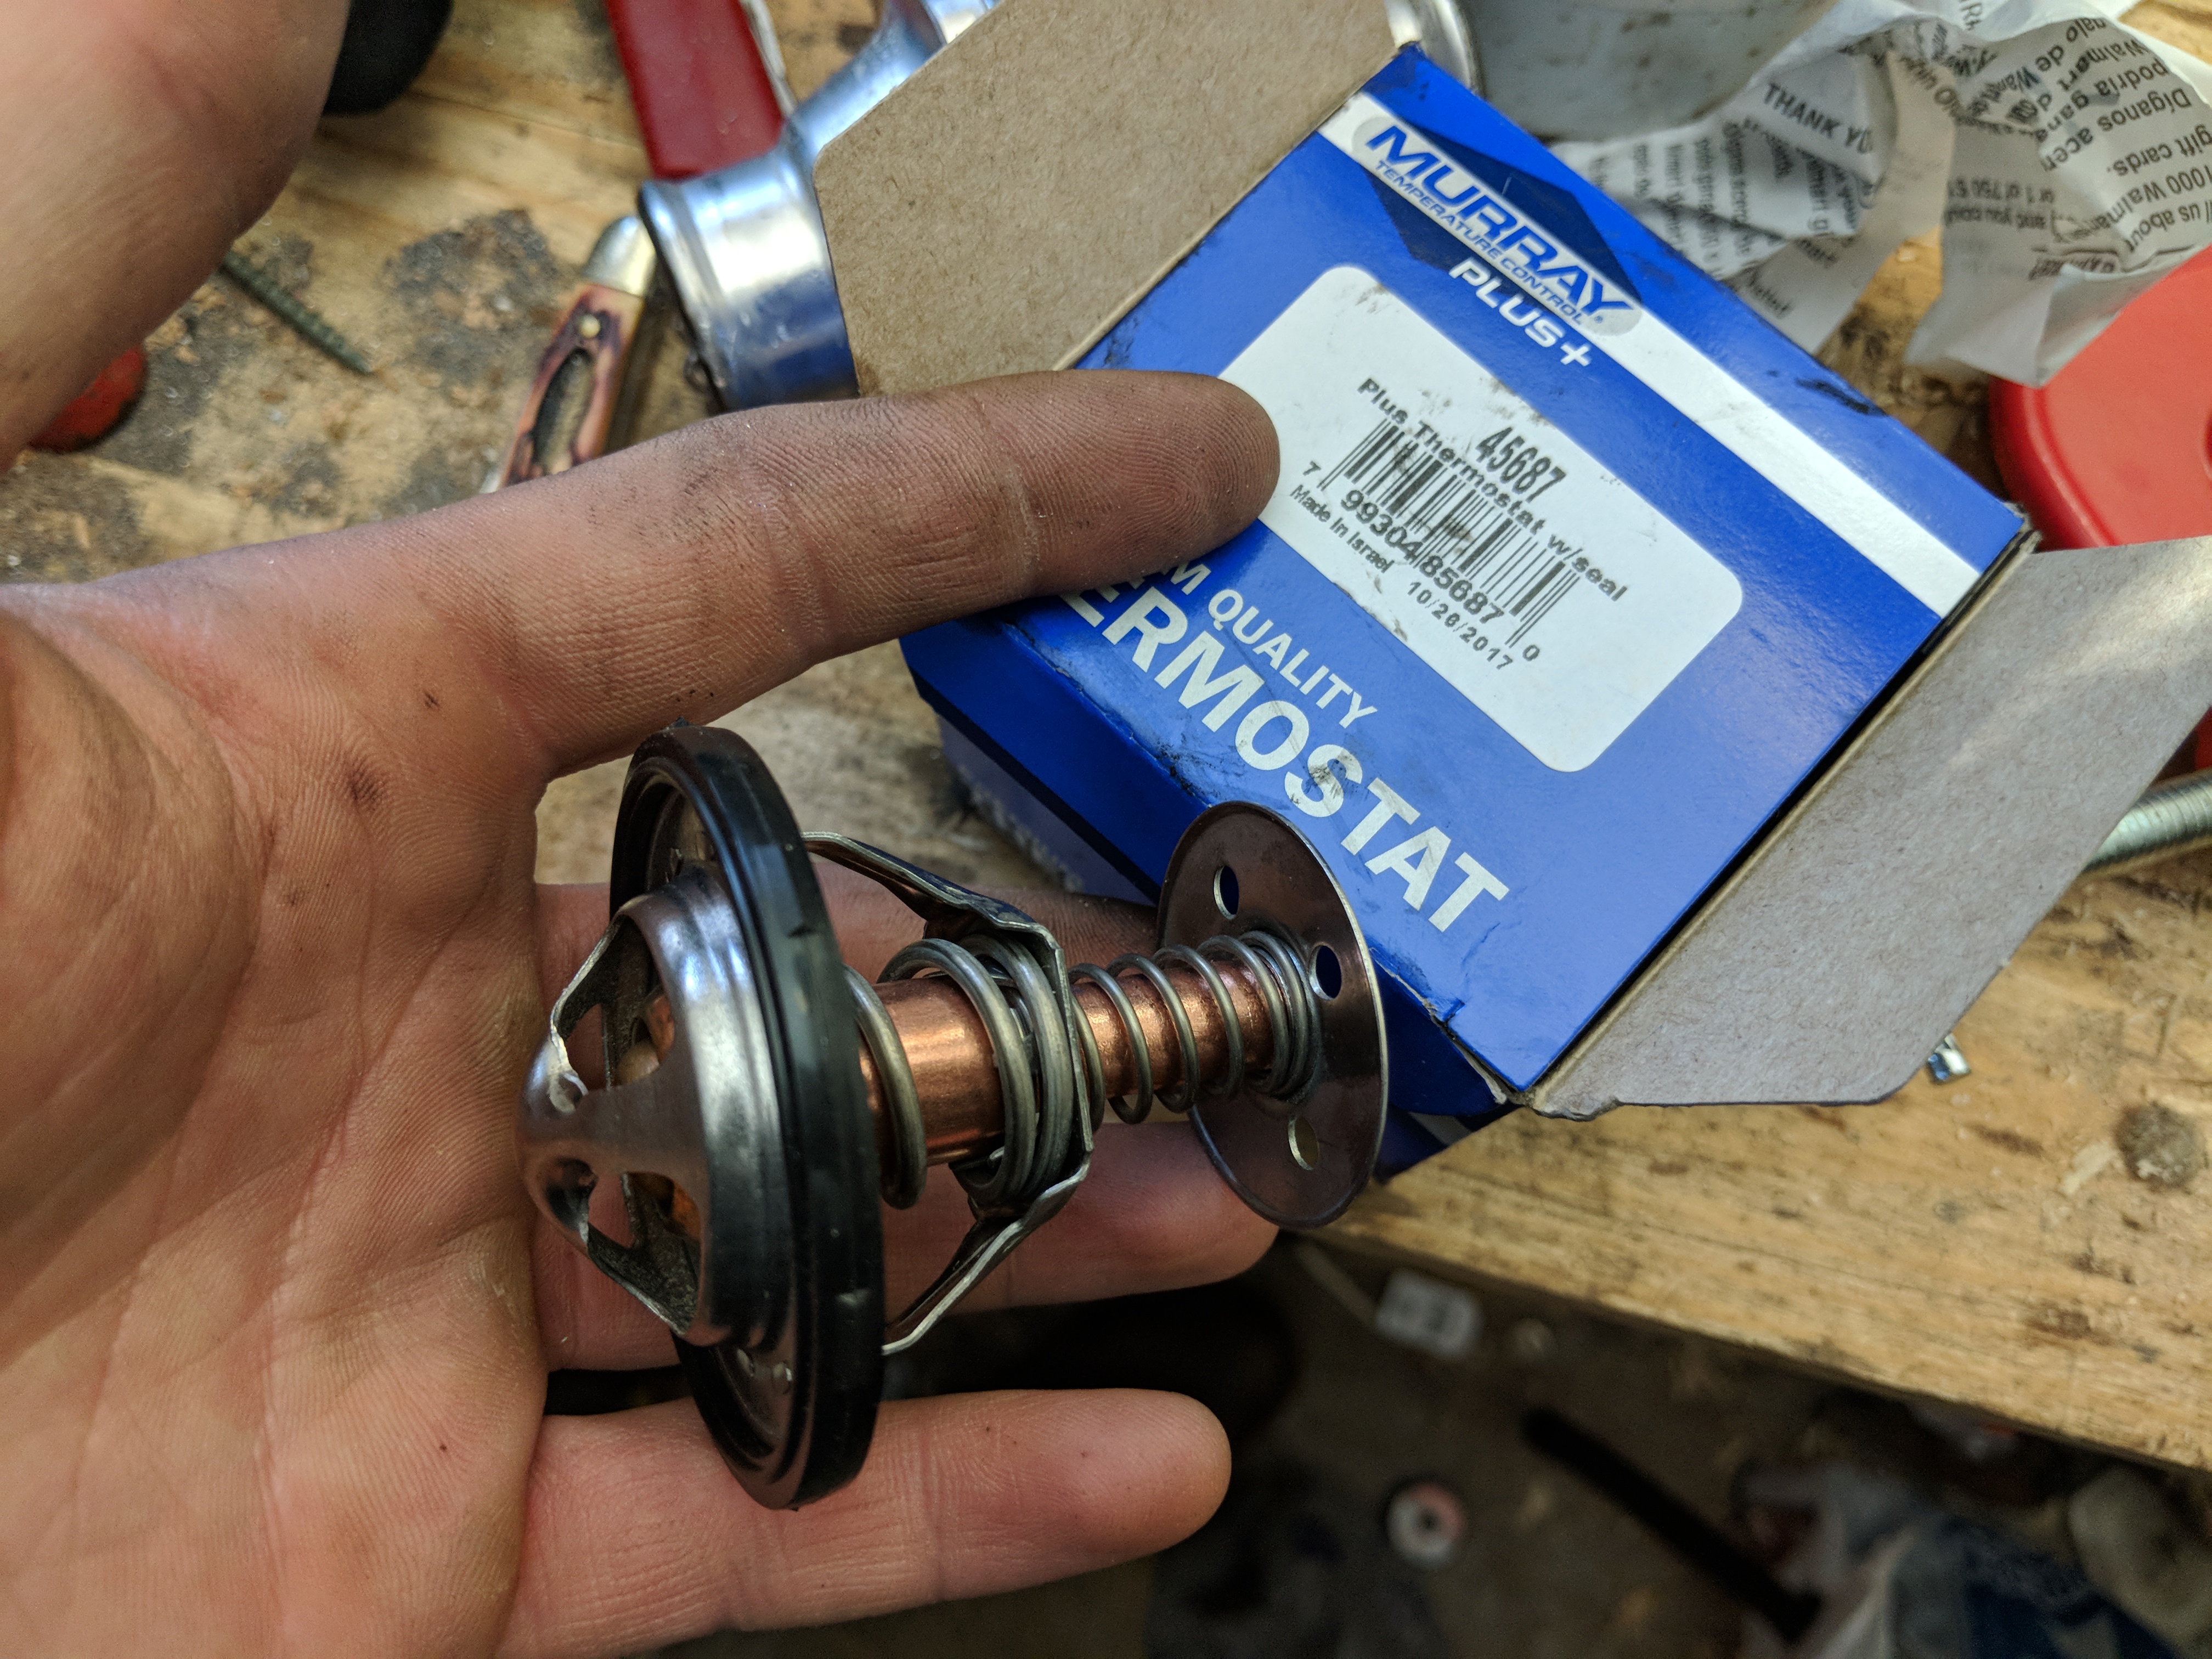
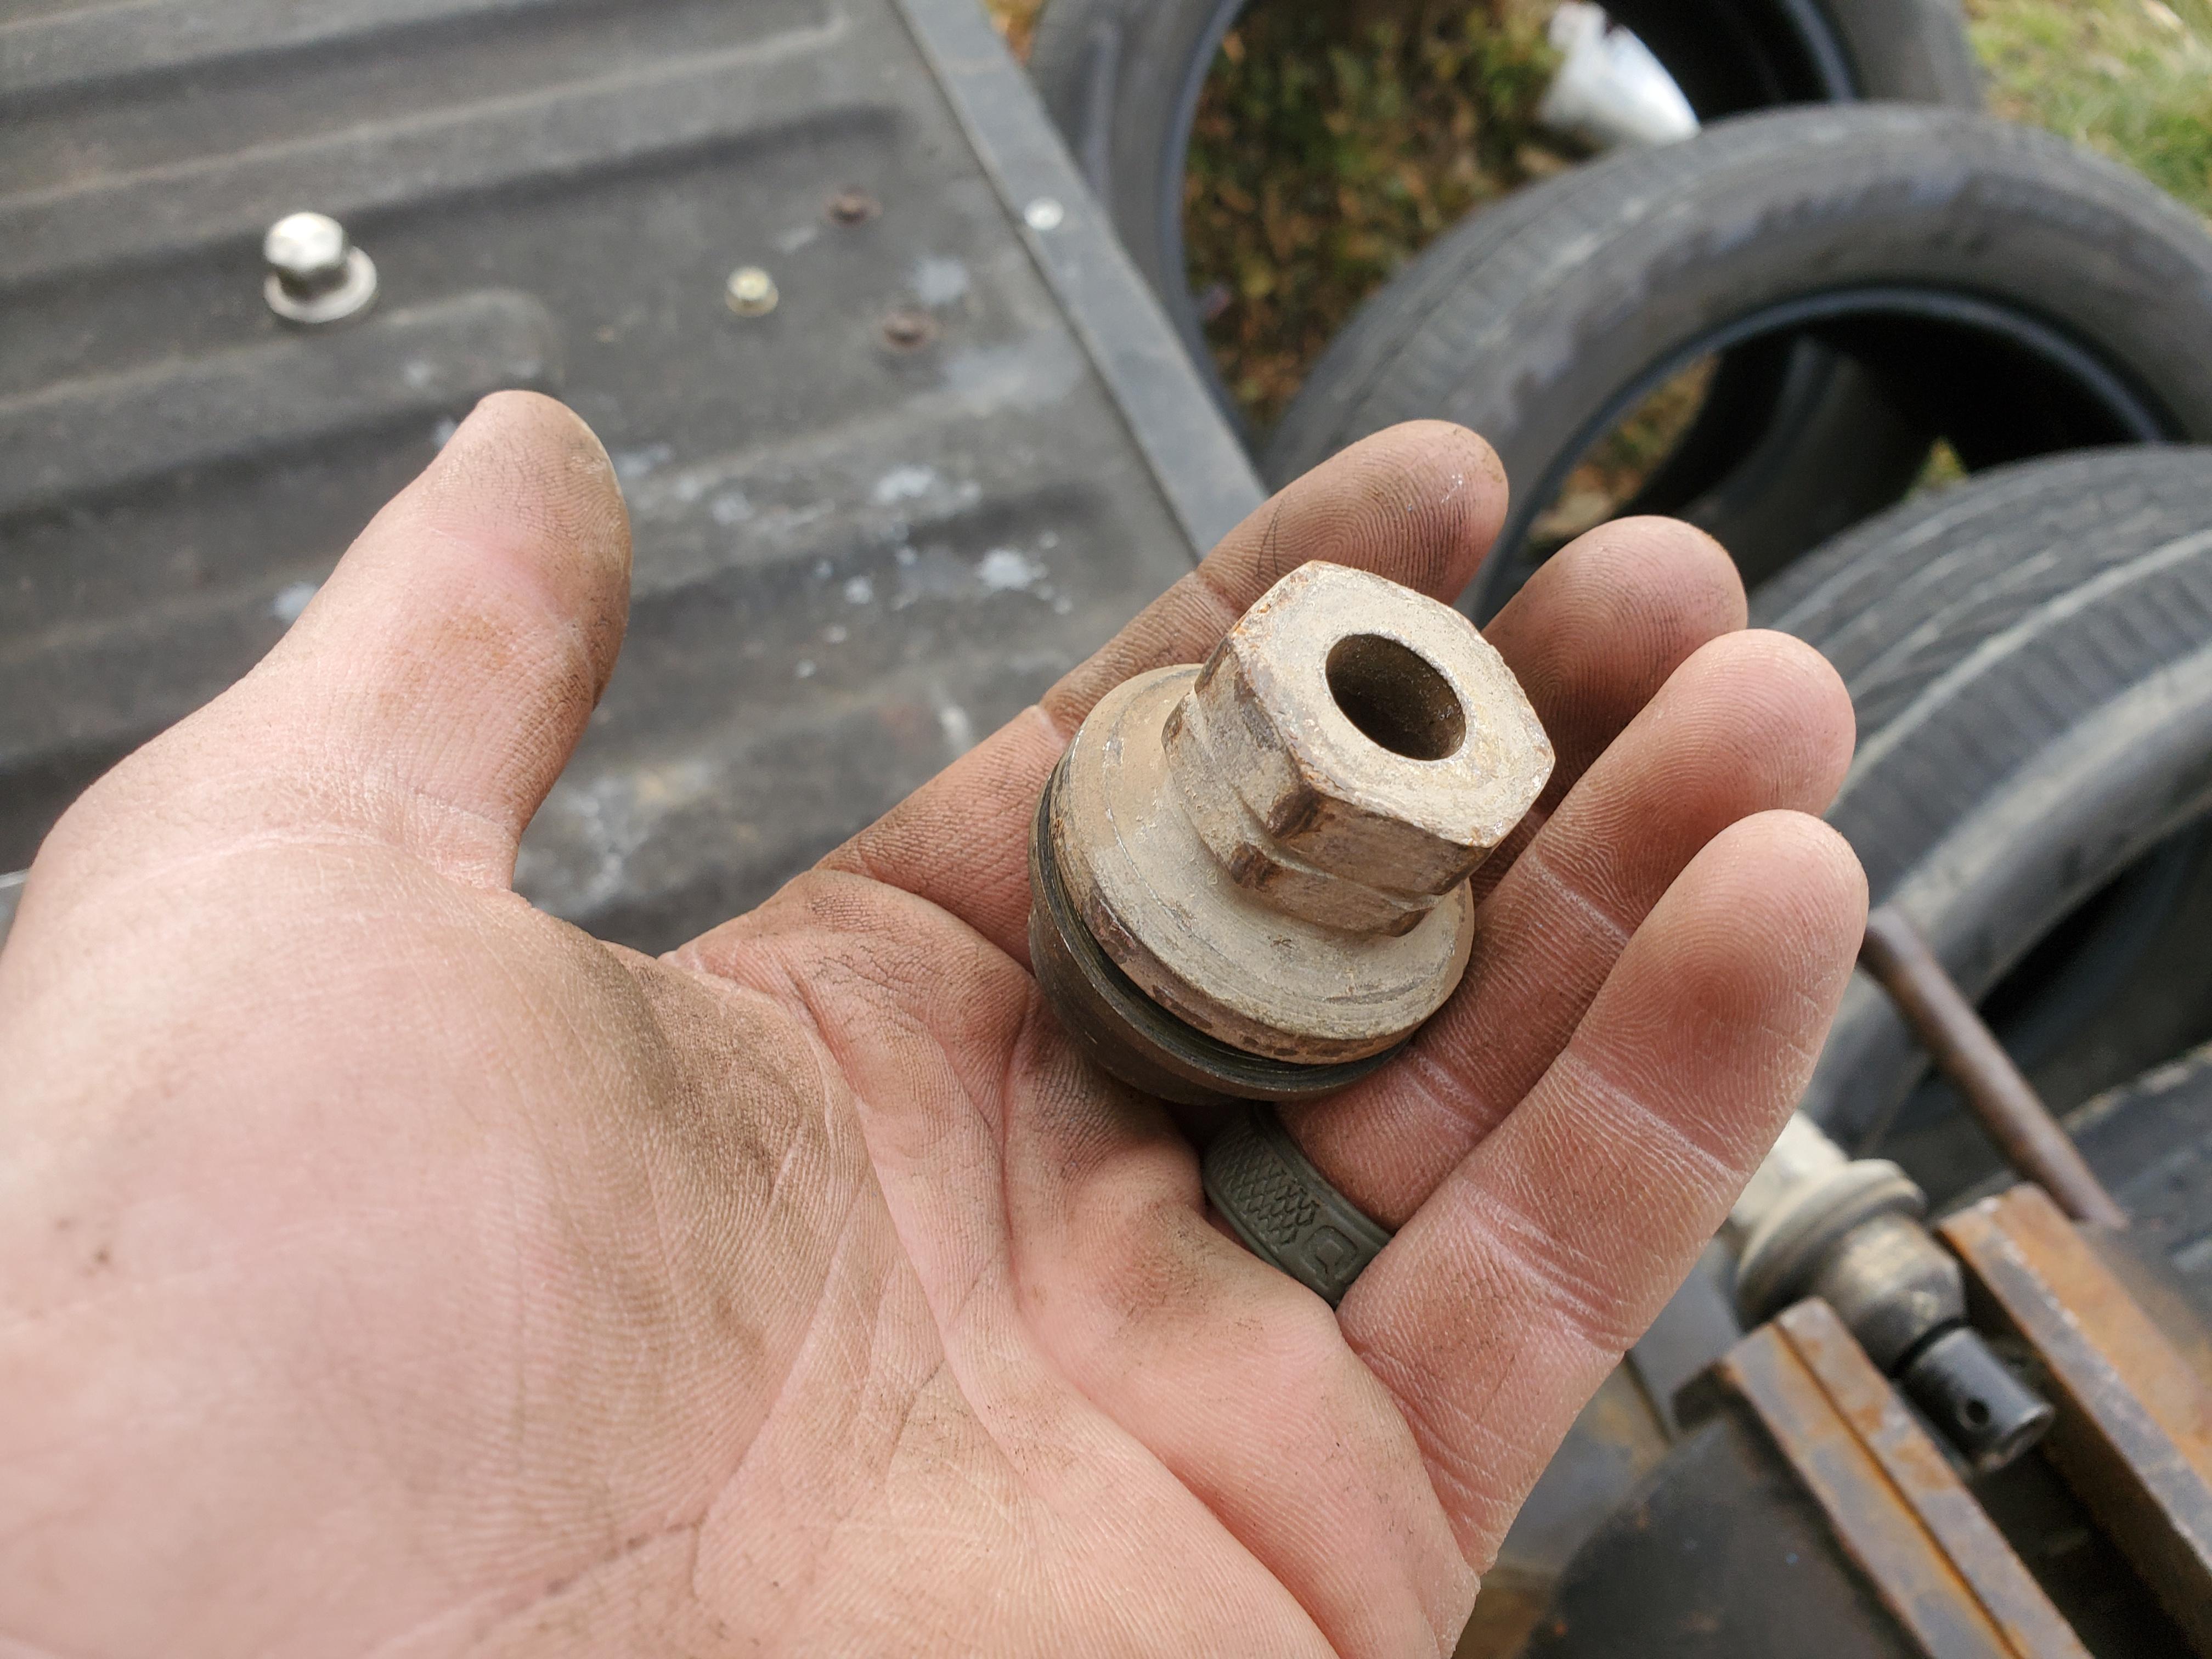
Here you can see the thermostat. It has a relief on the back that I believe is for the heater core on an LS. It must be removed for the thermostat to fit the in-line housing. Very easy; all you have to do is cut it off.
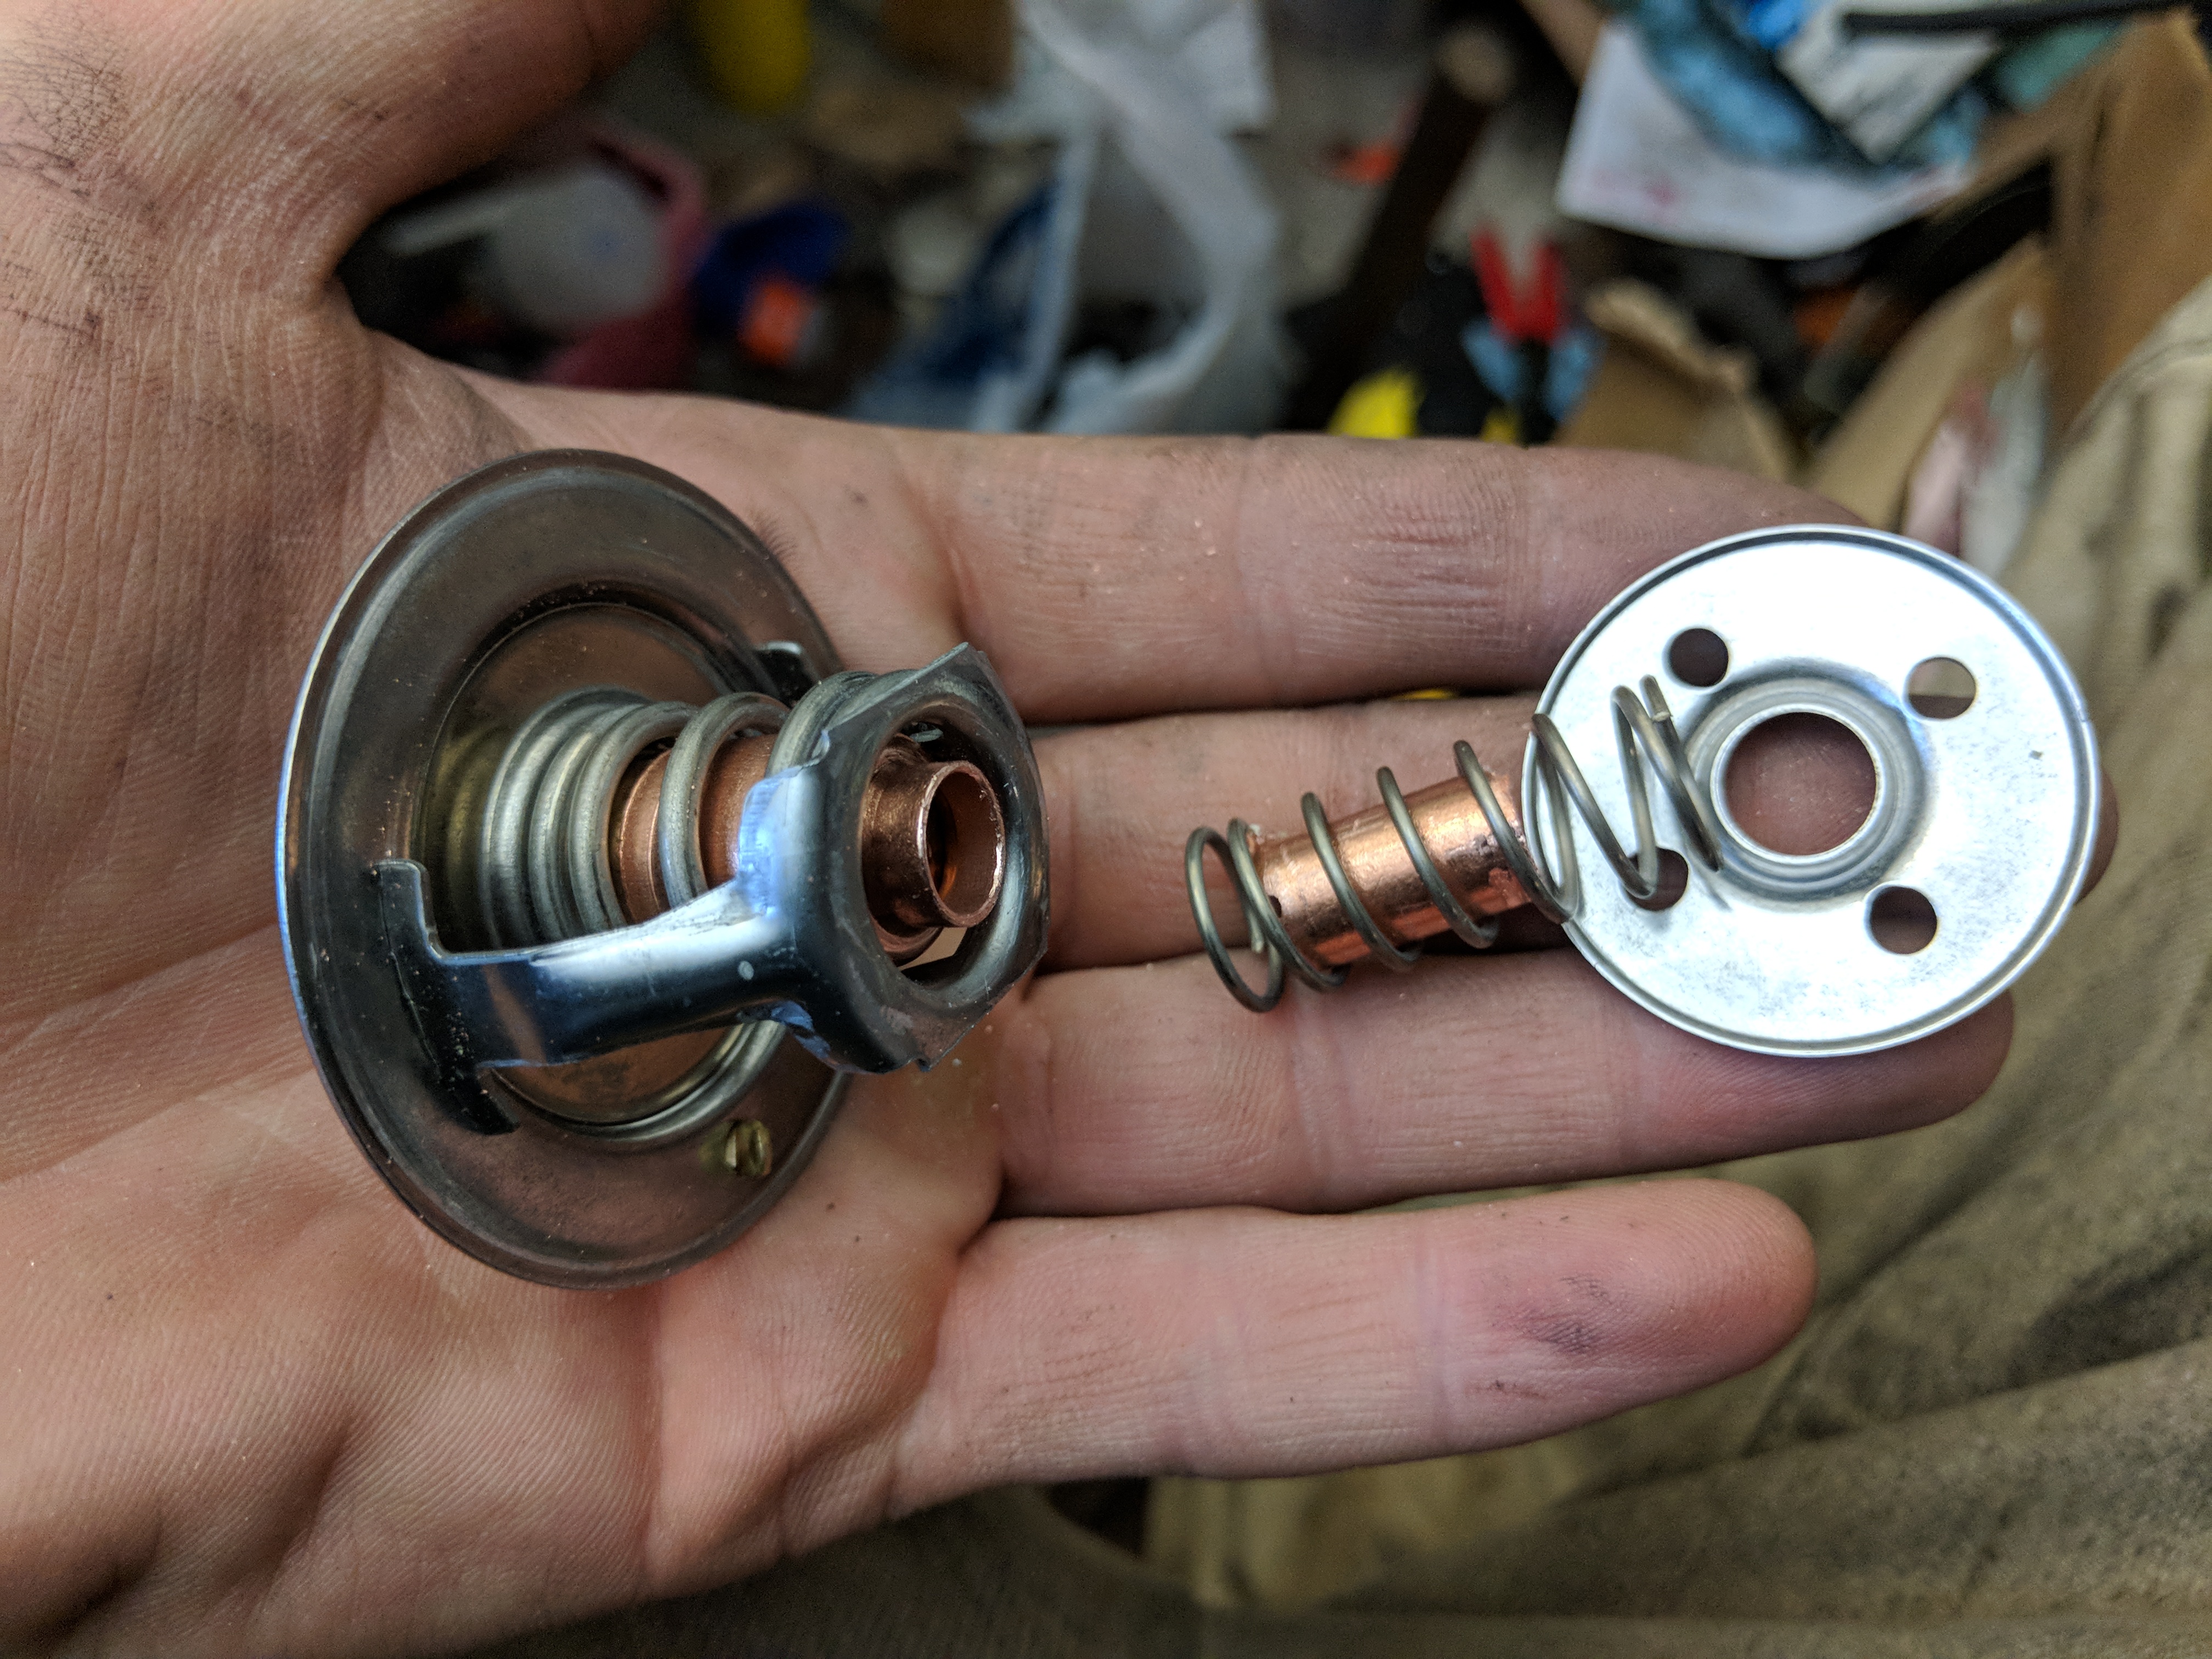
I just cut the relief on the back off with an angle grinder and cleaned up the burrs with a file. This allowed it to drop right in the in line housing. I guess you don't even really need to clean it up any, but I preferred to.

As you can see, they're now the same dimensions and will fit/function perfectly.

It did have a jiggle pin in it, but I opted to remove it and slightly enlarge the hole so that hot water would get to the thermostat quicker since it's no longer installed directly in the engine as it was designed. I tried running without removing it and without enlarging the hole with it removed, didn't like the performance as well.
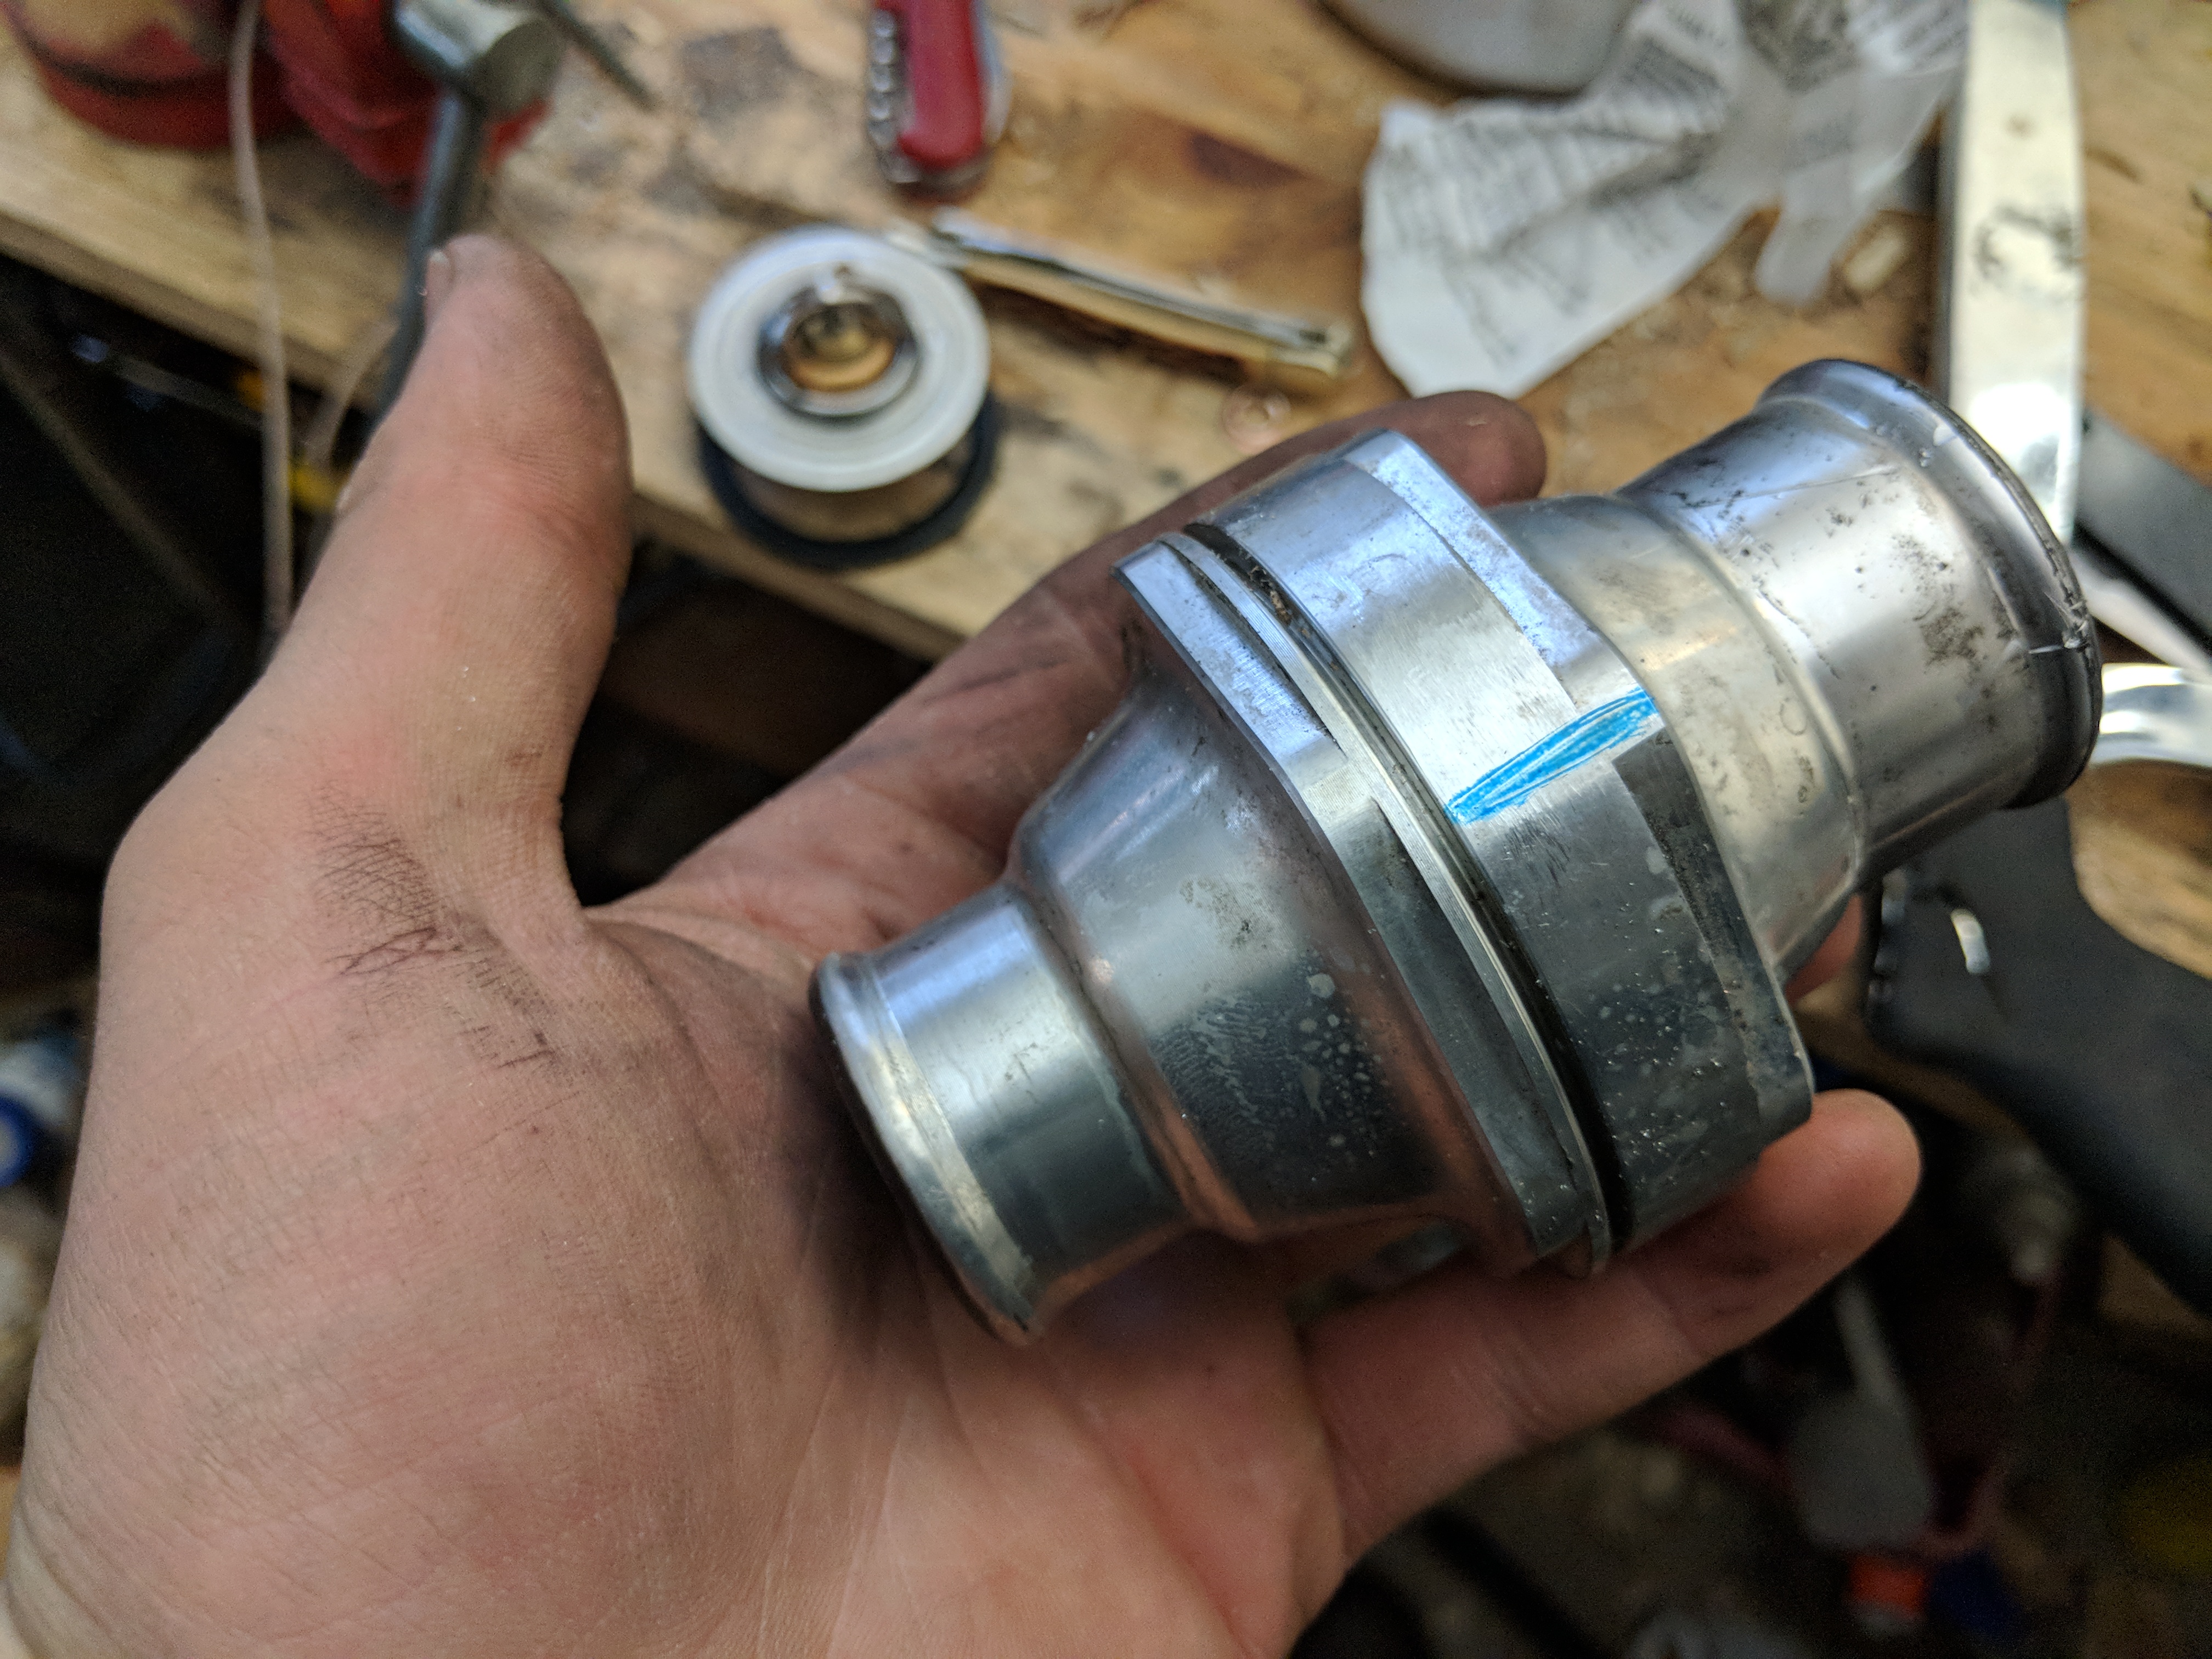
I like to mark where the hole is on the outside of the housing. That way I can orient it on the top so that air bubbles can escape.
Easy as that. Then just smack your housing back in and you're good to go.
Here you can see the thermostat. It has a relief on the back that I believe is for the heater core on an LS. It must be removed for the thermostat to fit the in-line housing. Very easy; all you have to do is cut it off.
I just cut the relief on the back off with an angle grinder and cleaned up the burrs with a file. This allowed it to drop right in the in line housing. I guess you don't even really need to clean it up any, but I preferred to.
As you can see, they're now the same dimensions and will fit/function perfectly.
It did have a jiggle pin in it, but I opted to remove it and slightly enlarge the hole so that hot water would get to the thermostat quicker since it's no longer installed directly in the engine as it was designed. I tried running without removing it and without enlarging the hole with it removed, didn't like the performance as well.
I like to mark where the hole is on the outside of the housing. That way I can orient it on the top so that air bubbles can escape.
Easy as that. Then just smack your housing back in and you're good to go.

#133
02-09-2018, 12:12 PM


#135
02-09-2018, 01:19 PM
I understand and respect that decision. It would show favoritism that the mods can't show due to their needing to stay neutral, especially having my name right in the title.
That said, feel free to pass it around! The more people it can help the better.

#137
12-24-2021, 01:05 PM
Got another one for you all, by request! Been a while under this thread.
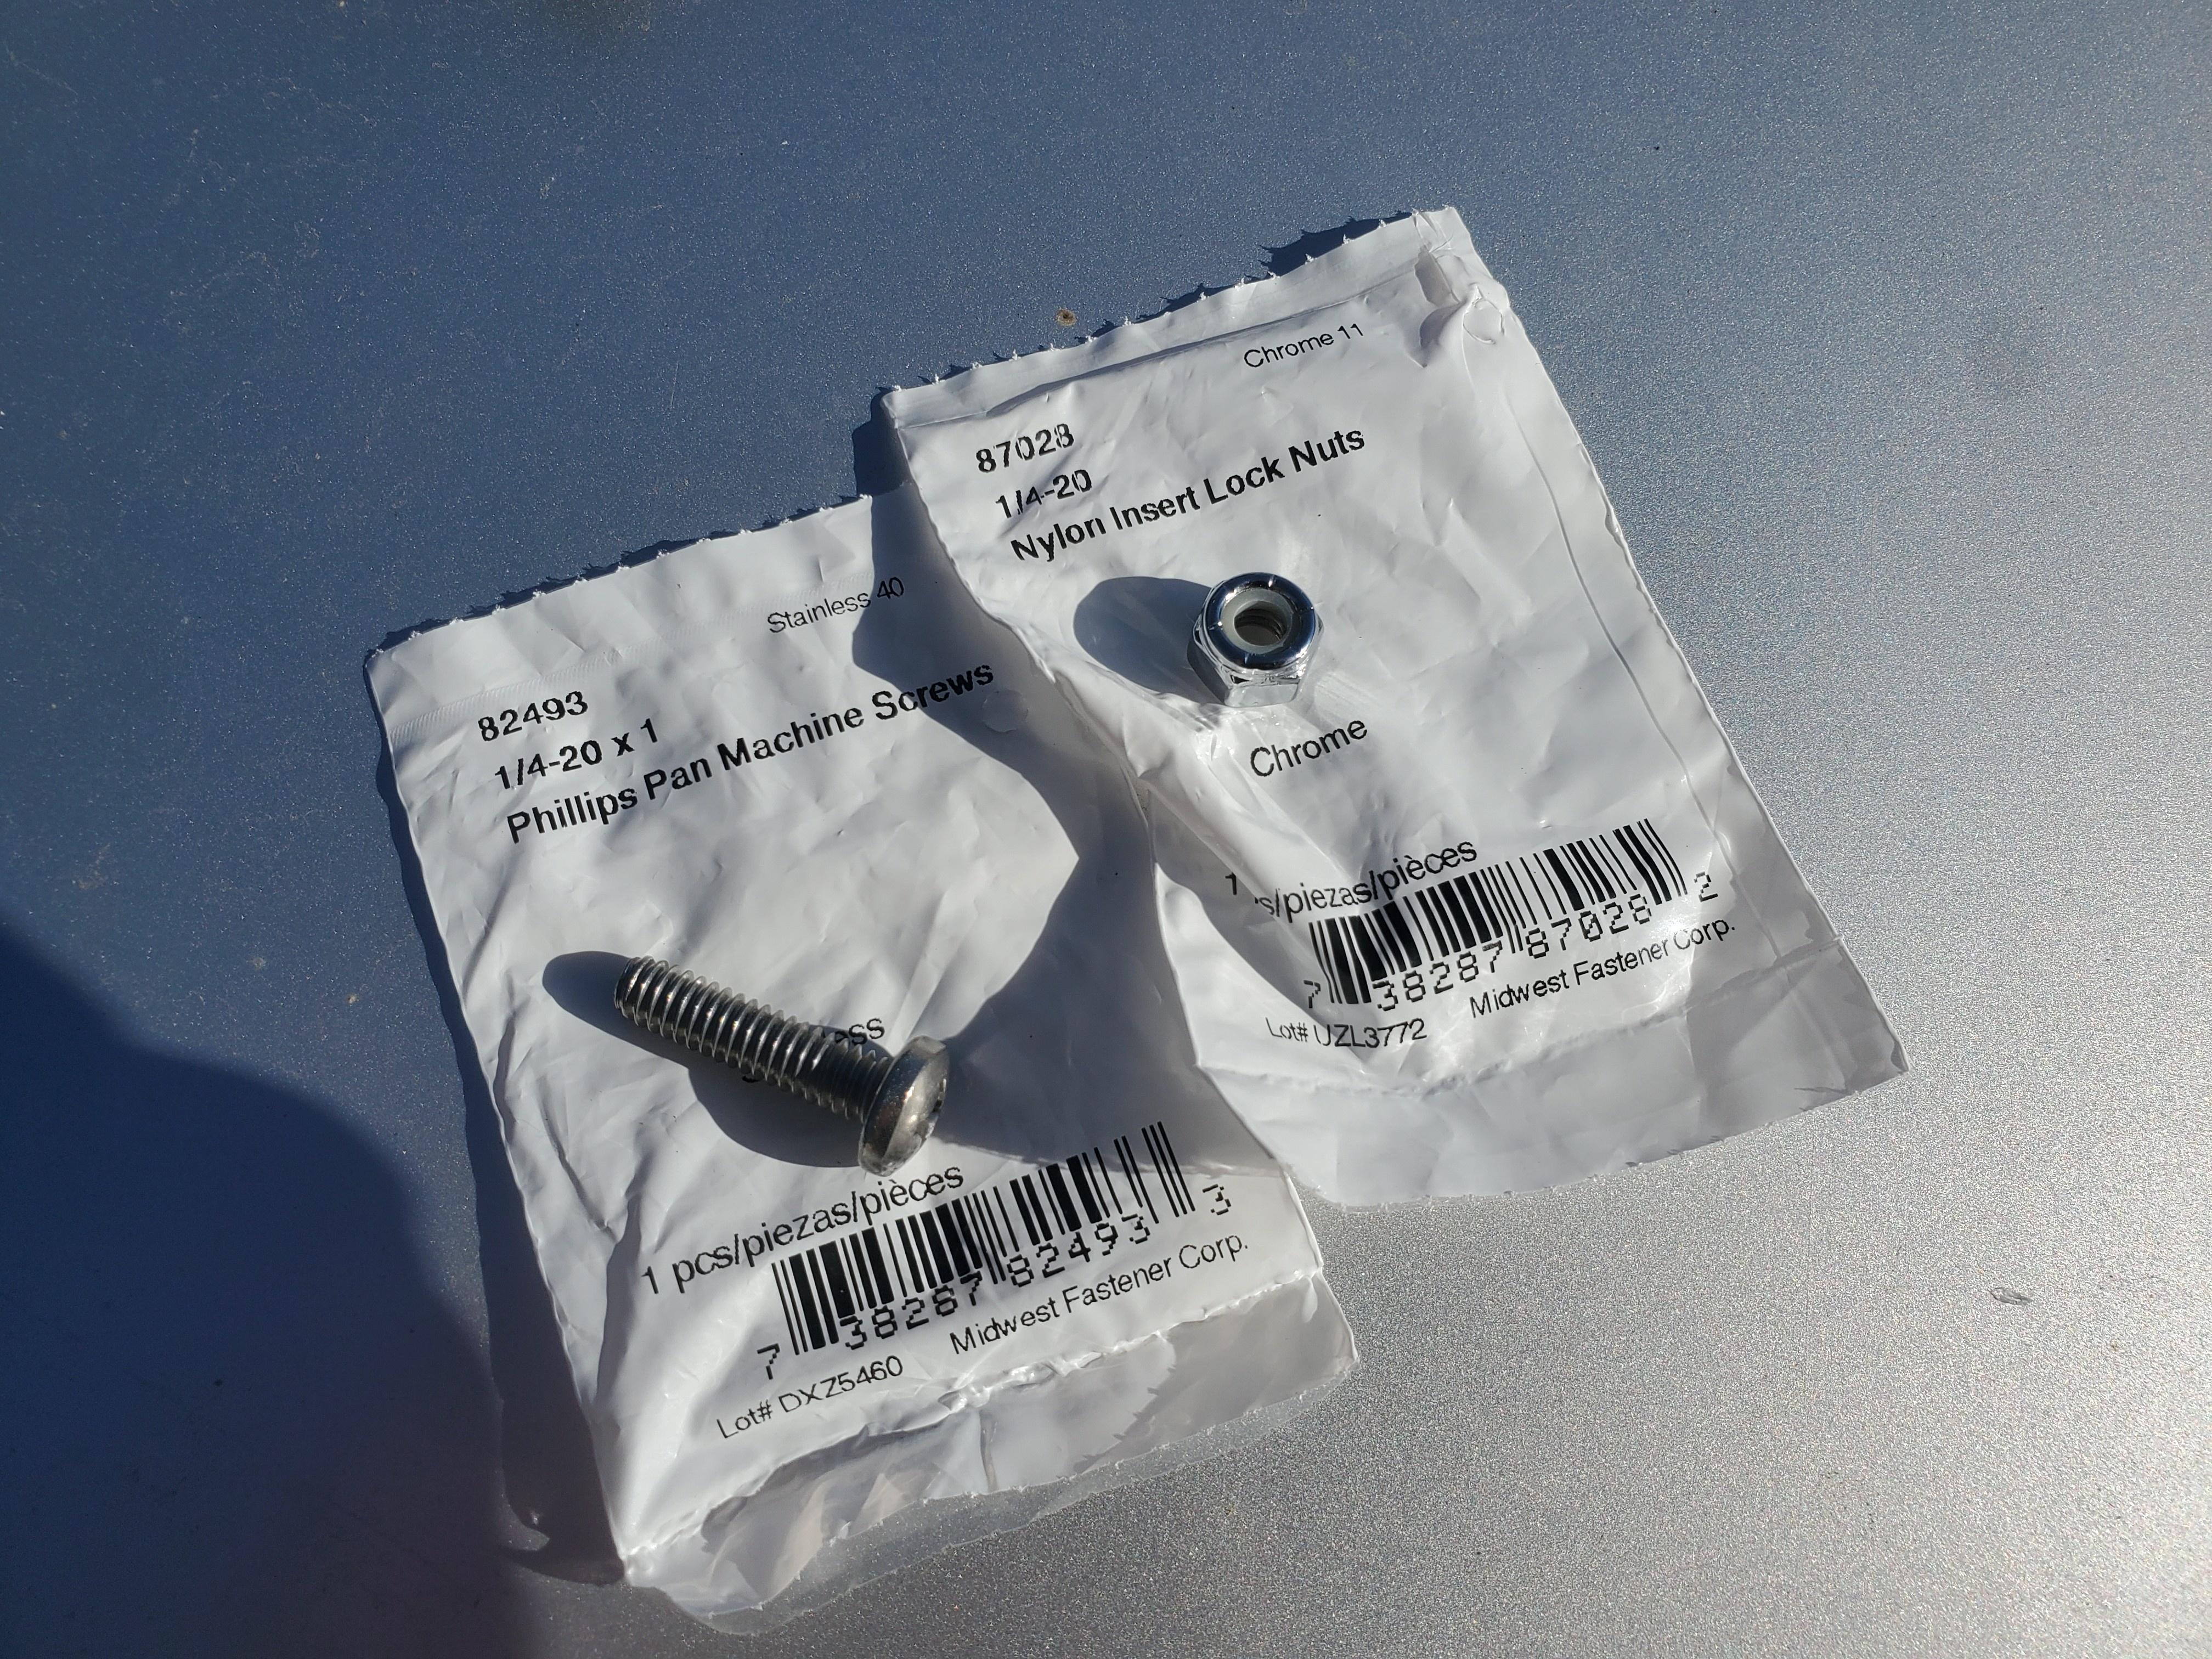
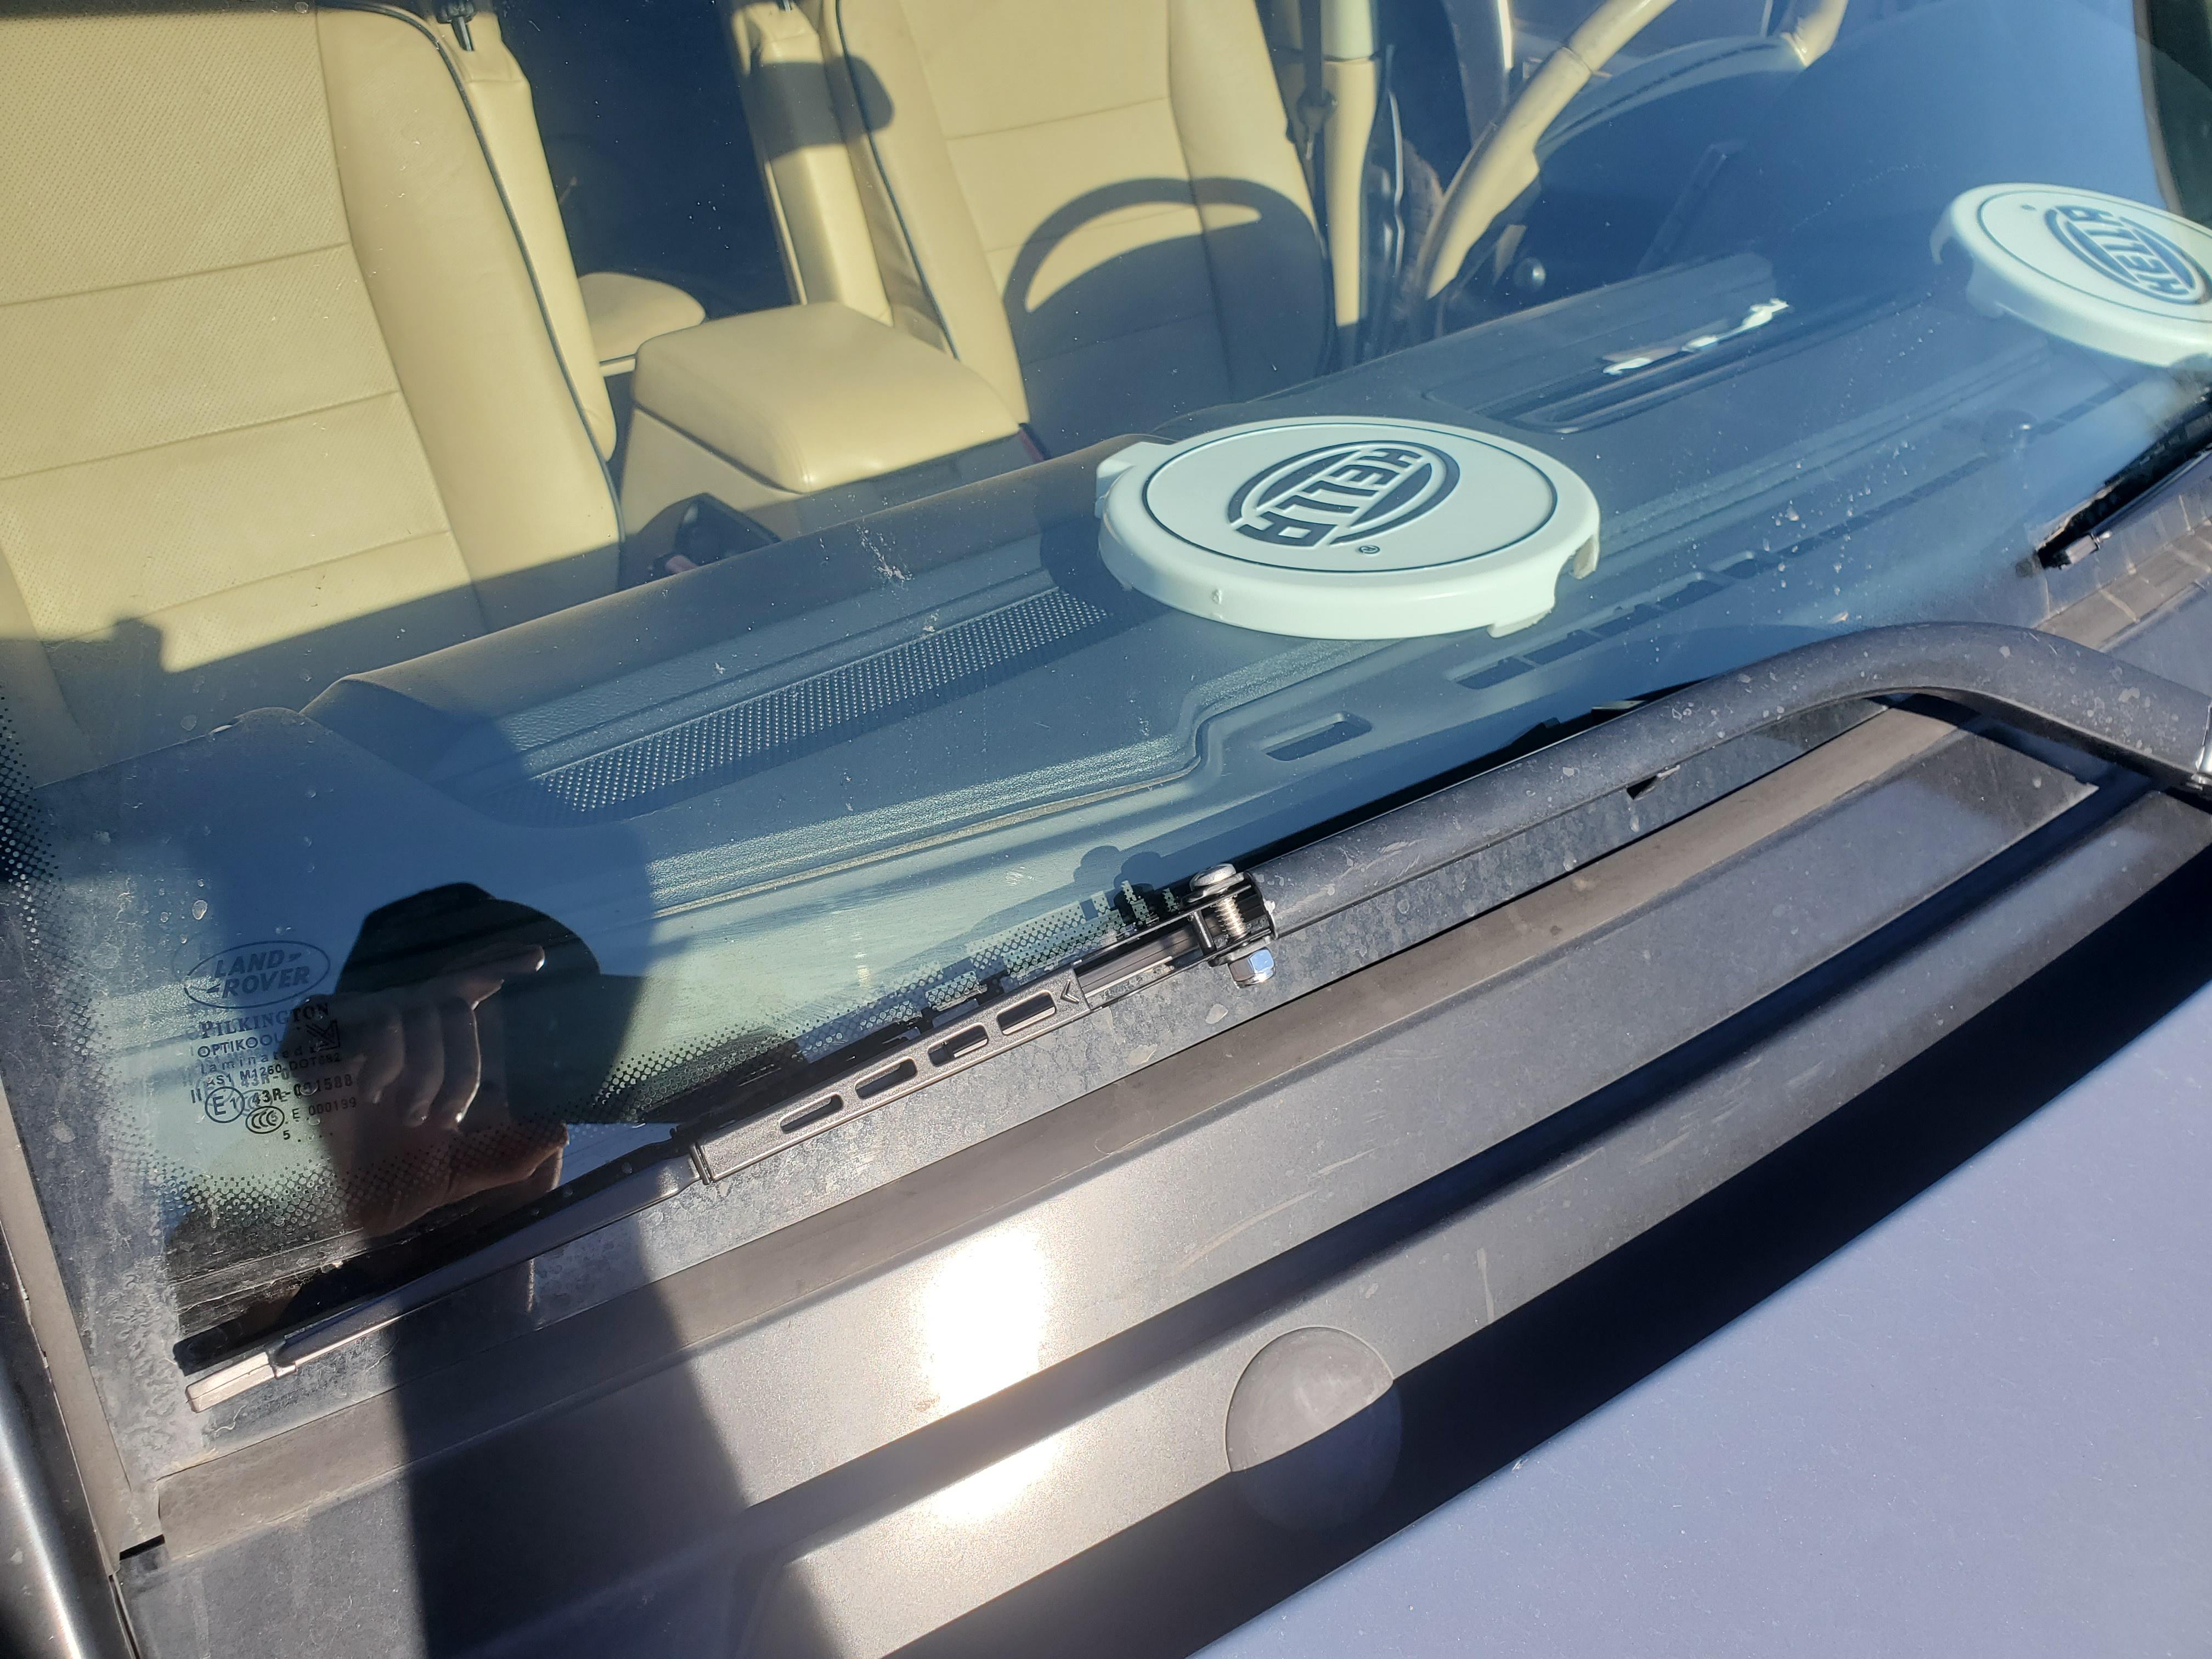
This is super simple, one of the first things I do to every single D2 I work on. It takes about 5 minutes and $5-$10 worth of hardware, and will allow you to use standard wiper blades on your D2 wiper arms.
All you need for this:
Pliers
Phillips screwdriver
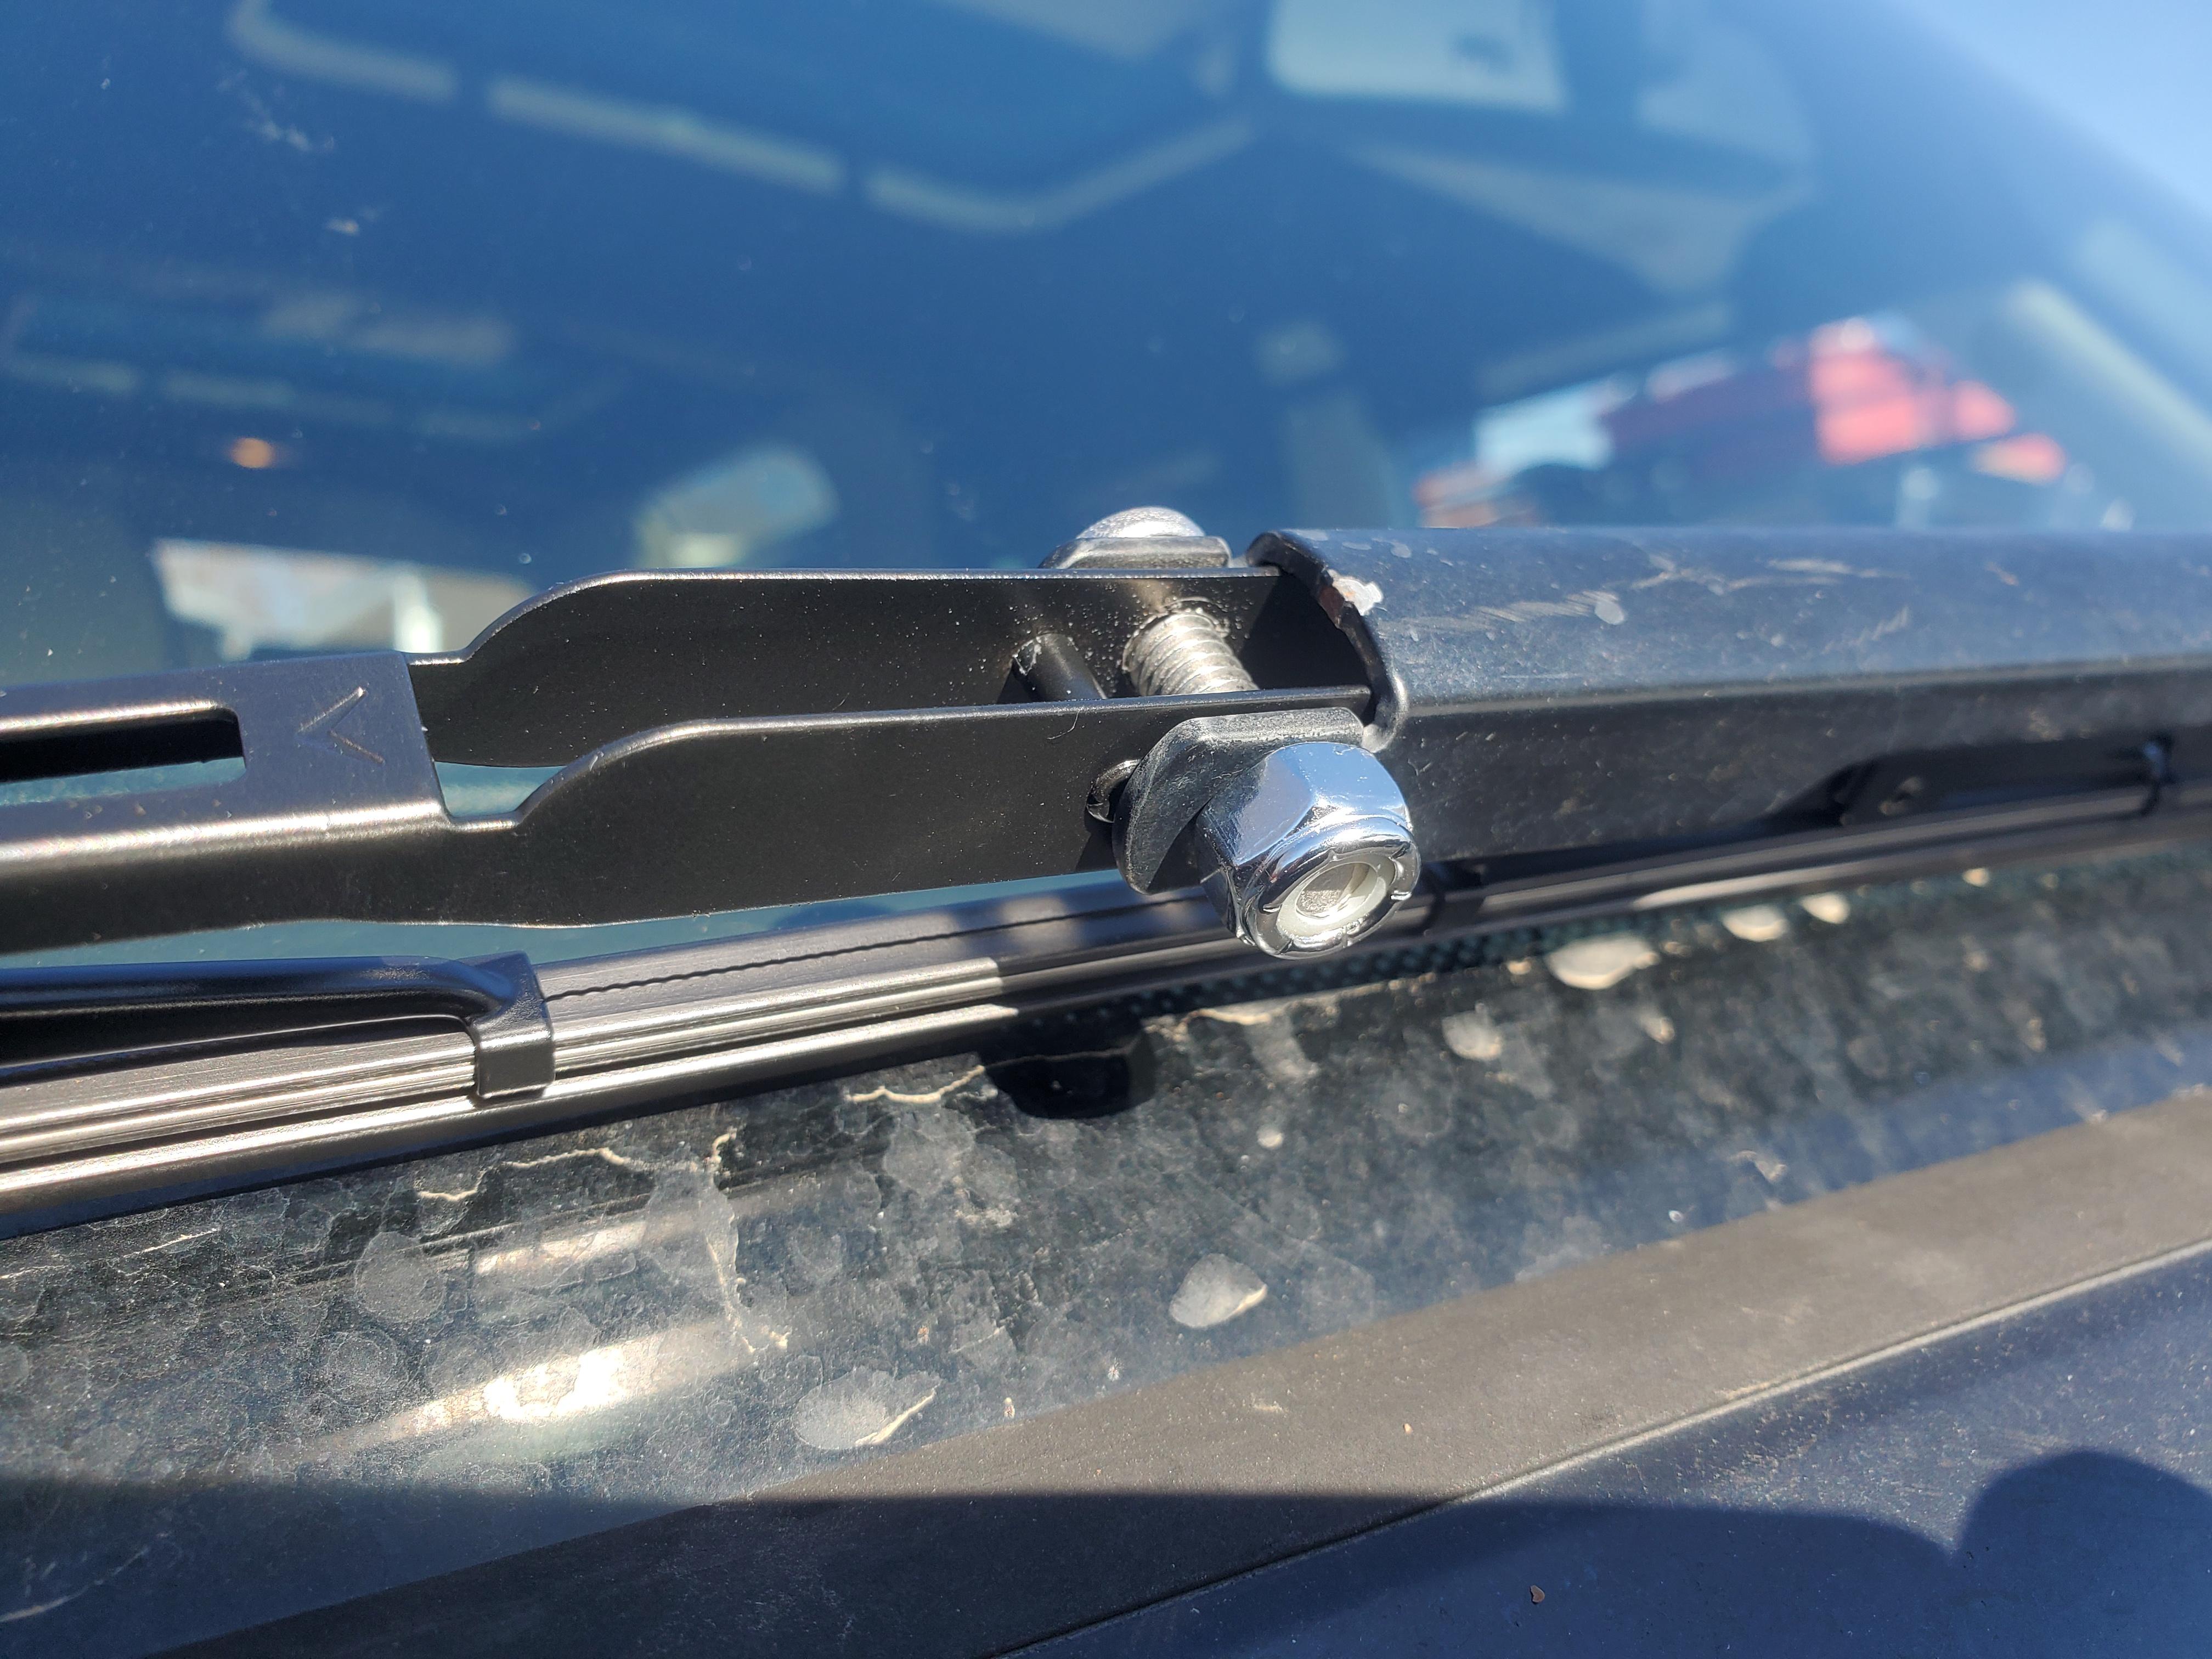
x2 - 1/4-20, 1" long Phillips machine screws
x2 - 1/4-20 nyloc nuts
x2 - Standard Wiper Blades
I prefer stainless hardware, but truthfully I've even just used a zip tie or wire in a pinch. I also like the cheapest wiper blades you can buy. I have recently been buying the $4/ea blades at Rural King.
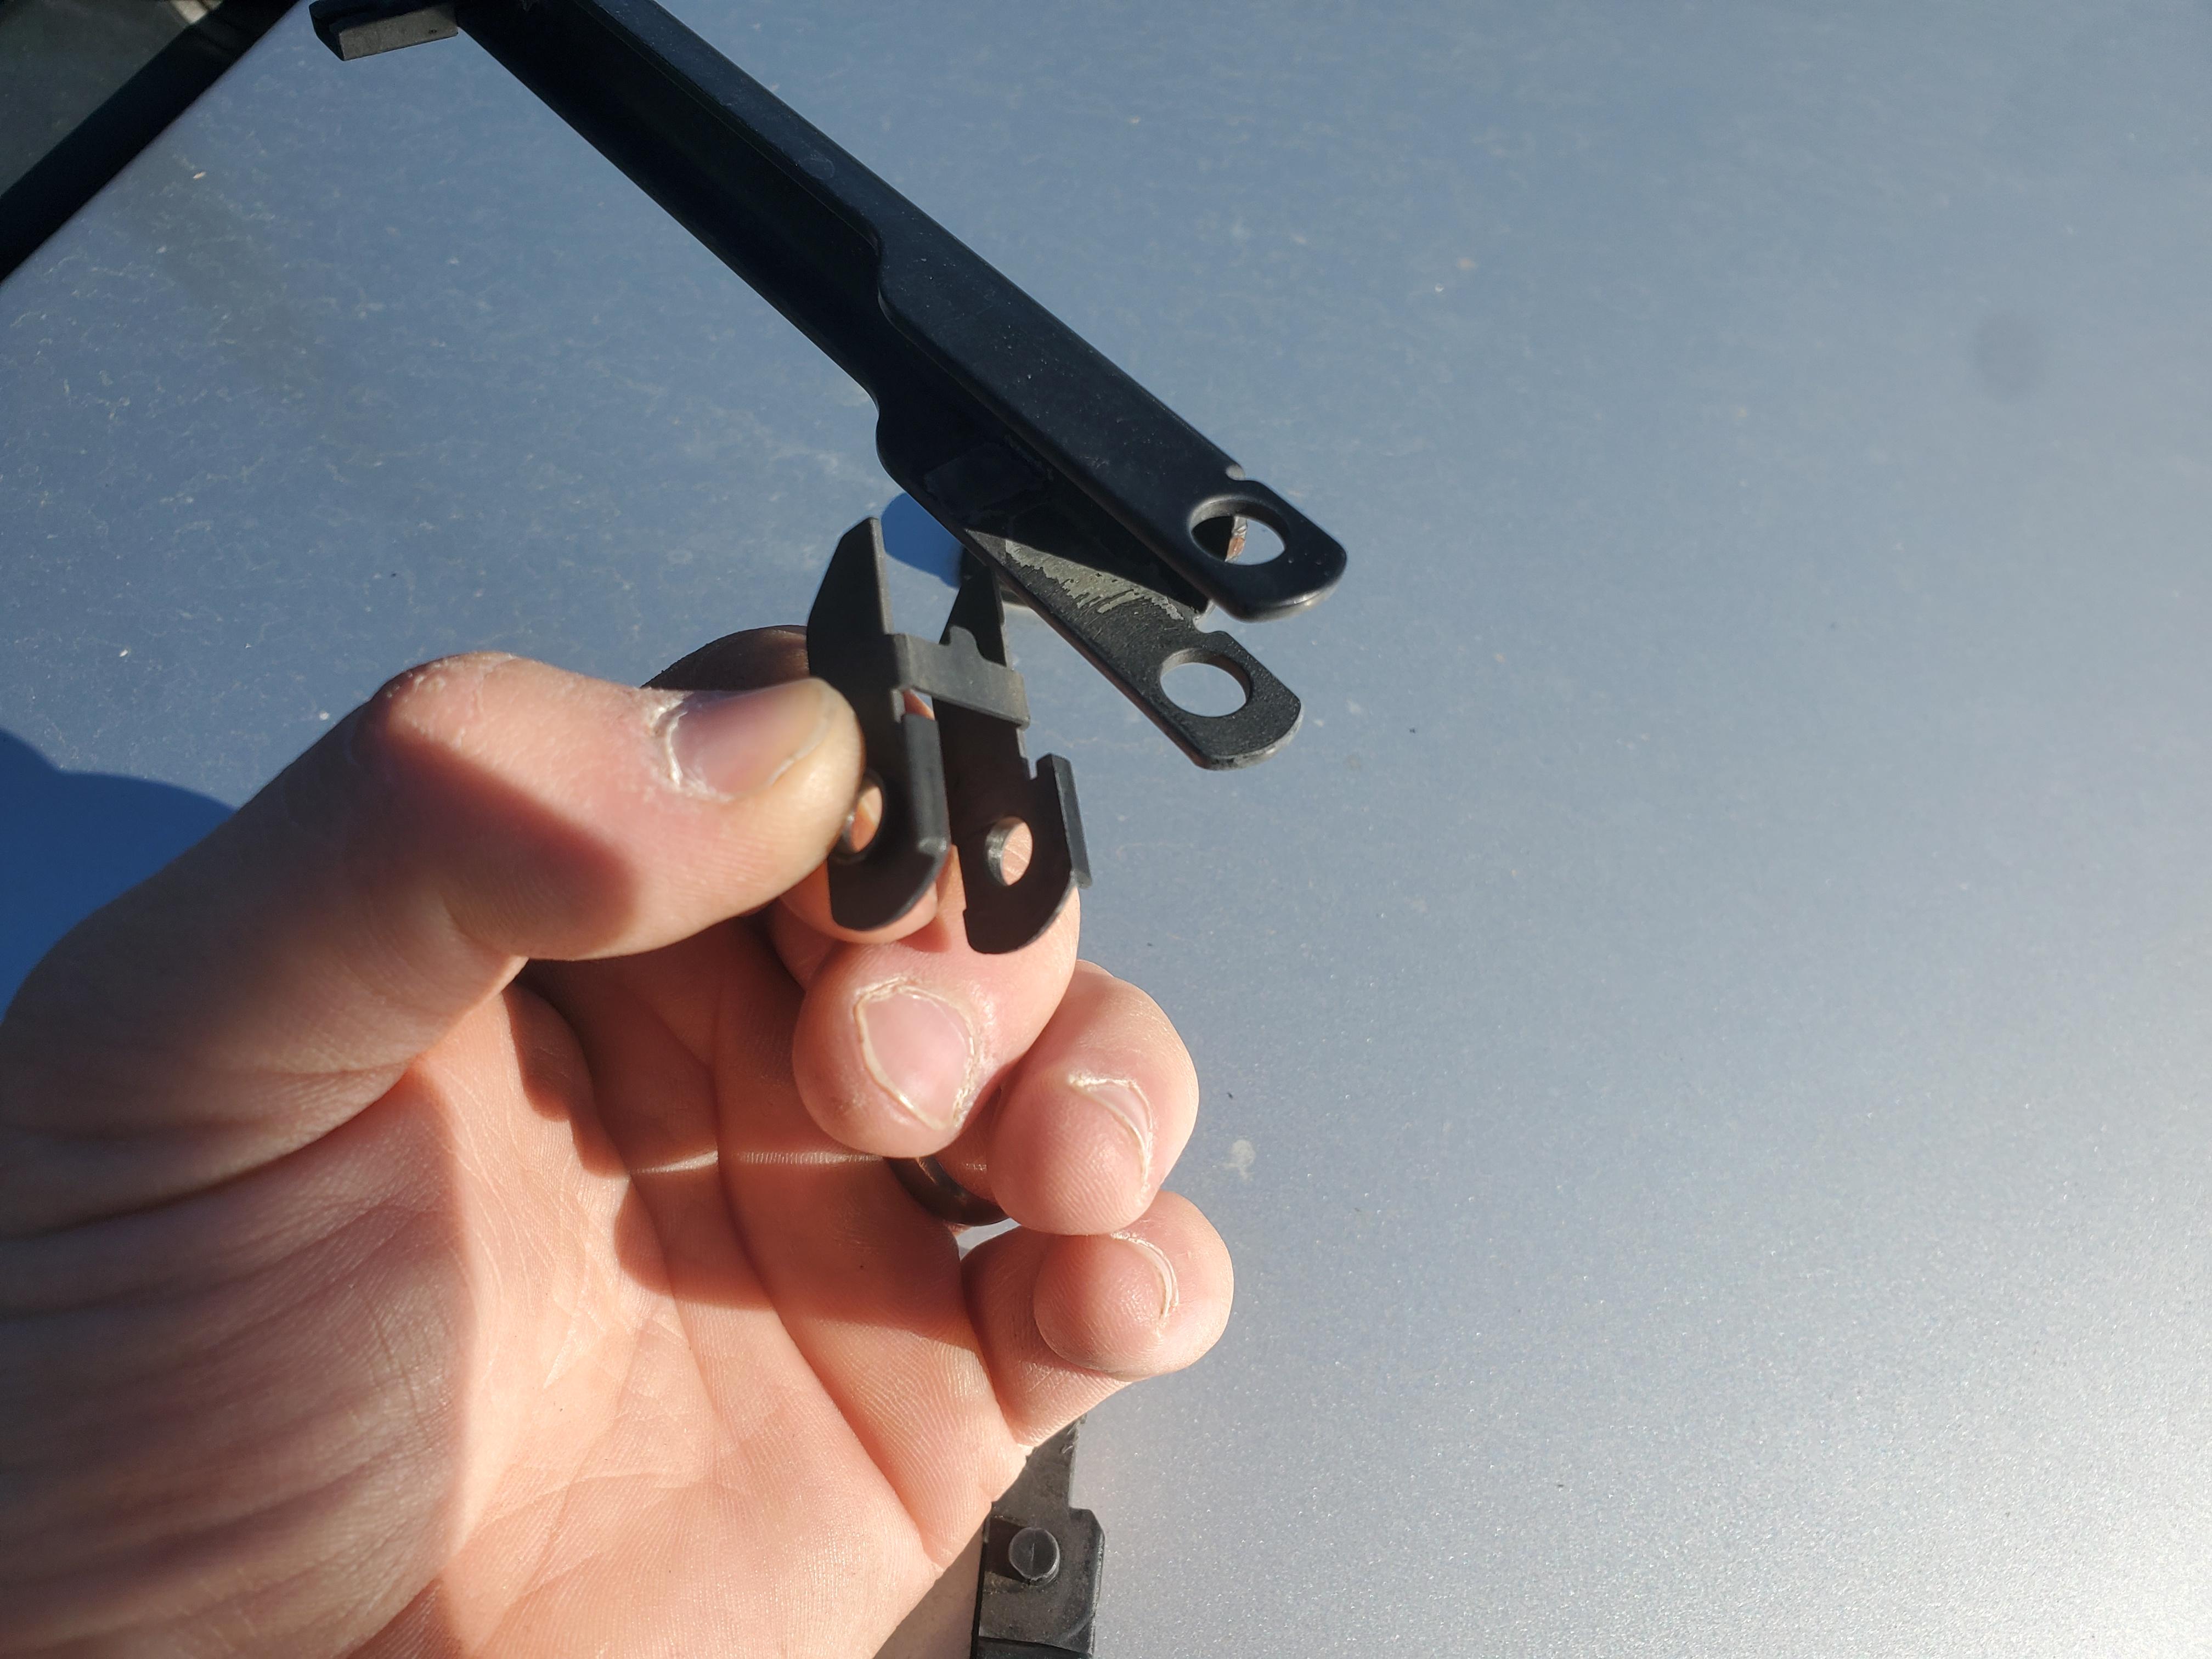
Start by breaking the plastic proprietary mounting parts out of the wiper arm. Here are the parts you need to remove.
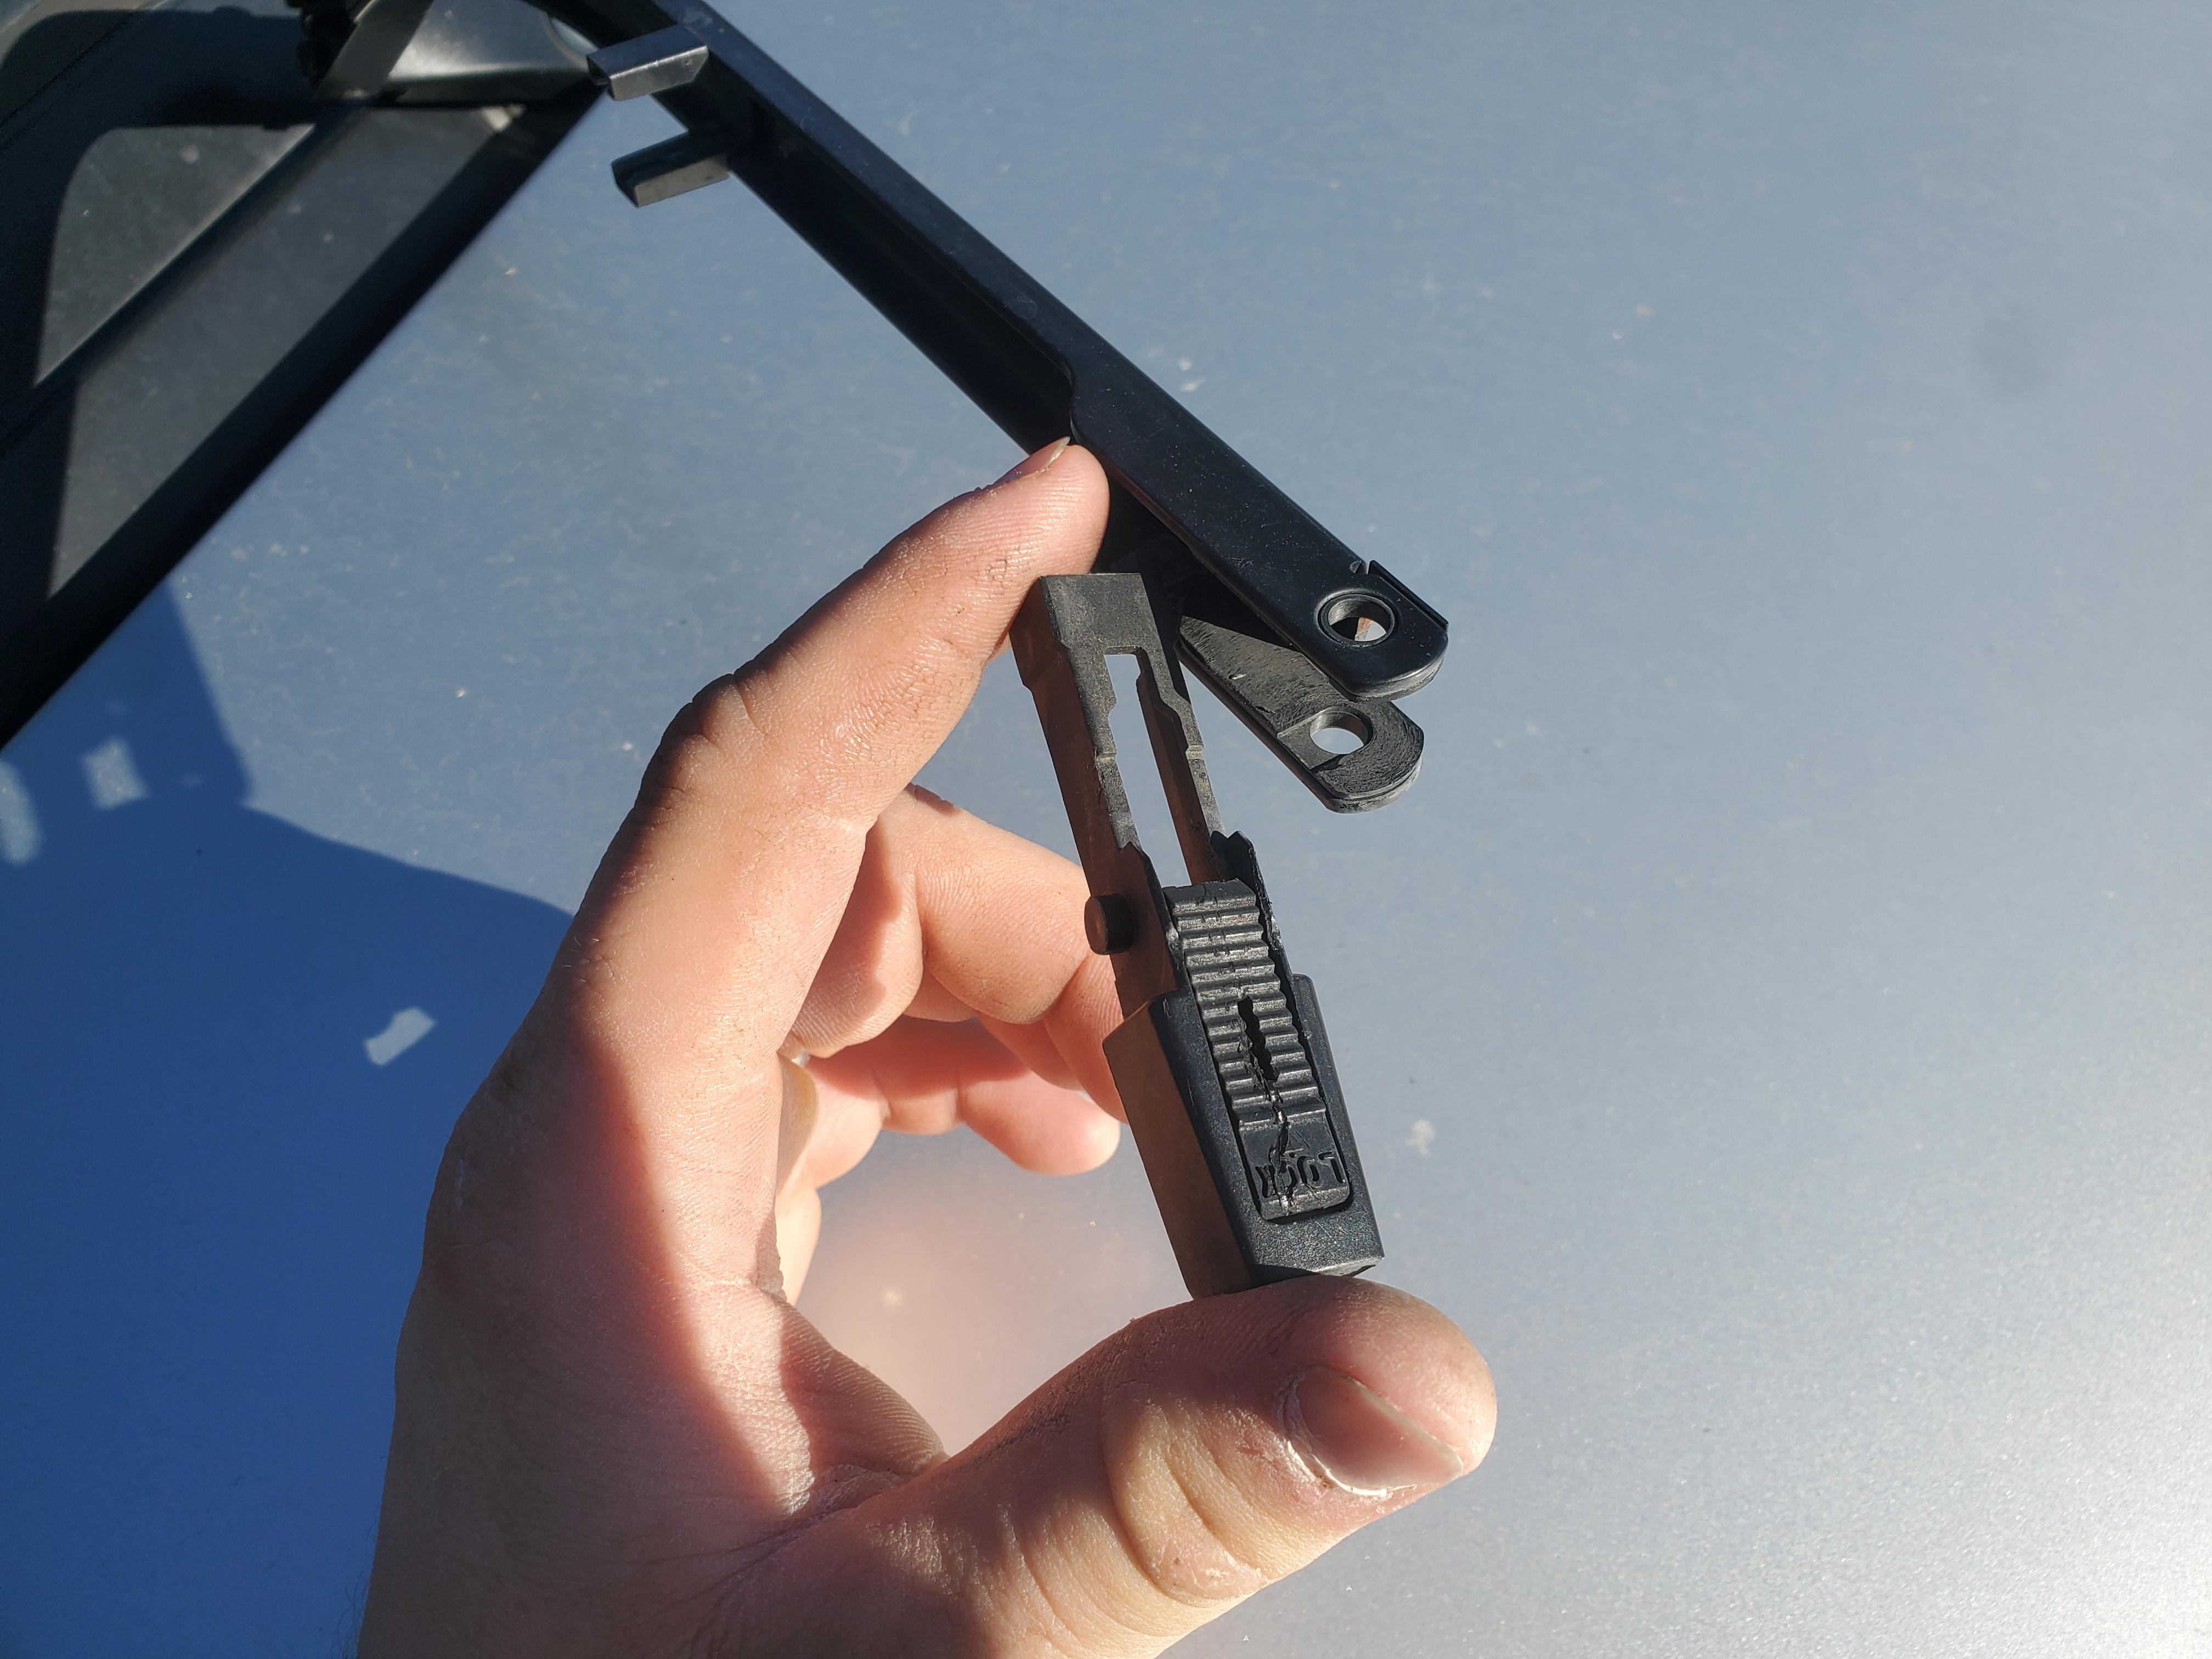
About half way down the arm there are these two tabs. Some wiper blades will interfere with them, some will not. I always bend them out about 45 degrees.
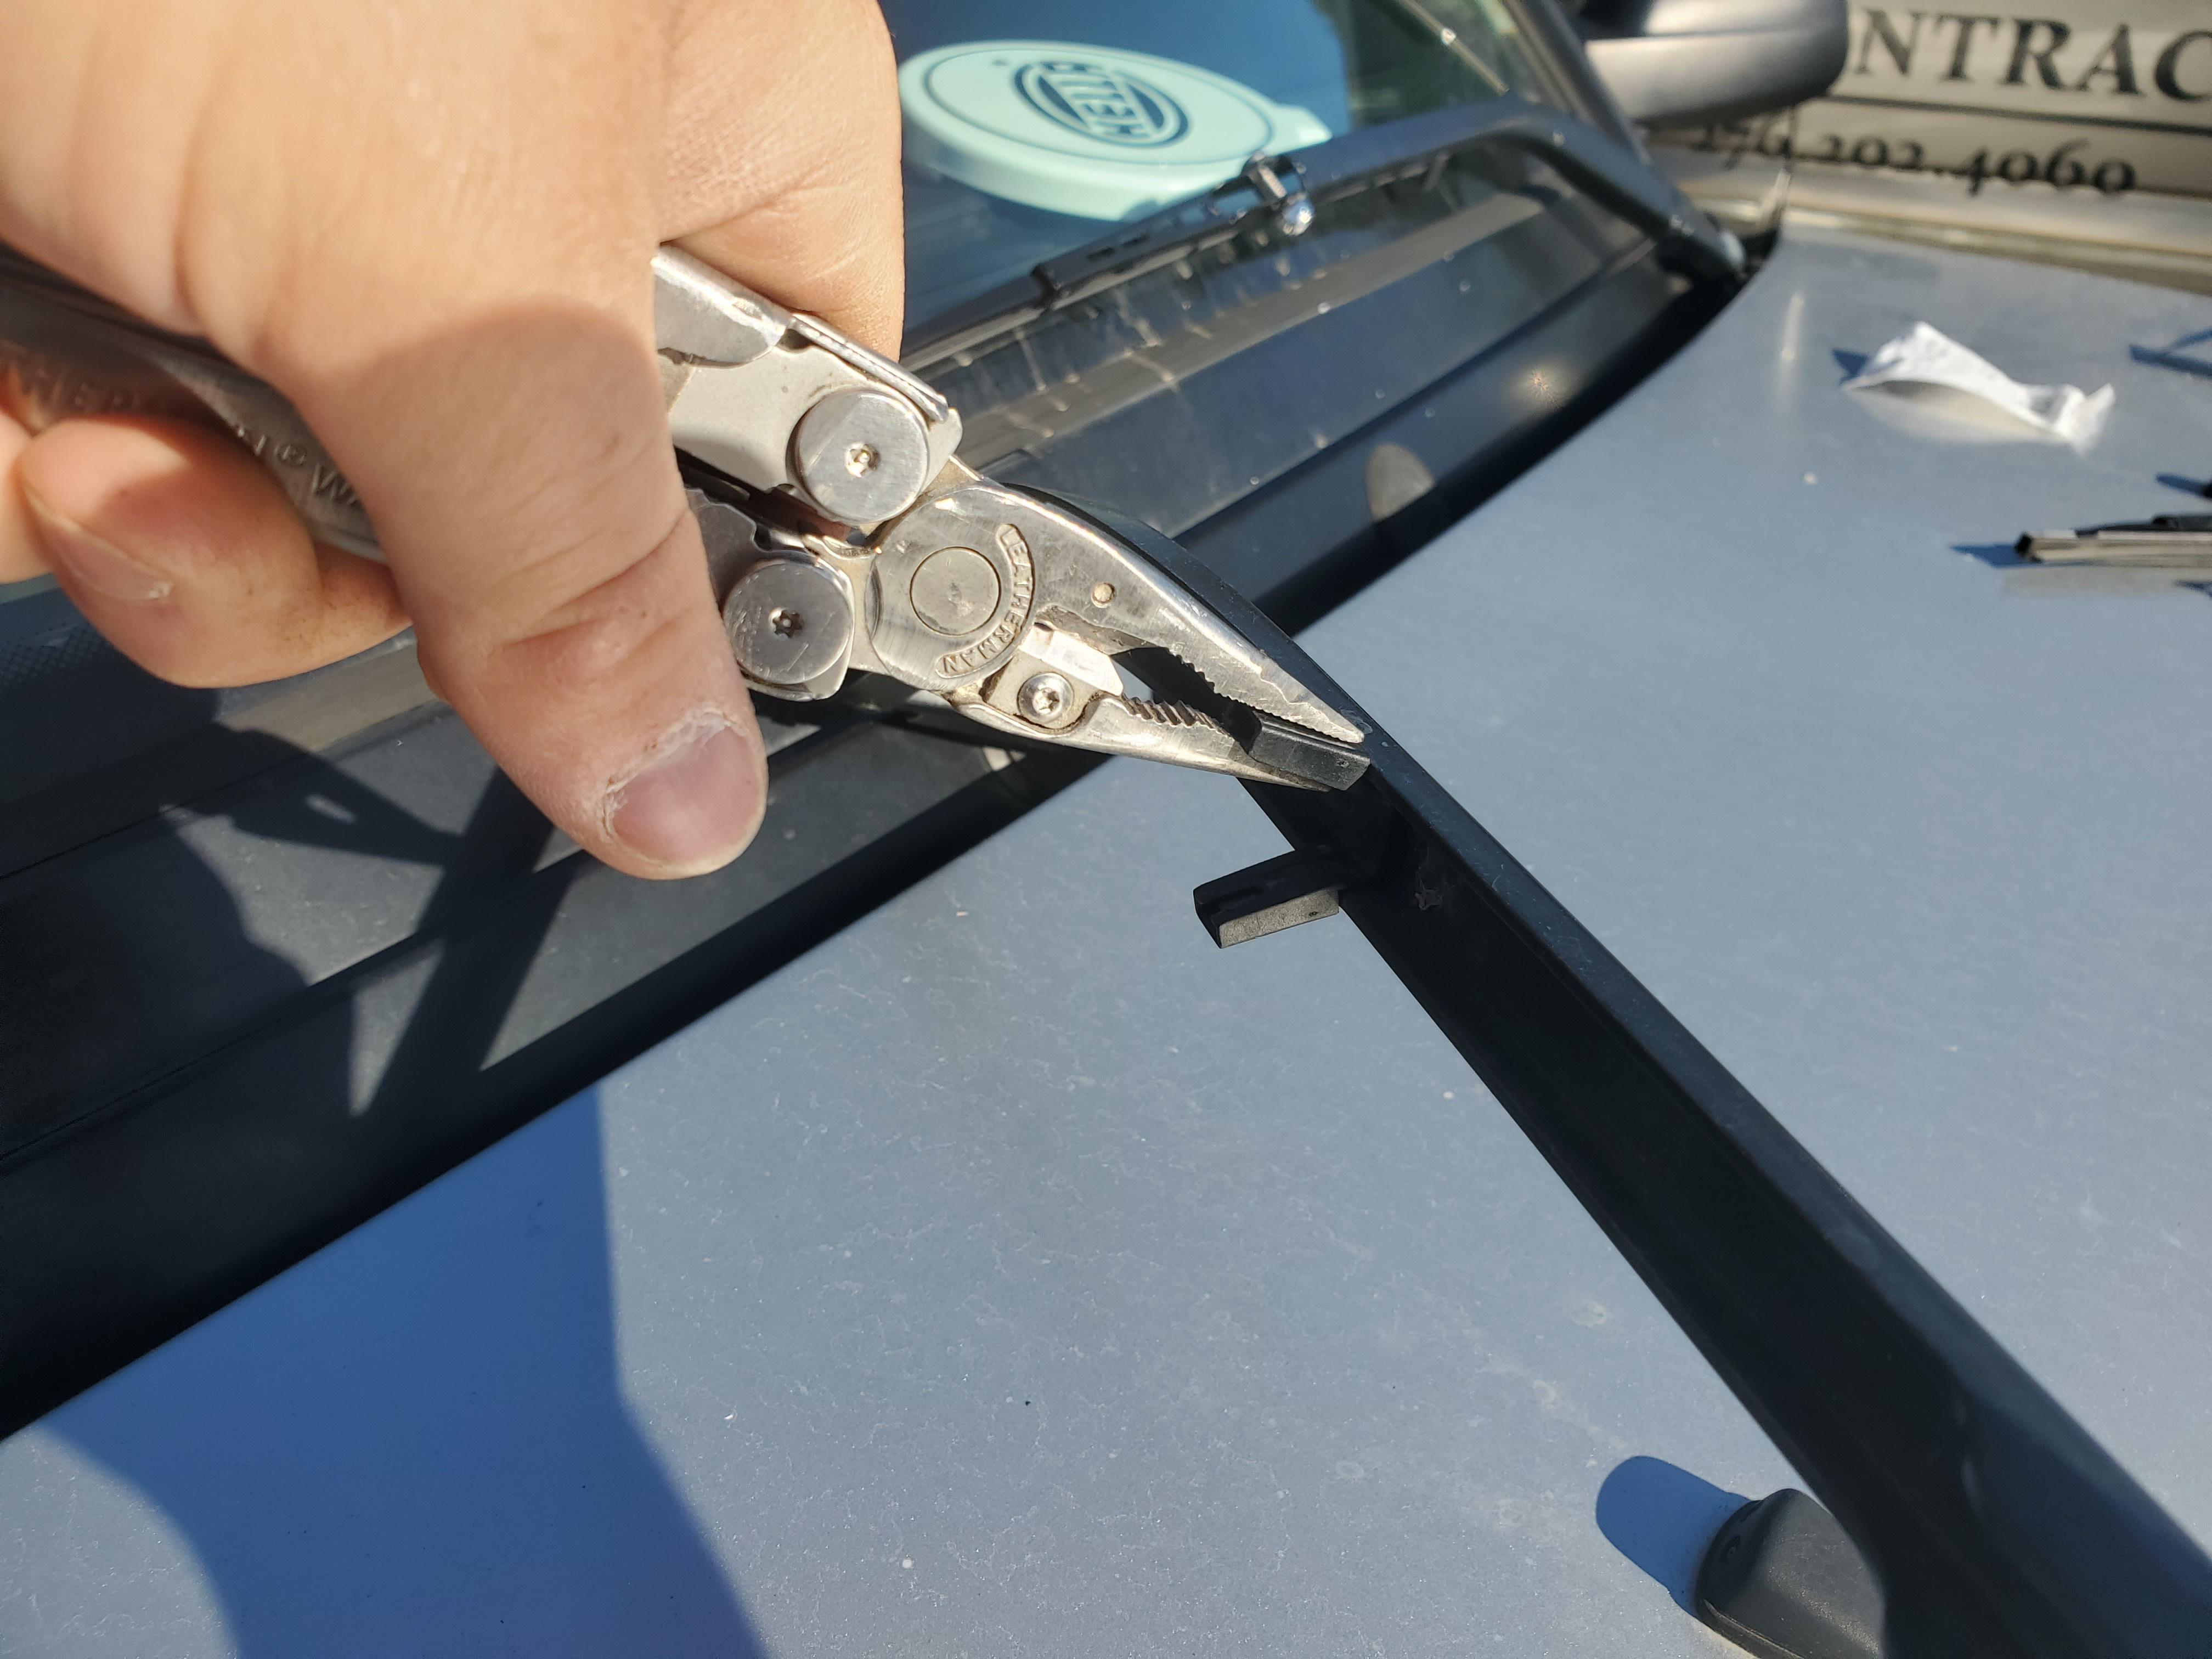
Now you can mount the wiper blade up. Most wiper blades already have a 1/4" hole. Occasionally a set will not, as with the set I used here. On some blades there are only 3/16" holes. I simply used a 1/4" drill bit and enlarged the hole, but if this is not accessible to you then simply use 3/16" hardware instead of 1/4".
The nyloc nut is important because you do not have to tighten them down tight. You can leave it loose enough so the blade still rotates freely on the end of the arm but the hardware stays in place.
This is super simple, one of the first things I do to every single D2 I work on. It takes about 5 minutes and $5-$10 worth of hardware, and will allow you to use standard wiper blades on your D2 wiper arms.
All you need for this:
Pliers
Phillips screwdriver
x2 - 1/4-20, 1" long Phillips machine screws
x2 - 1/4-20 nyloc nuts
x2 - Standard Wiper Blades
I prefer stainless hardware, but truthfully I've even just used a zip tie or wire in a pinch. I also like the cheapest wiper blades you can buy. I have recently been buying the $4/ea blades at Rural King.
Start by breaking the plastic proprietary mounting parts out of the wiper arm. Here are the parts you need to remove.
About half way down the arm there are these two tabs. Some wiper blades will interfere with them, some will not. I always bend them out about 45 degrees.
Now you can mount the wiper blade up. Most wiper blades already have a 1/4" hole. Occasionally a set will not, as with the set I used here. On some blades there are only 3/16" holes. I simply used a 1/4" drill bit and enlarged the hole, but if this is not accessible to you then simply use 3/16" hardware instead of 1/4".
The nyloc nut is important because you do not have to tighten them down tight. You can leave it loose enough so the blade still rotates freely on the end of the arm but the hardware stays in place.
The following 5 users liked this post by Alex_M:
Dervish (10-22-2023),
Externet (10-24-2023),
Richard Gallant (12-25-2021),
Roont (10-25-2023),
V50-M66 (10-21-2023)

#139
02-17-2022, 06:52 PM
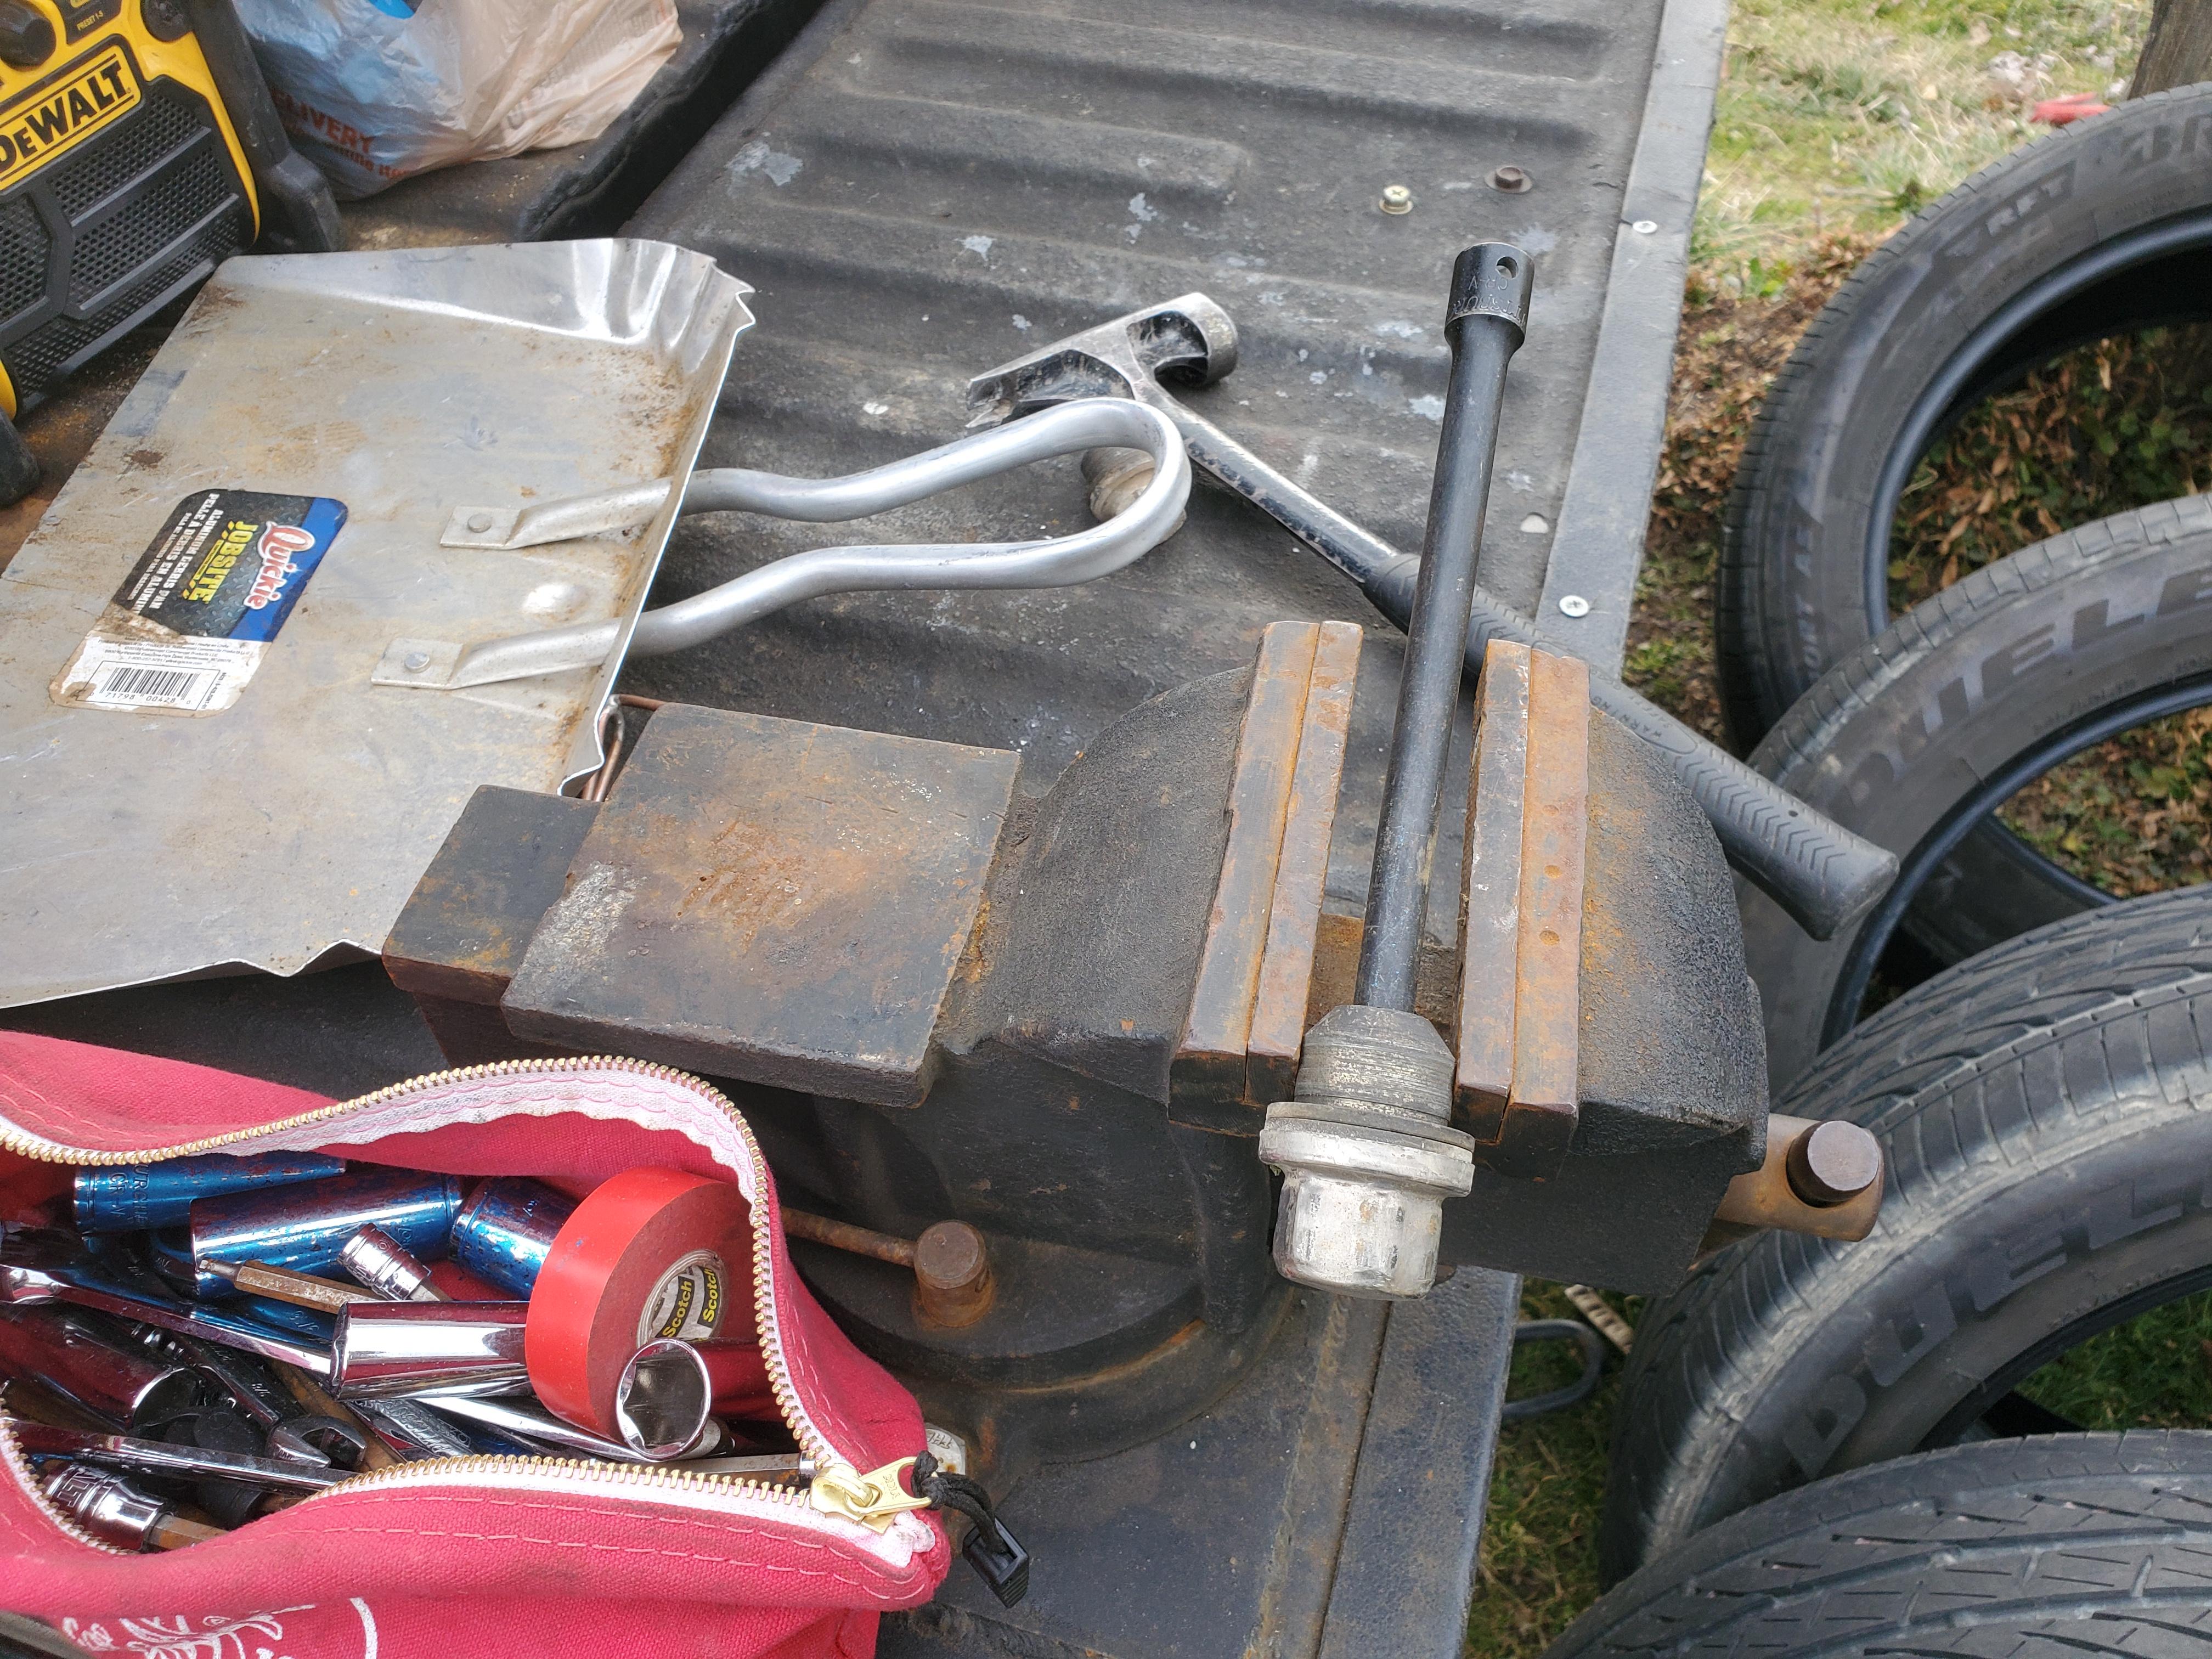
Pretty simple process to remove the chrome lug nut covers if they have become disformed and you don't want to pony up for new ones.
Vice up your lug nut on the flat as shown in the picture. You'll have to get it pretty tight. Find something that will fit down the bore of the lug nut easily. I used a 1/2" ratchet extension.
And simply hammer it off. That's about it.
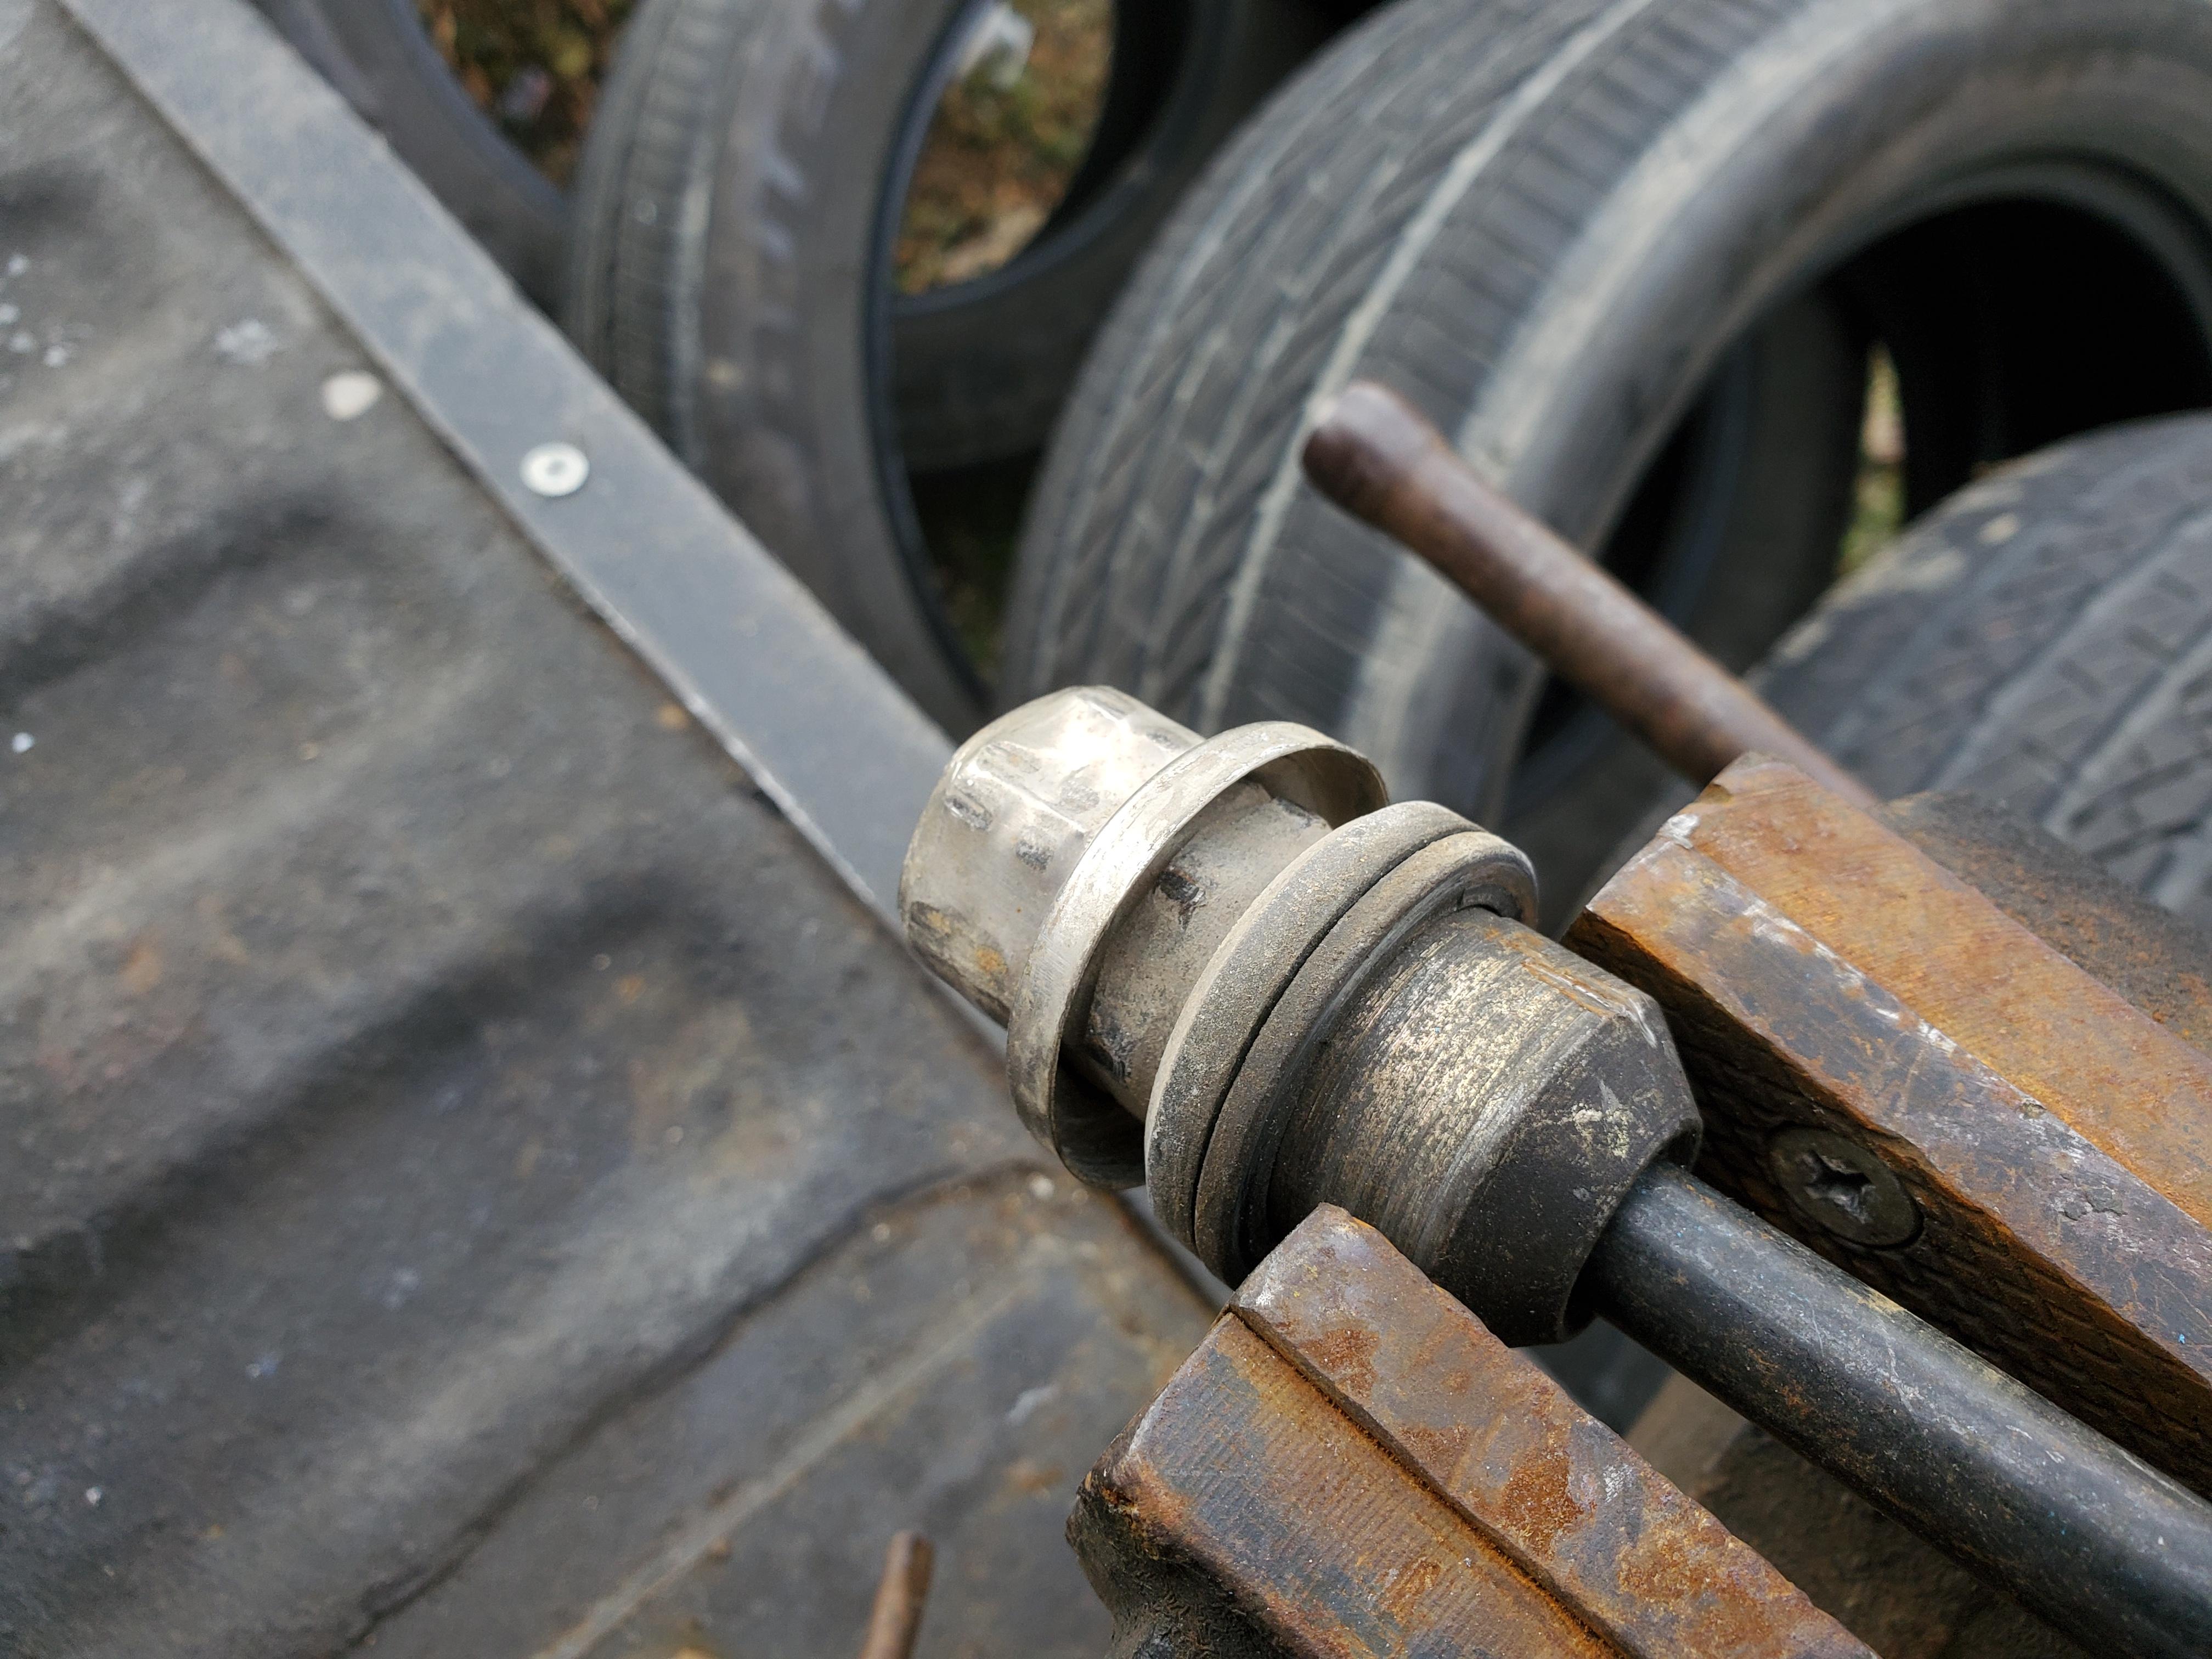
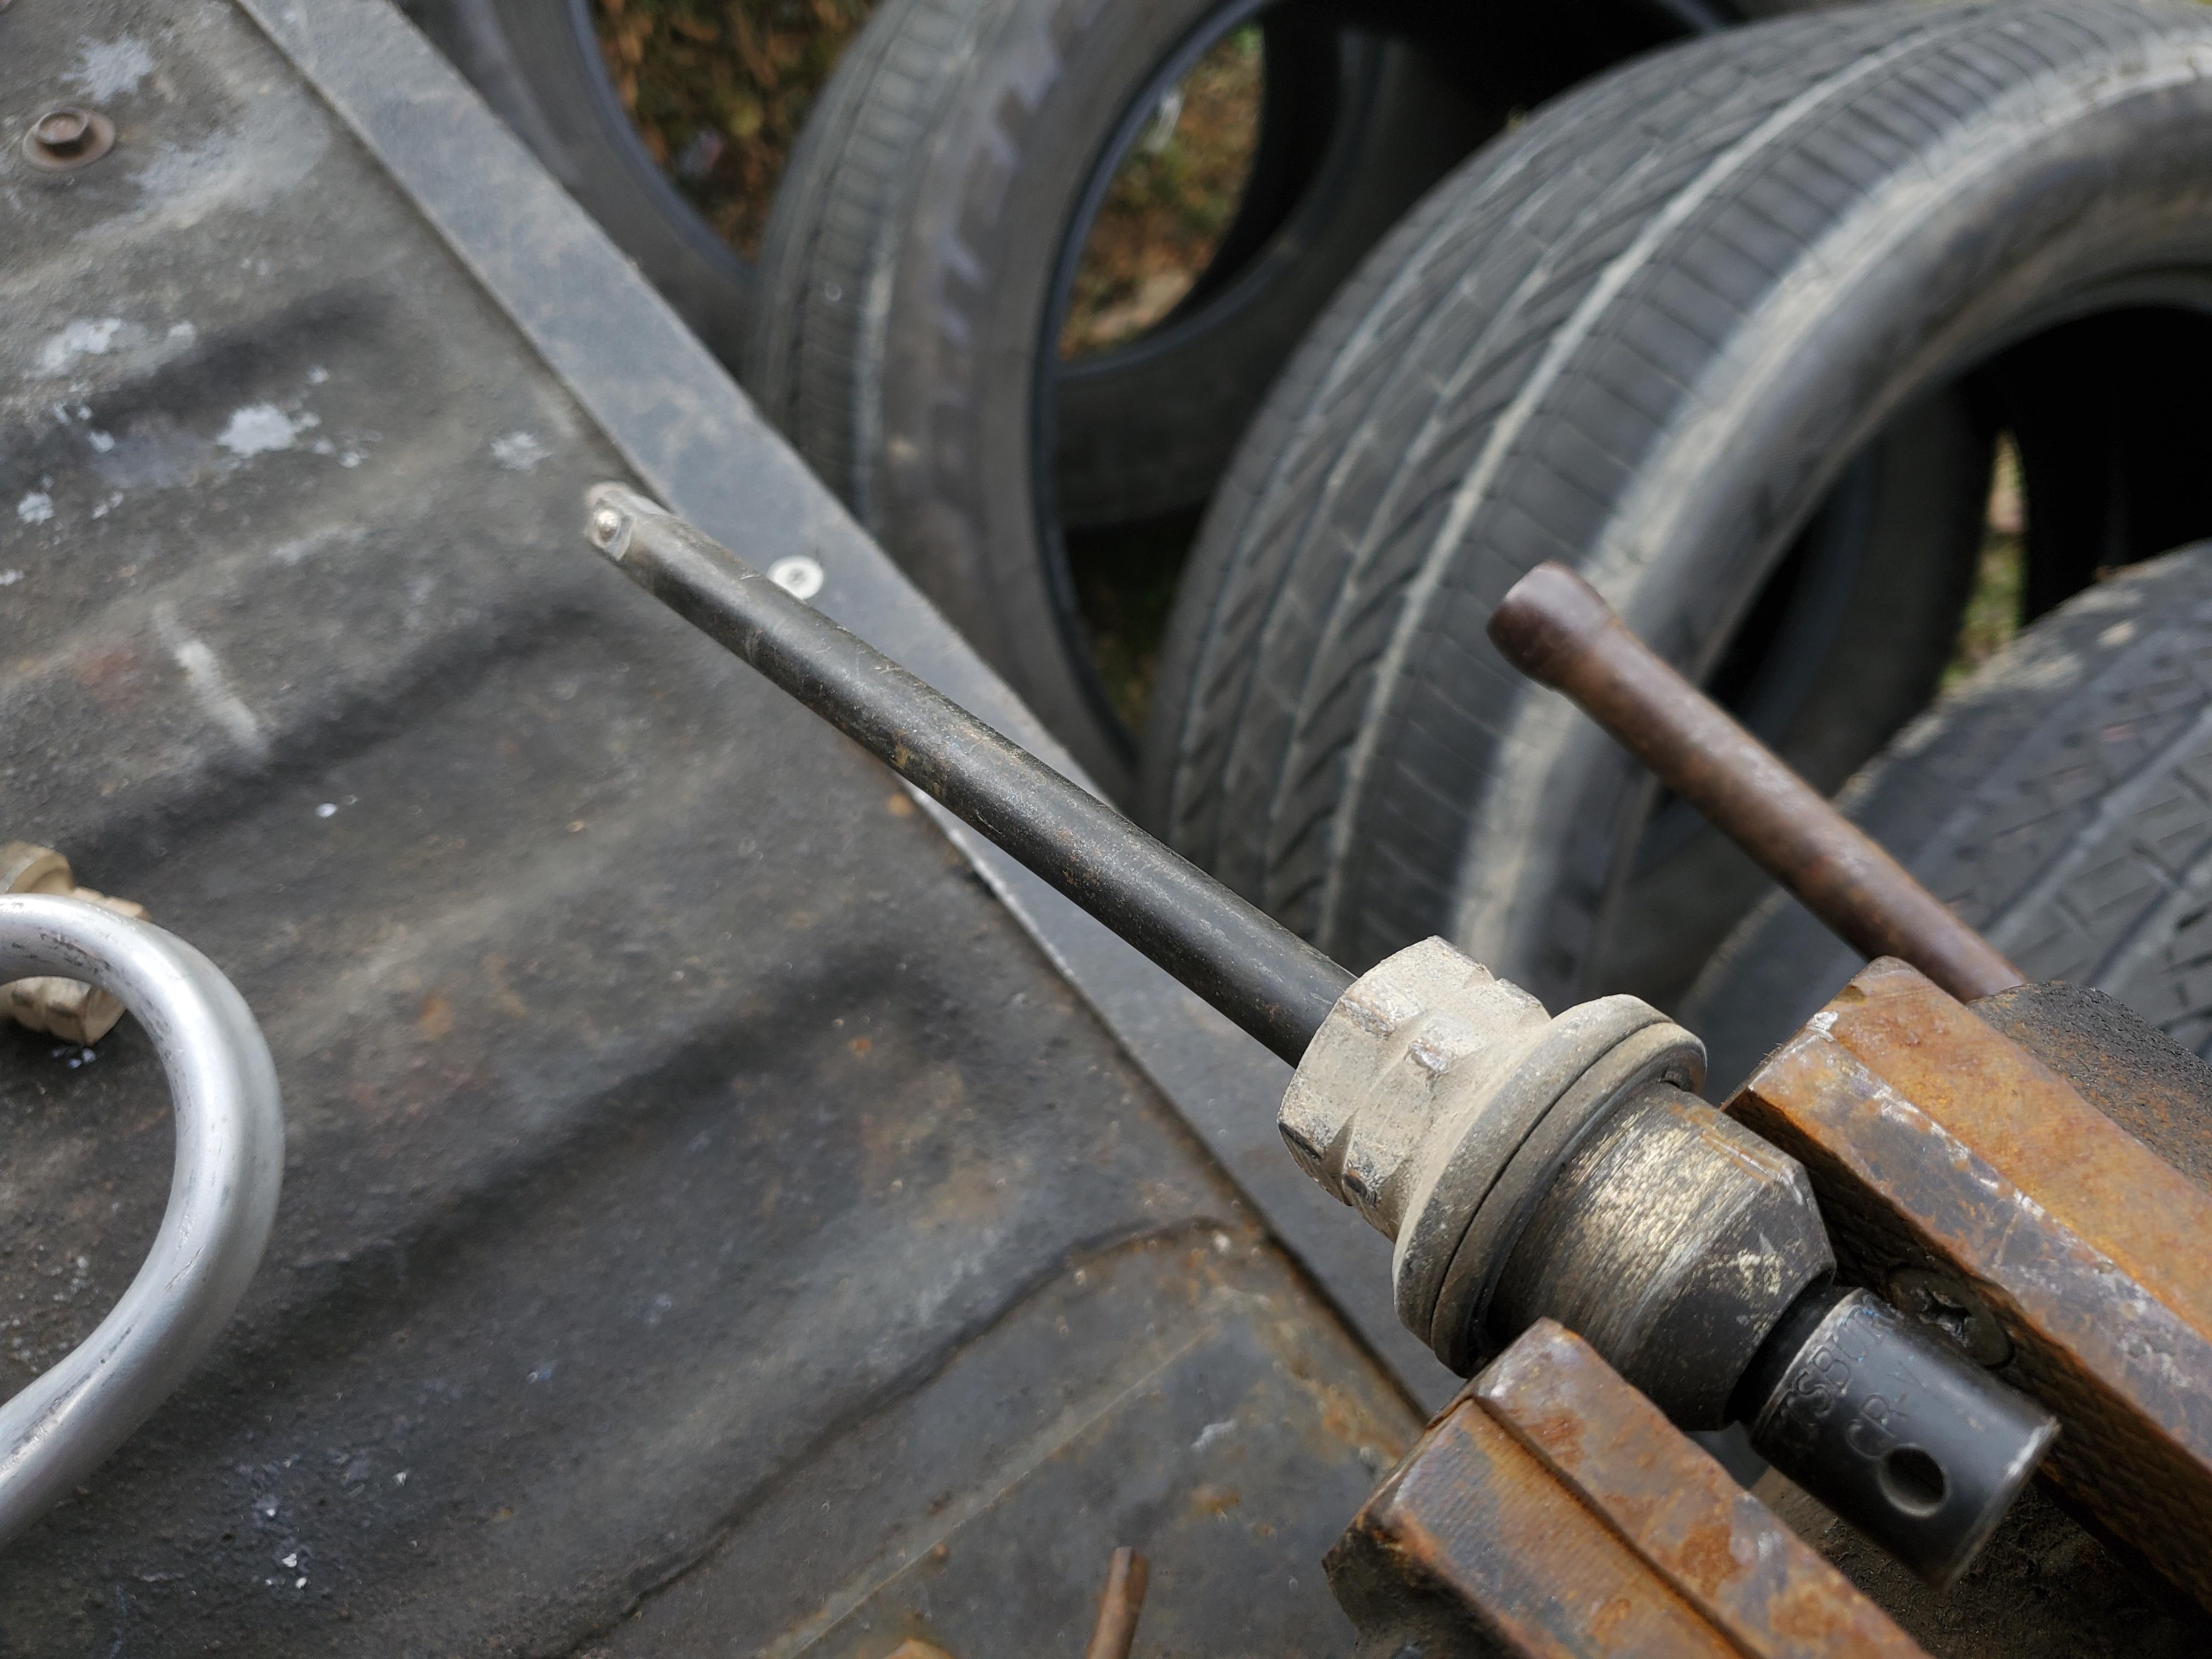
You may have to clean the hex head up with a file if they've been peened over, which they probably have. When they are cleaned adequately they will accept a 1" socket.
Vice up your lug nut on the flat as shown in the picture. You'll have to get it pretty tight. Find something that will fit down the bore of the lug nut easily. I used a 1/2" ratchet extension.
And simply hammer it off. That's about it.
You may have to clean the hex head up with a file if they've been peened over, which they probably have. When they are cleaned adequately they will accept a 1" socket.
The following users liked this post:
Roont (10-25-2023)
#140
02-17-2022, 09:12 PM