

What did you do to your LR3 today?

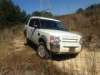
We just finished up (for the day) the tube bumper for my rover yesterday. All that is left is two more pieces of pipe to weld in, mounting the skid plates, light tabs and recovery points and then a finish grind and paint. Came out pretty cool I can't wait to see it all finished.

Recovery Vehicle
Joined: Oct 2014
Posts: 1,222
Likes: 130
We just finished up (for the day) the tube bumper for my rover yesterday. All that is left is two more pieces of pipe to weld in, mounting the skid plates, light tabs and recovery points and then a finish grind and paint. Came out pretty cool I can't wait to see it all finished.
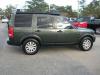
I always forget how big the radiators on these things are since it sits behind the bumper.
If anyone is interested in one of these or anything else for your lr3 let me know!
Winching
Joined: Aug 2008
Posts: 594
Likes: 40
From: Newport, Rhode Island
Here's what I'm up to.  Got the bushings and ball joints out, what a pain but doable. Just sanded and finished painting the control arms with por-15. I got the control arms free from a forum member. They were originally from a rr sport 2008. Now just have to get my orange poly bushings and ball joints, and that's where the real fun begins. So far I'm about $14.00 into the arms and about 4 hours.
Got the bushings and ball joints out, what a pain but doable. Just sanded and finished painting the control arms with por-15. I got the control arms free from a forum member. They were originally from a rr sport 2008. Now just have to get my orange poly bushings and ball joints, and that's where the real fun begins. So far I'm about $14.00 into the arms and about 4 hours.
Recovery Vehicle
Joined: Oct 2014
Posts: 1,222
Likes: 130
Here's what I'm up to. Got the bushings and ball joints out, what a pain but doable. Just sanded and finished painting the control arms with por-15. I got the control arms free from a forum member. They were originally from a rr sport 2008. Now just have to get my orange poly bushings and ball joints, and that's where the real fun begins. So far I'm about $14.00 into the arms and about 4 hours.
Got the bushings and ball joints out, what a pain but doable. Just sanded and finished painting the control arms with por-15. I got the control arms free from a forum member. They were originally from a rr sport 2008. Now just have to get my orange poly bushings and ball joints, and that's where the real fun begins. So far I'm about $14.00 into the arms and about 4 hours. Baja
Joined: Mar 2009
Posts: 5,736
Likes: 230
From: south n.j. and ne va.
Ours is done, threw the new lower b joints in and reassembled today, just needs to go for alignment
Why did you por15 the arms? I just used good spray paint, if you want to preserve them you need to use some Eastwood internal frame coat inside them or seal the holes IMO, ours were not very rusty
Why did you por15 the arms? I just used good spray paint, if you want to preserve them you need to use some Eastwood internal frame coat inside them or seal the holes IMO, ours were not very rusty

Mudding
Joined: Feb 2014
Posts: 196
Likes: 55
From: Madison, WI
I did some stuff over the past 2 weekends that have been on the list for a while. Wanted to get it all done before winter sets in. Vehicle now has 103,000 miles -
1. Swapped out both engine drive belts. Atlantic British video helped a LOT.
2. Rear locking diff fluid. Used the correct fluid. No signs of 'concern' within the oil - just a small amount of silvery 'paste' on magnet.
3. Finally got rid of almost all of the baked on mud from beneath the vehicle, from a trip back in the Summer.
4. Front passenger side wheel hub and bearing assembly. History - swapped out driver side a few months ago, didn't have time to do passenger side. Actually, truth is, I'm not very clever, and left the Wheel Speed Sensor attached to Driver side, and wacked it with the hammer and broke it. So, I was scared that I would do something similarly silly with the passenger side...
5. BG Fuel Injection and Induction clean
6. Spark Plugs afterwards
7. Oil change afterwards.
8. New Air Filter
9. Cleaned MAF Sensor
10. Took apart and cleaned Front Brakes, both sides.
11. Took out both front seats in order to refit plastic sill units (removed to try to fix unresponsive Key Fob remote-entry buttons - My issue was NOT bad or corroded door sill wiring, by the way). When seats were out, thorough cleaned carpet, and seats rails. Amazing what I found. I have a really useful steam cleaning machine, which helped clean stuff. Sidenote, just bought a $50 ozone machine 'kit' from Amazon, which I will use to remove any residual smell from the vehicle.
Runs very smooth now.

1st Gear
Joined: Nov 2015
Posts: 1
Likes: 0
Took my LR3 SE V8 for a drive this morning and suddenly a engine warning came on the car started to miss , I took it to a dealer and according to the diagnostics there is a miss fire on cylinder 5 wonder what could caused that?

Rock Crawling
Joined: Jun 2015
Posts: 474
Likes: 36
From: Elizabethtown, Kentucky
Haven't got it installed yet but I picked up this off Craigslist last week. Had to order the mounting brackets but I got the rack and the storage bag for $70. That was a win in my book.
It was in pretty good shape. I did a touch up coat of black paint and the usual covering of the screws and the joints to keep the water out. Hope to get it on as soon as the brackets get here.
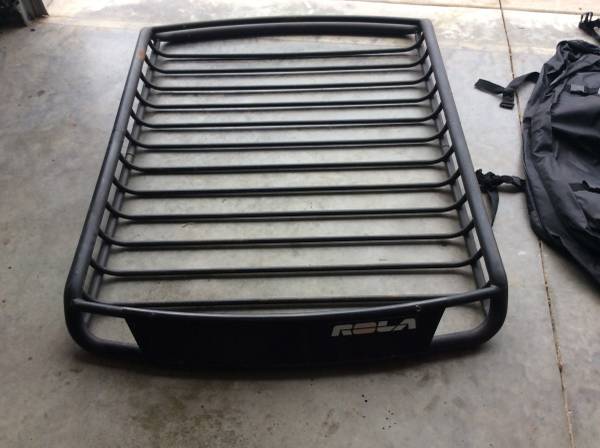
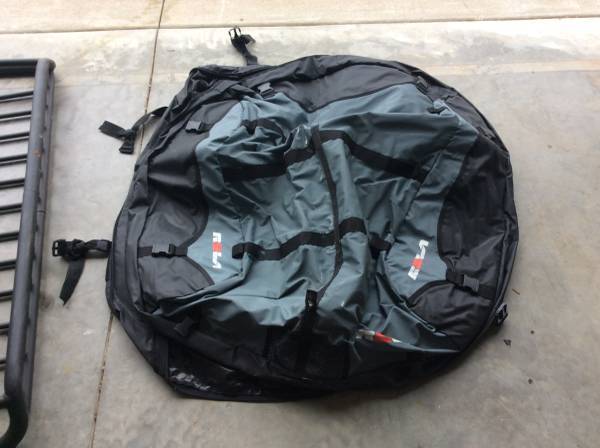
It was in pretty good shape. I did a touch up coat of black paint and the usual covering of the screws and the joints to keep the water out. Hope to get it on as soon as the brackets get here.

