When you click on links to various merchants on this site and make a purchase, this can result in this site earning a commission. Affiliate programs and affiliations include, but are not limited to, the eBay Partner Network.
Replaced my front suspension valve block with an extra one I rebuilt ahead of time. Also found you do not have to take the whole liner out, 3 screws and one push pin is plenty. The flat rate tech in me is always looking for tricks to get these jobs done quicker. I'll take apart the original one when I have some spare time and see how bad it is. You can see in the second photo the 3 lines had quite a bit of white powder on them so I have a feeling it isn't going to be great inside the original valve. I do know that on first start up the front end came up quicker than it ever has. Sitting overnight will tell me if it's better/fixed as that is about how long it took to get it to sag.
Thanks for the tip, I have a used OEM one from Great Britain (Torx screws) and ready to install, just a bit reticent, but also have a rebuild kit for the old one!
Thanks for the tip, I have a used OEM one from Great Britain (Torx screws) and ready to install, just a bit reticent, but also have a rebuild kit for the old one!
It's a pretty easy job to both rebuild the valve and install it. I watched a couple different videos on the rebuild so I could see what I was getting into. Couple tricks for installing the valve, take a before picture so you know which port each of the black lines go into and put tape on one if there already isn't tape and once you have the fittings undone spray some silicone spray on the top and bottom sides of it. This will help it spin so it's easier to install into the replacement valve and also helps the o-ring on the brass fitting seal and not bind up preventing future leaks. Also remember that the fittings are mainly sealed with those o-rings so once the fitting feels snug into the block stop tightening.
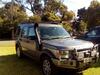
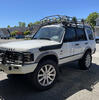
Did the Daniel Boone Back Country Byway Friday and Saturday, out in the Daniel Boone National Forest. There was pretty amazing trails out there. That new Defender though handed the LR3 and RRS their butts though. That thing walked everything except one spot that probably would have required 40's
Last edited by ArmyRover; Jun 20, 2021 at 07:58 PM.
I trimmed a couple inches off the bottom of my bumper and now it gets 'pants' a lot less!
Followed the molded indent almost like the original engineers were asking for it to be cut off:
"That thing walked everything" - careful what you wish for. One of my regular crew has a Rubicon on 35"s and while very impressive to watch, the driver finds it a little boring.
I like that nice work.
The Defender does just walk up however you have to put your mind to work to find that line for the tires to keep the clearance high
I trimmed a couple inches off the bottom of my bumper and now it gets 'pants' a lot less!
Followed the molded indent almost like the original engineers were asking for it to be cut off:
"That thing walked everything" - careful what you wish for. One of my regular crew has a Rubicon on 35"s and while very impressive to watch, the driver finds it a little boring.
I like this, I did something similar to the front bumper of my Jeep Grand Cherokee ZJ when I had one about 5 years ago. I wish the front bumper of the LR3 was slim like the 03-04 D2's.
Changed the oil and front differential, on to the transfer case. Thought my son was being weak, but my lord is that drain plug way too tight. Thanks dealership�