mesh grill write-up


Mudding
Joined: Aug 2011
Posts: 188
Likes: 0
From: Greenbrier, TN
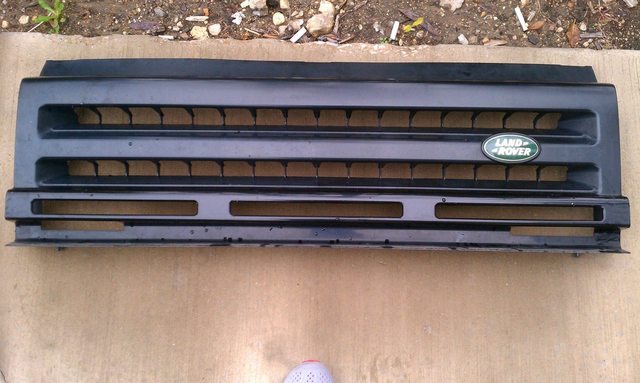
After cutting the old plastic out and laying the expanded metal in i drilled holes in a few spots and put some bolts through the plastic and metal then a washer and a nut, the bottom didnt need any ( i only had 5 bolts, 3 across the top, 1 on each side). then i got hit and the bottom started sagging with the cracks so i ziptied some stuff.
I made it where if I want to redo a new grille i just unbolt the metal and repeat the process to the new donor grille.
I made it where if I want to redo a new grille i just unbolt the metal and repeat the process to the new donor grille.

Mudding
Joined: Aug 2011
Posts: 188
Likes: 0
From: Greenbrier, TN
I was gonna do the mesh from lowes, but I had trouble finding any that seemed sturdy enough or the kind that did there wasnt enough. The expanded metal was easier to cut up and weld to the dimensions needed plus it looks more rugged than the mesh IMHO

Pro Wrench
Joined: Oct 2010
Posts: 1,669
Likes: 2
From: San Juan, Puerto Rico
I could not find any good grill metal anywhere that wasn't over $80. I used cheap hardware cloth with steel perimeter support. I spray prime etched it and then hit it with stovepipe paint. I painted the plastic parts with black plastic paint and then hit it with the stovepipe paint. I'm going to install the two pieces so that I can get the grill part out again should I find something I like better. I'm waiting to install until after I do the body work and wet sand, etc. so I don't mess it up. I'll probably hit the other exterior plastic bits with forever black or maybe even SEM bumper coater.
Try wiring the mesh to a steel perimeter. Lots of wire points will insre it stays straight. My stuff is pretty flimsy. I used threaded steel which I had laying around.
Try wiring the mesh to a steel perimeter. Lots of wire points will insre it stays straight. My stuff is pretty flimsy. I used threaded steel which I had laying around.

Pro Wrench
Joined: Oct 2010
Posts: 1,669
Likes: 2
From: San Juan, Puerto Rico
ah Savannah...you know me. Blacker the better baby. Flat please. i've been running the truck with no grill and it shows no signs of overheating at all. still have to get that damn gauge hooked up.
i'll be talking to you shortly about my new drivetrain problem. don't have the details yet but I'm working on it.
i'll be talking to you shortly about my new drivetrain problem. don't have the details yet but I'm working on it.

Baja
Joined: Mar 2010
Posts: 5,584
Likes: 7
From: Pittsburgh PA suburbs.
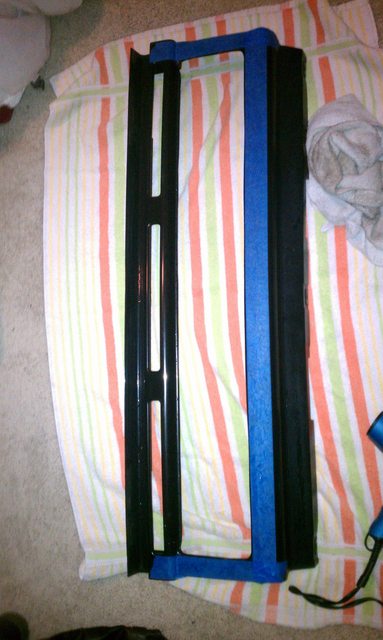
I finally got around to cutting the expanded metal piece I had into two equal pieces. They were perfect height to reach from the bottom frame members where the front bumper bolts on all the way to the top of the metal edge at the top of the radiator.
The only part of the plastic grill I used was the top strip where it mounts to keep the expanded metal flush to the top. On the sides, I trimmed the upper corners to fit around the headlamp adjusters. Just a minor trim and it fit well. The sides are behind the headlights and the bottom edge is behind the bumper.
Pretty good fit. I was concerned about how to cut the expanded metal but my tin snips worked just fine cutting one piece at a time. I have a double layer of expanded metal slightly offset from each other to stagger the openings. It looks better to me that way instead of seeing thru the openings, that way the stuff behind the grill does not show thru. And it is very stout as well.
Last edited by Danny Lee 97 Disco; Dec 5, 2011 at 11:47 AM.