
So what did you do to your Disco today?


Drifting
Joined: Feb 2013
Posts: 41
Likes: 0
From: Abingdon, Virginia


Drifting
Joined: Feb 2013
Posts: 41
Likes: 0
From: Abingdon, Virginia
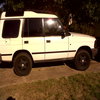
Attempted to replace the oxygen sensors. Removed the ignition coil packed successfully. Thought that was going to be the trial for the day. Disconnected the right O2 sensor from the multi-plug. Time to get under the truck and unscrew the sensor. After may attempts at freeing the O2 sensor, I headed to O'Reily's to see if they had a tool, ... that would get that 02 out. The gentlemen behind the counter just chuckled and said those sensors are almost welded in from the repetitive heating and cooling. A couple of customers chimed in that I just needed to take my blow torch and heat the pipe up red hot and then it would come free. I quickly determined that climbing under the truck with a blow torch given the limited space available from the jack stands was a sub optimal option and replacing the 02 sensors was better left to those will skills and tools. Went home less dejected then when I arrived at O'Riely's and set about re-connecting the 02 sensor and re-installing the coil pack. Turned the ignition key and the truck fired right up. Six hours +/- and I'm back to square one. Emboldened by my success at reassembling the truck, I set about replacing the front head and fog lights. Headlights replacement was easy-peesy. The fogs lights took a little thinking but were successful replaced. Final analysis, two trips to O'Reily's and 8 hours of solid work to replaced the headlights and fog lights.

Camel Trophy
Joined: Nov 2009
Posts: 4,079
Likes: 227
From: IL
Painted my headliner and tossed it back in the truck. Looks good at about 5ft+. It came out just OK, but good enough for what it is.
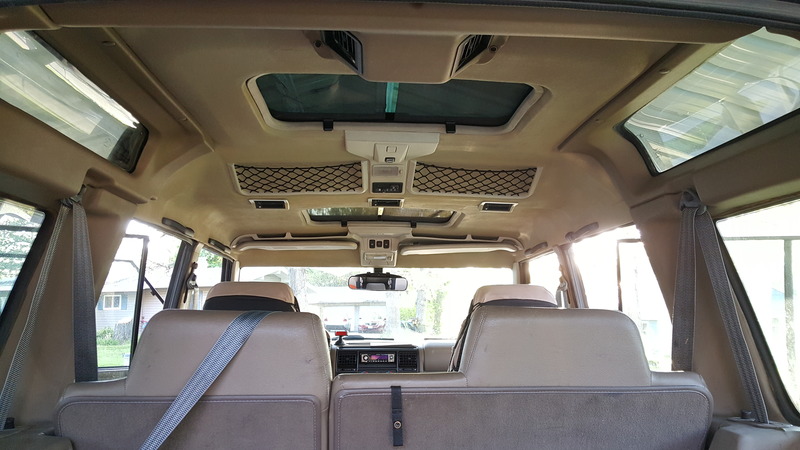
Felt pretty good about the headliner and repairing the Alpine windows. Decided to recharge the AC since it wouldn't blow cold on the way home.
Felt like a kick in the junk when I heard and saw the refrigerant leaking out.

Felt pretty good about the headliner and repairing the Alpine windows. Decided to recharge the AC since it wouldn't blow cold on the way home.
Felt like a kick in the junk when I heard and saw the refrigerant leaking out.

Mudding
Joined: Jun 2015
Posts: 138
Likes: 13
From: Athens, GA
Painted my headliner and tossed it back in the truck. Looks good at about 5ft+. It came out just OK, but good enough for what it is.

Felt pretty good about the headliner and repairing the Alpine windows. Decided to recharge the AC since it wouldn't blow cold on the way home.
Felt like a kick in the junk when I heard and saw the refrigerant leaking out.
Felt pretty good about the headliner and repairing the Alpine windows. Decided to recharge the AC since it wouldn't blow cold on the way home.
Felt like a kick in the junk when I heard and saw the refrigerant leaking out.
Camel Trophy
Joined: Nov 2009
Posts: 4,079
Likes: 227
From: IL
I took a stiff brush to remove all the foam/adhesive.
I primed by rolling on Kilz.
I was hoping for a smoother finish on the end product but its pretty rough still.
If I were to do it again I'd roll on the finishing coats of paint and do it pretty thick to achieve a smooth finish.
Mudding
Joined: Jun 2015
Posts: 138
Likes: 13
From: Athens, GA
I used the RustOleum Camo spray paint, Khaki I think.
I took a stiff brush to remove all the foam/adhesive.
I primed by rolling on Kilz.
I was hoping for a smoother finish on the end product but its pretty rough still.
If I were to do it again I'd roll on the finishing coats of paint and do it pretty thick to achieve a smooth finish.
I took a stiff brush to remove all the foam/adhesive.
I primed by rolling on Kilz.
I was hoping for a smoother finish on the end product but its pretty rough still.
If I were to do it again I'd roll on the finishing coats of paint and do it pretty thick to achieve a smooth finish.
Camel Trophy
Joined: Nov 2009
Posts: 4,079
Likes: 227
From: IL
I'm not sure I'd use Kilz again either, the stuff was really thick. Because of the absorbanct nature of the headboard the Kilz didn't roll very well.
Drifting
Joined: Feb 2013
Posts: 41
Likes: 0
From: Abingdon, Virginia
I used the RustOleum Camo spray paint, Khaki I think.
I took a stiff brush to remove all the foam/adhesive.
I primed by rolling on Kilz.
I was hoping for a smoother finish on the end product but its pretty rough still.
If I were to do it again I'd roll on the finishing coats of paint and do it pretty thick to achieve a smooth finish.
I took a stiff brush to remove all the foam/adhesive.
I primed by rolling on Kilz.
I was hoping for a smoother finish on the end product but its pretty rough still.
If I were to do it again I'd roll on the finishing coats of paint and do it pretty thick to achieve a smooth finish.
