So what did you do to your Disco today?
#811
 11-01-2012, 09:28 AM


1) I want them for my collection
2) I didn't have a chance to test all the parts before I tore into the truck and I wouldn't feel right about selling an untested part.
#812
11-02-2012, 06:31 AM
Mudding
Join Date: May 2012
Location: Massachusetts
Posts: 113
Likes: 0
Received 0 Likes
on
0 Posts
Plan on taking off the headliner and stopping the shower of water I get everytime it rains. (Nothing like a cold gush of water to the face to get you up in the morning) 
Hopefully if that doesn't take forever, I'll finally get a chance to clear out the breather tubes on the axles and M/T & T/C.
If by some miracle all this happens before I run out of daylight (not keeping my fingers crossed) I will rip the exhaust off with my bare hands because of how long the easiest things take to fix on a 94. Then atempt to replace the o2 sensor.
Then replace the u-joints on both drive shafts on Saturday! Anybody want to lend me a press or vice because I'am almost positive the u-joints will be a pain to change out?

#814
11-03-2012, 03:50 PM
#815
11-03-2012, 03:51 PM

#817
11-03-2012, 06:29 PM

Rock Crawling
I inserted a temperature probe into the city light bulb hole and left the headlights on for a while. Surprisingly it only rose about 6 degrees above ambient before leveling out. So with the reassuring data I ordered and installed my LED city lights. These are 5100k LEDs, model WLED-WHP5 from superbrightleds.com. They're brighter than the stock incandescent bulbs and I'm really pleased with the crisp white light that updates the look, all at 1/12th the current draw. They even look great when combined with the more yellowish halogen headlights. I didn't take a picture of it, but it creates an interesting mix between the LED and halogen color temperatures.
Stock 168 bulb on left, LED on right:
Attachment 12331
Attachment 12332
Stock 168 bulb on left, LED on right:
Attachment 12331
Attachment 12332
#818
11-03-2012, 08:44 PM


#819
11-04-2012, 12:06 AM
Recovery Vehicle
#820
11-04-2012, 12:41 AM
Recovery Vehicle
got some work done on the toy conversion..
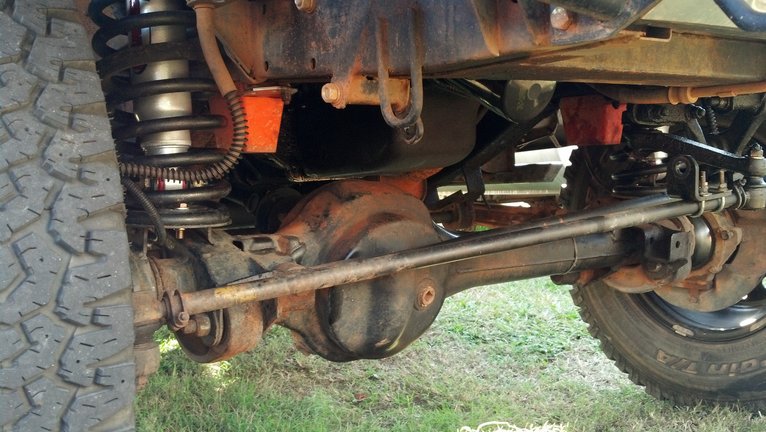
Got front diff built last night and started work on the rear axle housing this evening. Got the sewer cap welded on. Stubs, hubs etc bolted back up. Test fitted the axles and rear diff and marked all the holes to be drilled.
Here's a pic of the sewer cap action..

Got front diff built last night and started work on the rear axle housing this evening. Got the sewer cap welded on. Stubs, hubs etc bolted back up. Test fitted the axles and rear diff and marked all the holes to be drilled.
Here's a pic of the sewer cap action..