When you click on links to various merchants on this site and make a purchase, this can result in this site earning a commission. Affiliate programs and affiliations include, but are not limited to, the eBay Partner Network.
Well got the heads bolted down using Arp studs, pushrods and roller rockers in, SAI inserts and exhaust manifolds connected. Also cleaned up the rocker covers, I am half tempted to paint them while I'm at it but who knows.
Last edited by thesoundguru; Aug 2, 2016 at 06:41 AM.
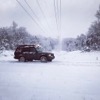
Like the thread title says, this post is about what I did WITH my DII today, not what I did to it.
Took the 4-vehicle ferry to the South Core Banks and drove the 14 miles south to Cape Lookout Point, visiting the lighthouse on the way there and stopping for lunch at the abandoned village on the way back to the ferry.
Went to DEQ today. No misfires, however when I was doing the plug wires I disconnected the battery (common sense), doing so erased all of the data to the point that the EVAP module and SAI module wasn't ready. This happened to my Disco I. They said to drive it around more to allow these modules to kick in. Looks like a road trip.
the other thing I did was to detail the interior. I've done the passenger side and will do the driver side next then on to the back.
Finally got my new gaskets and re-surfaced heads back on. Next step is the valley pan gasket and lower manifold. Any suggestions on a good sealant for the valley pan gasket? I was told by a friend to use grey RTV. Prayin' for a leak free DISCO!
Finally found and fixed the cause of my reduced AM radio reception... Have noticed a decline in reception over the last six or so months. lots of excess noise and weaker signals.
I have an aftermarket head unit and like most modern radios it lowers the bandwidth (frequency response on AM) and lowers the fidelity in weak signal conditions... this is done so that users don't run to the dealer or shop when the radio amplifies all the interfering noise instead of the program you want to hear.
Checked the ground cable on the back of the head unit and that tested out ok... A non or poor ground is the first thing to look for if you have bad AM reception.
With that checked off the list the only thing left to check is the RF amplifier in the cargo area between the side window and the alpine window on the passenger side. after removing the interior panel the first thing i noticed was about a half inch of braid exposed between the connector and the jacket of the RF coaxial cable coming out of the Amplifier module!!!
With the radio on and tuned to an AM station I could push the cable back into the connector and hear the signal restore to clean and interference free. If i just let it hang there lt would produce noise as i tapped on the cable or the module.
As this is a non standard connector with a non standard sized ferrel I could not re-terminate the cable, so i tried just taping (Scotch Super 88 electrical) the cable securing it into the connector with none of the braid sticking out...
After a test drive it seems to have fixed the issue. No more interference, no more "chuffing" sounds when hitting a bump, etc. So far this simple fix seems to have worked!!
I was prepared for it to be a bigger issue so I acquired a spare AM-FM RF module from a wrecked vehicle and found on a Range Rover forum how to remove the connector... which is finding the arrow on the module side so that the plastic piece slides toward the module... the cable will then unplug without breaking anything. Turns out my original module was ok, and there is no need to cut that cable in the event you do need to replace that module.
It's great to have full strength, full fidelity AM in the truck again!!
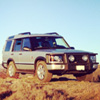
2001 Land Rover DISCOVERY II- within the past two weeks i have done the following:
Removed upper intake and replaced valve cover gaskets replaced plugs and wires, de greased engine and under carriage. Topped off front and rear dif fluid, greased all greasable parts. Installed new lower and upper ball joints, installed new track rod and drag link, installed "2 suspension lift - springs and shocks. Cleaned and relocated passenger o2 sensor wires and installed new sensor. Rebuild break booster reservoir, replaced radiator, coolant reservoir, replaced both plastic coolant lines, hoses and thermostat, new belt. Repaired rear door "Catch", greased all five door hinges, fresh oil/ k&n filter/and air filter. Transmission filter and fluid was done around 100k but i also checked fluid levels and condition. Installed 265/75R16 tires, and flipped carrier on back to hold tire (still want to noch it out so wiper sits flat)
took alot of time lol.
after these repairs we went off roading at Cleghorne Rd trail near Los Angeles. did most of the "Hard" trails all without any problems.
Landy has 113K miles and is running excellent.
Once this last round or parts are paid off i will be installing: Steel front bumper with 12K lb winch, steel rear bumper, rock sliders with tree bars, roof rack and lights. Rock guards for both Diffs/steering/fuel tank.
Other items n the Horizon: have head liner re done, wrap the roof in black, bottom panels in black wrap (lower 12" or so down both side following body line), and the hood black out like the camel trucks - just the center raised area.
Landy was a daily driver but she is transforming into a off road toy. i will complete transformation as i pay off the current parts. were on a budget. The total i expect to spend is about $5000 so will continue as funds permit.
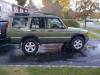
Got my hands on a rough cosmetically but mechanically sound. Im learning to car for her and up grade her for a off road rig slowly. So any advice with her is awesome. My back door keeps getting locking up.
Putting my pass side head back on. Did heads 2 years ago. It was weeping out of the rear for a while. Torqued the APR studs to 85 ft lbs. Last time I did not go that high (only 60 ft lbs) because I was afraid of pulling the studs from the block. There is conflicting instructions of 80 and 100 ft lbs for the studs. I decided to go with 85 lbs.