When you click on links to various merchants on this site and make a purchase, this can result in this site earning a commission. Affiliate programs and affiliations include, but are not limited to, the eBay Partner Network.
Over the weekend I grabbed some good parts at the LKQ yards in Houston, Camel Trophy Adventure tire cover, 04 CDL linkage, 94-99 D1 rear cargo door latch cover (cool mod coming soon), 99-04 D2 rear cargo door latch cover, and another OEM D2 trailer wiring harness.
I also got the 02 Westminster running cool & from what I can tell the 4.0L V8 is in great shape. Idle is kinda funky (working on that), but it’s real issues are the rusty frame/body, and a transmission that has to be shifted like a manual until you are moving.
I’ll either sell it running/driving for 1500.00, or sell just the engine & then part out the rest. I have a spare HP24 transmission, but I don’t have the time to mess with that & all the rusty bolts holding the current one in place.
The install I did took a lot longer than the normal install because I took the time to install sound deadening material under my carpet , I routed the power wire directly to the fuse box via a add a fuse so I can have it have power 24/7. The rear view camera wire I routed through the headliner along the right side then behind the plastic cover on the rear passenger window to the door. I wired the reverse power wire to the reverse light so when I put it into reverse the camera pops up, then the wire went through the door and I put the camera on the spare tire rim till I find a permanent location , I may try to put it on the license plate
I bought mine today. I plan to do some of the same things you did as far as wiring goes etc. I don't like wires hanging etc.
I have a laundry list of things to work on. Still waiting for the Shop to make room for my bumper so I have more time to get some of this done before I need to drive over there.
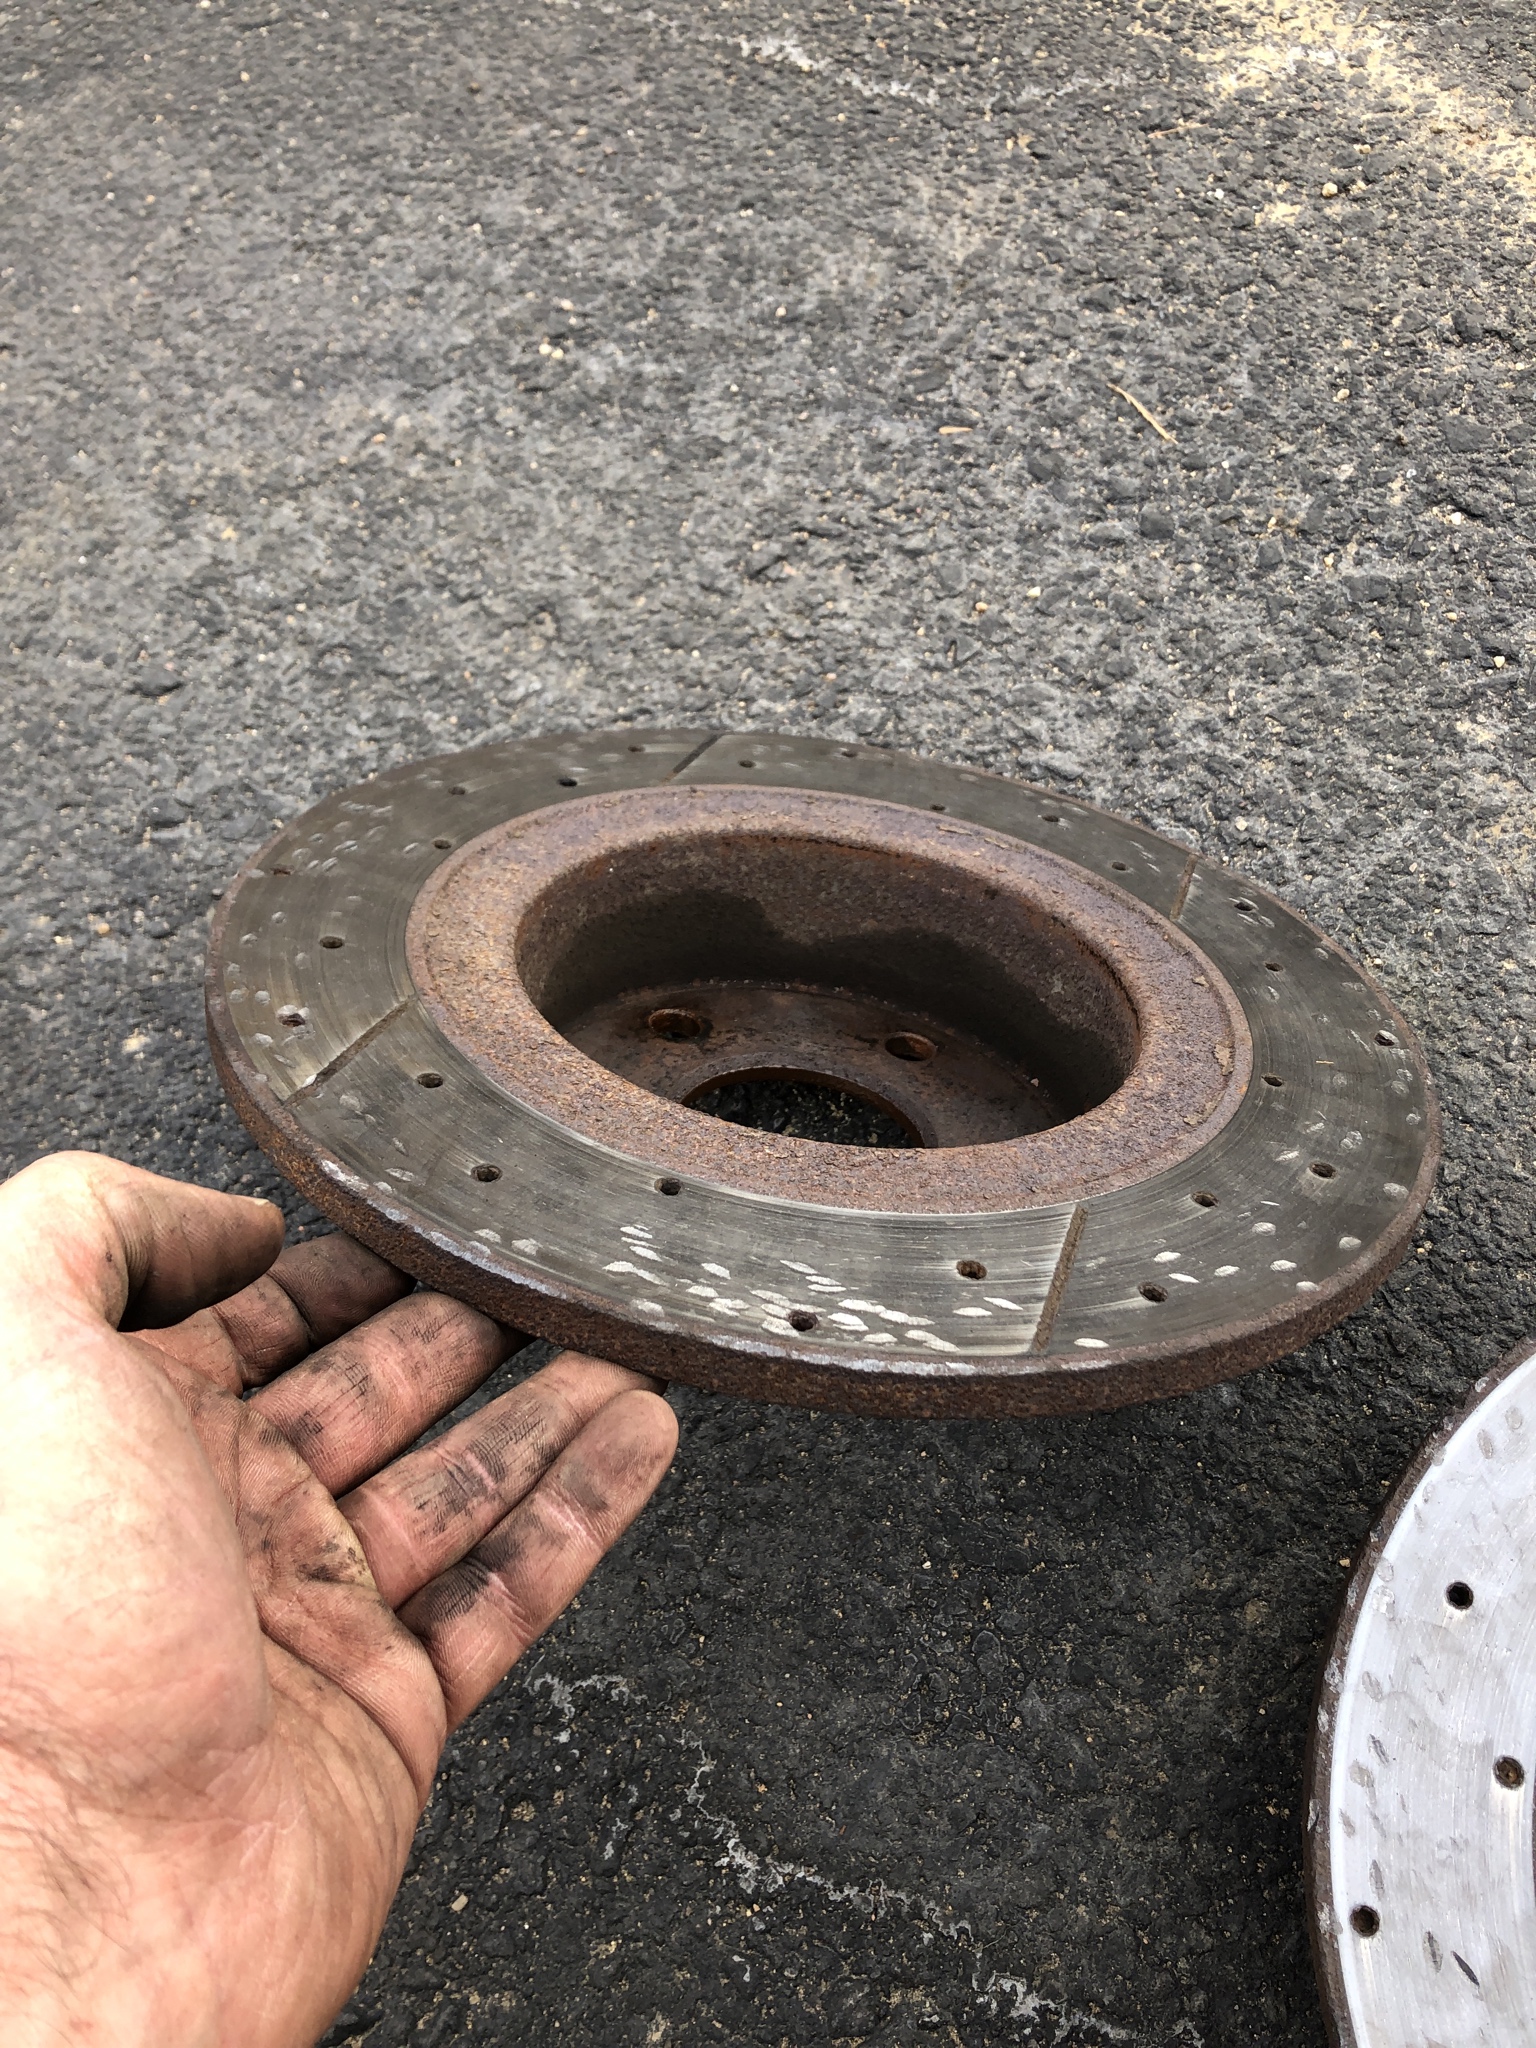
I was going to do my brakes today but i'm currently buried under a mountain of snot rags and its 40 degrees / windy outside. Bleh. I might go out and check to see if the PO left the rotor screws out from the last time the brakes were done Might have to buy one of those impact screwdriver thingys
Just take a drill to them. Drill the heads off, they are soft metal and a 3/8's drill bit make mincemeat out of them. Don't reinstall...these are just used at the factory for assembly line purposes...or by folks that want to keep a vehicle 100% original.
Just take a drill to them. Drill the heads off, they are soft metal and a 3/8's drill bit make mincemeat out of them. Don't reinstall...these are just used at the factory for assembly line purposes...or by folks that want to keep a vehicle 100% original.
Picked my Disco up today. Rear frame section replaced, hole in frame near cat plated, and the rest of the frame was hit with a grinder and painted. Also, new rear Britpart steel bumper installed. Looks great! No more rusty frame! Pics to come....
Picked my Disco up today. Rear frame section replaced, hole in frame near cat plated, and the rest of the frame was hit with a grinder and painted. Also, new rear Britpart steel bumper installed. Looks great! No more rusty frame! Pics to come....
Unless I swap my motor into a rustfree rover I am going to have to do this eventually.
Thanks to a GoWest post from 2011 on LRR, I learned that I didn't have to pull out my radiator to remove the high pressure steering line. The trick is removing the plastic side cover that you can see just under/inside the driver side fender. 3 8mm bolts hold that cover up against the frame, 1 that you access from under the hood, 1 is easily visible from the driver side front tire, and 1 is hidden way up against the frame on the upper outside back of the panel.
I also removed the cover that hides the windshield cleaner fluid/pumps and I removed the front grill and front underside wire mesh which allows access to 2 philips screws that hold on the 2 brackets for the high pressure steering line.
With those brackets disconnected from their base, you can squeeze in an 8mm socket to remove each of the 2 bolts that hold those brackets onto the high pressure steering line.
Then I used a 17mm wrench to loosen the nut holding the HP steering line to the steering pump, and a 10mm socket to remove the bolt that holds the other end of the HP steering line to the steering box.
With that removed, that huge, long high pressure steering line just slides and twists out through that now-vacant plastic side cover area by the windshield washer reservoir.
Tomorrow I'll install the new high pressure line and test. It was a pretty bad PS fluid leak so this should be a dramatic improvement.
You don't remove a wheel/tire.
You don't remove the fender liner.
You don't remove a radiator.
You don't remove the engine fan/clutch.
Changed the water pump, again, on my wife's 03. Not sure where l bought the old one from, but it only lasted about six/seven months. Anyhow, new one came from Lucky 8...so hopefully we have better lucky with this one.
Afterwards, took her to town for a bath.
Threw some tires on old whitey gold, so l could move her into the engine hoist bay. She's slowly becoming dismantled.
She'd been sitting for a week or so...started right up and purred like a kitten. Sometimes, l question my sanity...for giving up on her and going with the new grey 03. Me and the 03 are off to a very rocky start, to say the least. Oh well, no turning back now.
 01-07-2019, 11:55 AM


 Might have to buy one of those impact screwdriver thingys