When you click on links to various merchants on this site and make a purchase, this can result in this site earning a commission. Affiliate programs and affiliations include, but are not limited to, the eBay Partner Network.
Did you use plastic gauge to check the clearances?
No
Telescoping bore gage and a micrometer, as it's more accurate.
First main is right on, and I'll check the rest later.
I'm not suprised that there will be some variance between blocks, but having one main good, with standard size bearings, and All in spec when it was in the 4.6, is now concerning.
Maybe a mix match of main caps from the 4.0 and 4.6 blocks can get them all in spec.
If not, I'm throwing in the towel.
I don't have the heart to continue spending money in this thing.
I've built alot of car and bike engines over the years, and they all have some challenges. But, as simple as this thing is, it has fought me at every turn, and I've about had it.
Did you use plastic gauge to check the clearances?
Like this
These are pics from when I did my 4.6, but I did the same.
Caps get torqued with bearings in, bore gage is spring loaded, locks in place, then the bore gage is measured with a micrometer.
These are Starette gages too, that are always carefully handled, and the mic has been calibrated.
Last edited by Sixpack577; 01-05-2020 at 11:41 AM.
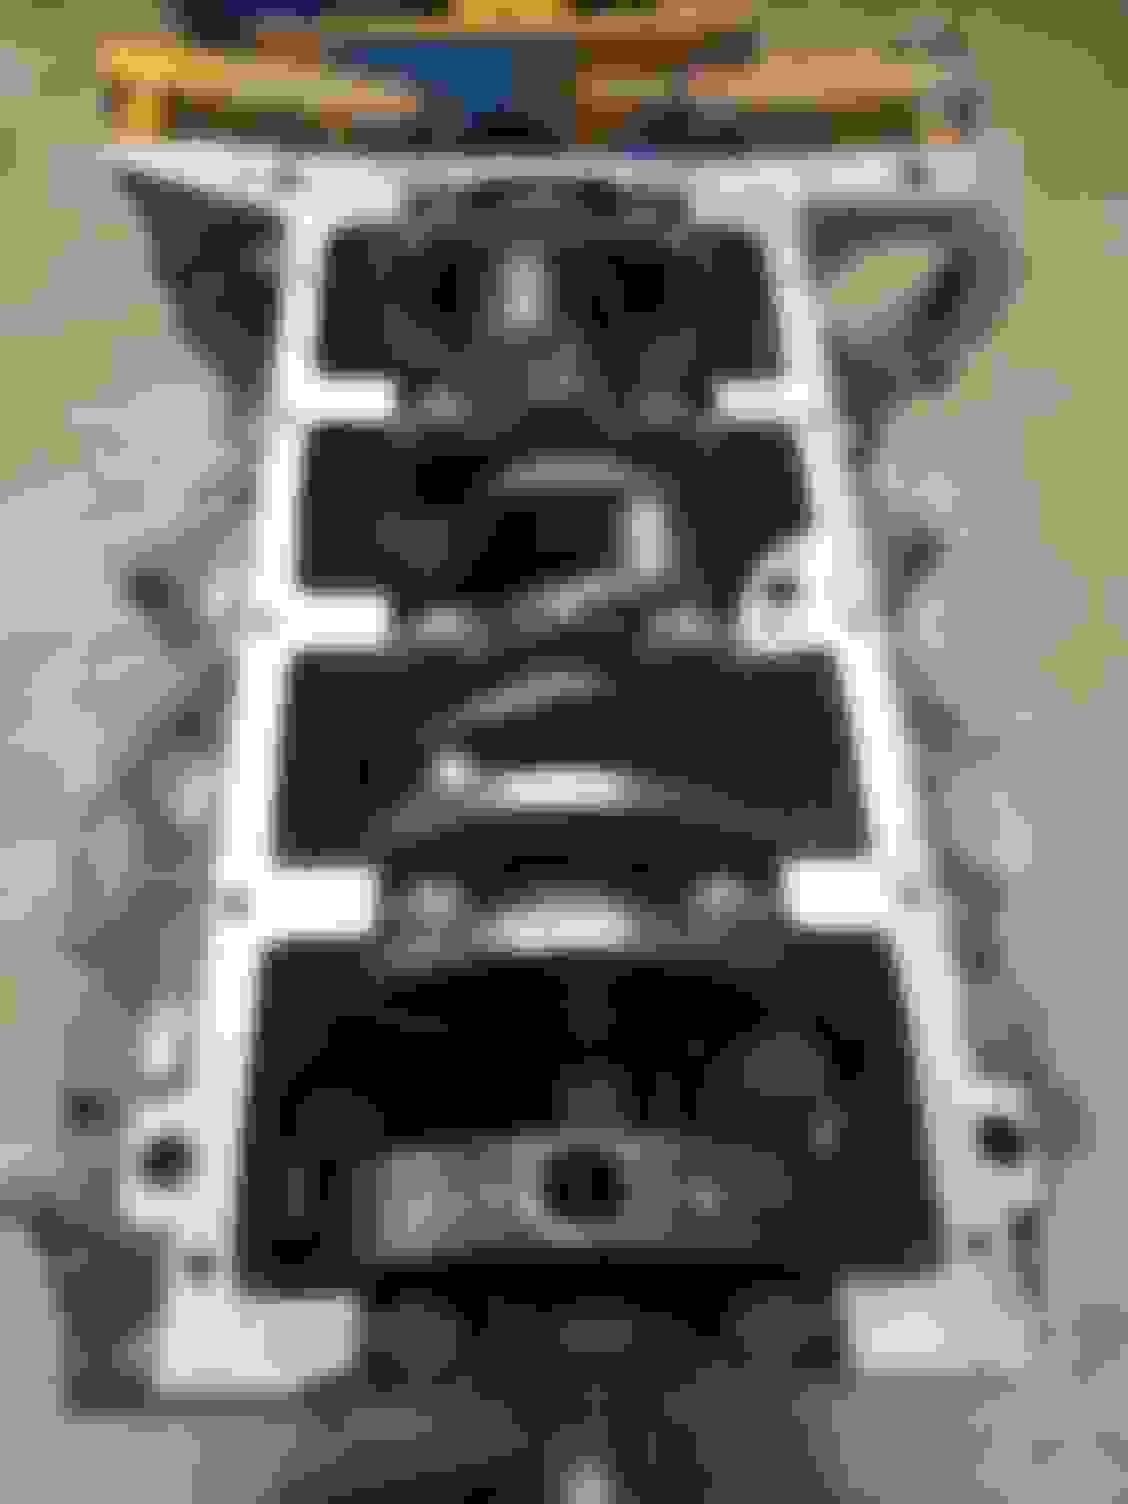
Crank is in...again...but it's right this time, lol.
Note to self, and word to the wise...stop working on things when you are tired.
I bag, tag, and label everything, and don't mix parts(since I'm working with 2 engines), but, screwed up, obviously.
I grabbed the 4.6 crank...and the 4.6 main bearing caps.
When I should have picked up the 4.0 main bearing caps that go with the 4.0 block I'm using.
Granted, the 4.0 and 4.6 caps Are the "same", and I am using stock bearings. But, we are dealing in thousandths of an inch, and the 4.6 caps were from the other block.
So, without a line hone, they were apparently just a little too tight.
I put the 4.0 caps in, measured, they're in spec, reassembled and torqued it all...and the crank spins freely, as it should!
Fortunately, I had bought 2 sets of cruciform seals too, so I had a new set for the other rear main cap.
Yay! Go dummy me!
But, I still hate this thing, lol.
On to gapping rings and finishing the bottom end now.
Note the different color main caps in this picture.
Last edited by Sixpack577; 01-05-2020 at 03:20 PM.
Crank is in...again...but it's right this time, lol.
Note to self, and word to the wise...stop working on things when you are tired.
I bag, tag, and label everything, and don't mix parts(since I'm working with 2 engines), but, screwed up, obviously.
I grabbed the 4.6 crank...and the 4.6 main bearing caps.
When I should have picked up the 4.0 main bearing caps that go with the 4.0 block I'm using.
Granted, the 4.0 and 4.6 caps Are the "same", and I am using stock bearings. But, we are dealing in thousandths of an inch, and the 4.6 caps were from the other block.
So, without a line hone, they were apparently just a little too tight.
I put the 4.0 caps in, measured, they're in spec, reassembled and torqued it all...and the crank spins freely, as it should!
Fortunately, I had bought 2 sets of cruciform seals too, so I had a new set for the other rear main cap.
Yay! Go dummy me!
But, I still hate this thing, lol.
On to gapping rings and finishing the bottom end now.
Note the different color main caps in this picture.
i feel your pain. You are a lot more patient than I. As you know I ended up spending $1450 having someone build my short block and when I got in over my head on the install, I spent another $2000. I�m thinking I should play zen music or install a waterfall in the garage when I am working on this thing to keep from throwing wrenches!
Did you use plastic gauge to check the clearances?
And, back to steel vs brass freeze plugs like we were talking about a few days ago.
I already had a set of steel freeze plugs, and did as much reading on brass plugs as I could.
The consensus seemed to be that brass plugs have a much higher likelyhood of popping out, as they do not have as much rigidity as steel ones do.
This thing has given me enough problems, and all the 4.0/4.6's I've seen all have steel plugs.
Have you ever put a freeze plug in with the engine in the vehicle? Yeah...it's no fun.
Steel it is.
i feel your pain. You are a lot more patient than I. As you know I ended up spending $1450 having someone build my short block and when I got in over my head on the install, I spent another $2000. I�m thinking I should play zen music or install a waterfall in the garage when I am working on this thing to keep from throwing wrenches!
Lmao!
I think it's a Land Rover thing.
If you don't keep feeding them money, they get pissed off and fight you harder.
Went ahead and put the Crower cam in and timed it next.
I find it easier to line up the key on the cam with the cam gear with the rods and pistons out.
That way I can reach through the bottom and make sure the cam gear is correctly seated on the cam, while aligning the timing marks(there is a gap between the rear of the cam and the cam plug. The cam can move back and needs to be held against the cam gear while fitting into the key and being torqued.)
I let the crank jam against a dead blow hammer for resistance while I torqued the cam gear(37' lbs).
Now on to the ring gaps and installing them...that'll take a while.
I'll leave the timing cover off until all the pistons and rods are in.
Last edited by Sixpack577; 01-05-2020 at 05:23 PM.

 01-05-2020, 11:24 AM