When you click on links to various merchants on this site and make a purchase, this can result in this site earning a commission. Affiliate programs and affiliations include, but are not limited to, the eBay Partner Network.
Today with my D2, I did a side by side 100% even comparison of my 1985 Toyota FJ60 (bone stock except for 31" mud terrains) versus the 2004 Disco (bone stock with 32" mud terrains) on the same track I made through my property, deep dry sand wash, rocky parts, 5 foot wash entry/exit drama and the whole 1/4 mile course has plenty of "flair".
Well, the Discovery flat out embarrasses the FJ, Most of this has to do with electronic aids like traction control, etc, but the center diff and the approach/departure angles just flog the Toyota.
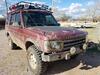
Found a mint 2003 S model (No sunroofs and OEM 16� wheels) with 85,000 miles for $1300. Lots of upgrades like new OEM rubber mats, brand new Toyo AT tires, heavy duty front driveshaft, and a complete gasket kit.
I purchased it from a nice fella that was told by his mechanic they suspected a failed head gasket. I towed it home and started the disassembly. I thought that repairing a failed head gasket would be a pretty major headache, but why not? Turns out, it�s not that bad at all. Loads of work, but if you take your time, have some patience and follow the Atlantic British video it�s actually kind of fun.
Got everything removed today. Turns out the seller and mechanic were right.
That's a clean looking engine too, inside and out...must have never had enough oil in it to leak out, lol.
Nice find.
No work on the truck itself, but I rebuilt my SVS switch just for fun. I pulled it out a few days ago and the switch tested bad.
The "SVS switch" is a black plastic assembly with two white plastic switch components wired in series. Each of these white components should have a resistance of 1500 ohms (normal) or 500 ohms (when pushed.) I cut and stripped the wires so I could test them individually. One was fine, the other was open-circuit.
With a hacksaw I cut around 4 sides of the base to open the faulty switch module. Inside there is a commercial snap-action switch and 2 resistors soldered to a small circuit board.
The snap action switch worked perfectly. I was expecting corrosion, but I opened it up and looked at the contacts and they looked great. It turns out the problem was where one of the wires from outside was soldered into the small circuit board.
The joint looked "solder-starved" to me. IDK if a) it was built that way and just failed or b) a tiny amount of brake fluid leaked in and selectively deteriorated the solder (?).
Anyway, I used plenty of flux and was able to repair the joint.
After testing, I decided to re-assemble everything. I epoxied the white switch housing back together, sealed it to the black holder plate w/ hot glue (so it wouldn't wiggle), and soldered and heat shrunk the wires back together.
Now the whole SVS is "as good as new" 😉. Although I already bought a new one and a seal kit, I'm thinking I will install this rebuilt one and see if it works. Probably do option B at the same time. If all goes well, I'll keep the new seals and SVS switch as spares and do the job later.
When I pulled the speakers from the rear door to get at the actuator, I noticed the foam surrounds were in pretty sad shape.
So that's why the sound was so horrible....
I ordered a pair of generic 6.5" foam surrounds from ebay for $6 and a bottle of Alleene's Tacky Glue for under $4. There are more expensive options out there, but I've had good luck with no-name foams before, and Alleene's glue has a huge fan base amongst speaker geeks.
Got the speakers glued and screwed today:
The excess glue still looks white, but it's basically dry and looks don't matter in this application. The glue was nice to work with - gets tacky pretty fast but allows enough time for careful alignment and adjustments.
Some folks go to a lot of trouble and remove The center dust caps and use alignment shims or apply a sine wave while gluing. I just placed the foam rings by hand and verified that the cone moved freely before the glue was dry.
Found a mint 2003 S model (No sunroofs and OEM 16� wheels) with 85,000 miles for $1300. Lots of upgrades like new OEM rubber mats, brand new Toyo AT tires, heavy duty front driveshaft, and a complete gasket kit.
I purchased it from a nice fella that was told by his mechanic they suspected a failed head gasket. I towed it home and started the disassembly. I thought that repairing a failed head gasket would be a pretty major headache, but why not? Turns out, it�s not that bad at all. Loads of work, but if you take your time, have some patience and follow the Atlantic British video it�s actually kind of fun.
Got everything removed today. Turns out the seller and mechanic were right.
Just know that the problem may not actually be the head gasket but a pin hole in the piston wall -