
95 Disco I 3.9 to 300D Turbo Diesel Conversion


Drifting
Joined: May 2014
Posts: 25
Likes: 0
From: USA
I wasn't able to see the truck today ( he wasn't available to show it) but I'm more than willing. It's only about 50 miles away. If I do, consider cash in your pocket and the the 240 bits your willing to let go of sold. 1000% agreed with your flywheel concerns. All the research has pointed to the use of the heavier flywheel at all costs. (not just disco swaps... any and all conversions involving the OM617) Several successful toyota swaps have been achieved using stock toyota flywheels or various others but I'm not completely sold that is the way I'd want mine. I have read several failures and don't want to experience it first hand. The heavier rotating mass will be essential to maximize the torque as you said in the previous post.
I had come across that thread you linked a couple days ago, I think you went a little easy on him. I hope we can make him eat his words. In an online forum it should be mutual respect and support for people in their projects, not bashing and beating down on their thoughts / opinions. He can justify his -25 starts with his gasoline engine all that he wants, I suppose if he lives in the yukon he has a point, but elsewhere.. its ridiculous to use that as argument why his gas engine is better suited than a diesel.
Anyways, I'll be sure to let you know of any updates that I get. Thanks for your support and information shared.
Drifting
Joined: May 2014
Posts: 25
Likes: 0
From: USA
Looks like the guy that was selling the manual disco fell off the face of the earth.. he is not responding to anything I send. Might have found a decent r380 a guy has sitting in his garage though. It is a ways away, but might be a ok route too. My biggest concerns now with the swap are oil pan clearance, specifically the clearance to the steering box. Franko had to cut his upper pan to clear his.. I want to avoid that if possible. I don't know if you could fit another steering box?

Looks like the guy that was selling the manual disco fell off the face of the earth.. he is not responding to anything I send. Might have found a decent r380 a guy has sitting in his garage though. It is a ways away, but might be a ok route too. My biggest concerns now with the swap are oil pan clearance, specifically the clearance to the steering box. Franko had to cut his upper pan to clear his.. I want to avoid that if possible. I don't know if you could fit another steering box?
However, I have seen a few videos on youtube that showed soldering aluminium with napp gass or propane with success in tinsel strength in different applications. I have aluminium stock and I am prepared to try this method. Oxidation between proper surface prep and actual material fill would be my only concern but the use of flux paste should take care of that.
om617 sump pans are easily enough to come by and I don't mint trying the soilder method as it makes sense heat wise as heat is the main concern regarding welding cast aluminium. Apearently during this process, the base material heats up enough to accept the fill material and properly roughened this base metal will be broken before the fill material.
Any welders out there try this
At,
Welding a Cast Aluminum Oil Pan
I have been reading up on welding cast aluminum this guy FusionKing states :
"All that said For cleaning I have great luck using "Super Clean" without any dilution on castings and inside fuel tanks. It cleans nasty engines very well.
It also etches aluminum so using it on polished aluminum is a bit too much sometimes. Find it at Wal-Mart. They have it generic as well.
Another product I like to use as well is "aluminum brightener". It is used on trucks and trailers and it is found at auto suppliers. It is an acid product and I use it after most of the grease is gone. It will turn the metal white and it will weld like brand new metal.
I like to use a SS knotted wire brush on a 4 1/2" grinder along the edge to be welded. Then take the tig torch and without using filler lay a bead down the edge and flow out all the junk to the top. Then use the wheel on the grinder again. If you are happy with the results then clamp and weld, otherwise repeat again. I weld loads of castings every week and this is how I do it. "
This is in response to a guy having difficulty welding a cast aluminum oil pan off a motor cycle.
Here is a video of these folks doing the mod and they sell a kit as well as mod your pan.
Drifting
Joined: May 2014
Posts: 25
Likes: 0
From: USA
Unless your truck has either; extended firm bump stops or at least a 4" lift, cutting and tig welding is the only way to absolutely avoid interference issues with the diff and axle.
However, I have seen a few videos on youtube that showed soldering aluminium with napp gass or propane with success in tinsel strength in different applications. I have aluminium stock and I am prepared to try this method. Oxidation between proper surface prep and actual material fill would be my only concern but the use of flux paste should take care of that.
om617 sump pans are easily enough to come by and I don't mint trying the soilder method as it makes sense heat wise as heat is the main concern regarding welding cast aluminium. Apearently during this process, the base material heats up enough to accept the fill material and properly roughened this base metal will be broken before the fill material.
Any welders out there try this
The pan you can buy modified above is a bit expensive, and because not proven in the discovery chassis, could very well have to be modified again, at which point, you would have been better off trying your luck on your own pan.
I looked up on youtube, WOW, there is some really neat.. STRONG stuff out there. Lots of videos with people BOASTING it's success. I think that is a very reasonable and viable option for the common, poor, garage, mechanic, welder wanna-be. Your right too, with oil pans cheap as they are, you aren't out much for the sake of trying it out on a spare. I'm going to do the same, Im gonna go sourcing a pan soon then.
The pan you can buy modified above is a bit expensive, and because not proven in the discovery chassis, could very well have to be modified again, at which point, you would have been better off trying your luck on your own pan.
The pan you can buy modified above is a bit expensive, and because not proven in the discovery chassis, could very well have to be modified again, at which point, you would have been better off trying your luck on your own pan.
My wife and child are going to MD for a while and I am without need for a daily driver. so WORK to commence this week. I have a really bad oil leak in the 3.9 and my r380 is mated to it. I have no more excuses. I actually have 2 om617's but one needs rod bearing set. And I have 2 D1's! It's time.
Drifting
Joined: May 2014
Posts: 25
Likes: 0
From: USA
Thats what I want to hear! great news! I got good news too, i'm IN. Committed to the transmission I was telling you I found. It comes with the trans, bell housing, throwout arm, slave/master cylinders and pedal assembly (unclear if the pedal assembly will work..it was an import and looks slightly different from US models) I just have to go pick it up.
Since I won't be working with a complete truck like you will, any and all measurements will be worth their weight in gold in the form of descriptions and pictures. It's likely my project will move slow too, but this way, I can get everything situated, and hunt down the "right" donor truck.
You sir, have a PM about those extra 240 parts!
I will post a picture today after my company leaves.
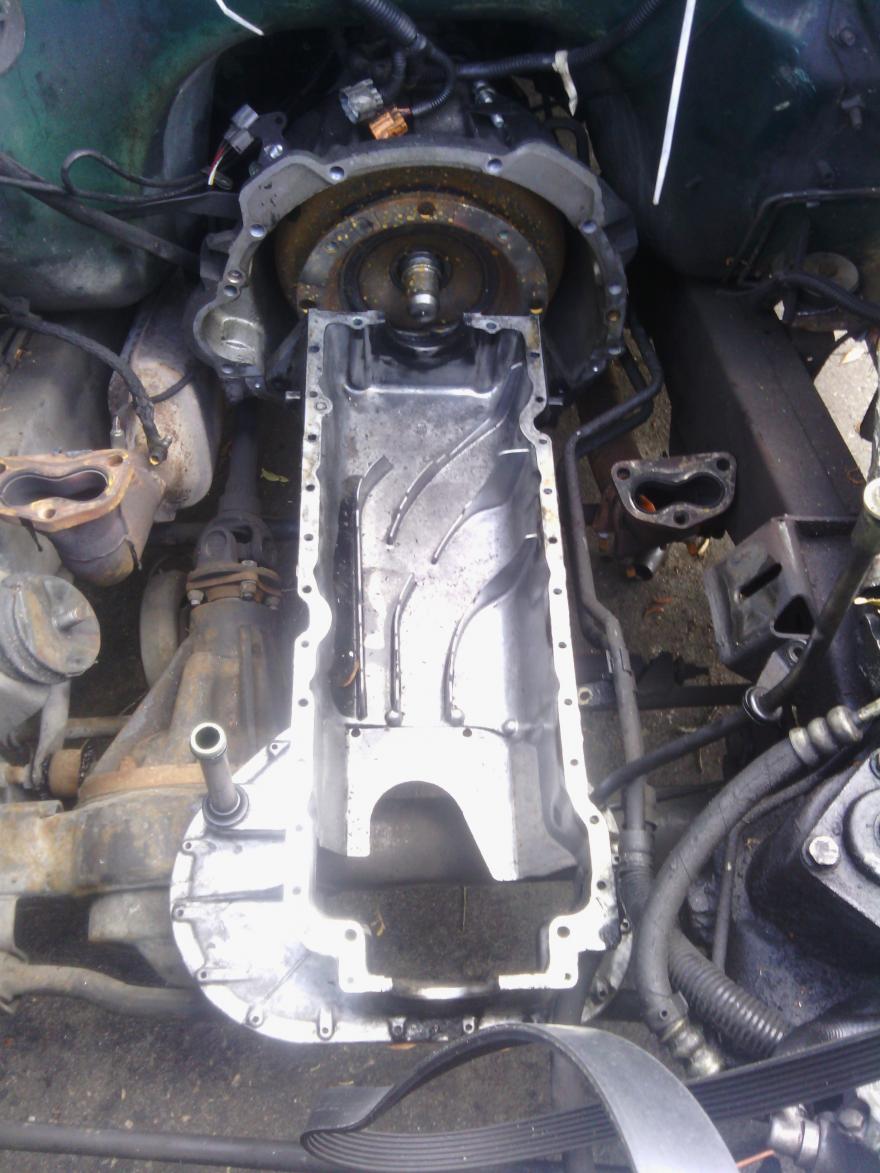
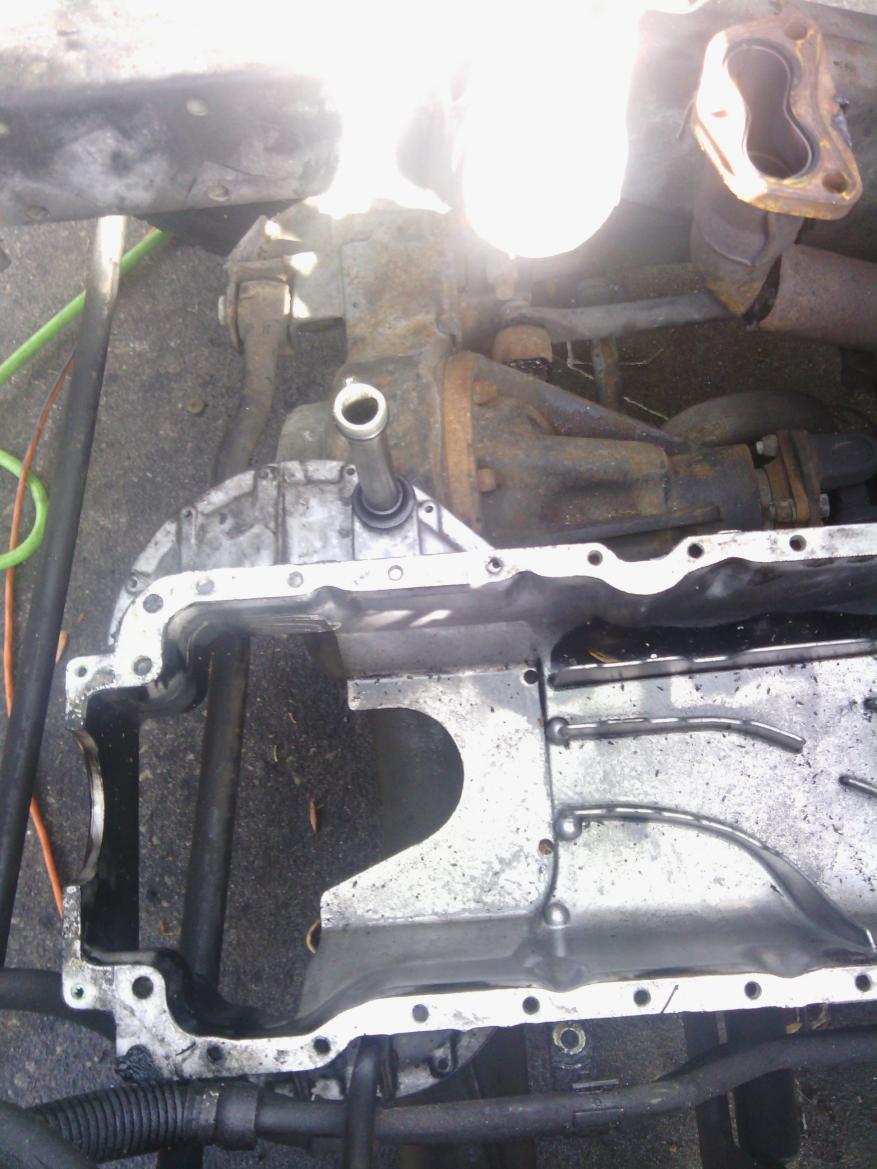
I now can see first hand the interference issue the om617 oil sump has with the diff as well as the steering box everyone doing this conversion has touched on . In both of these photos, you can see the lobes or flare out on either side. I have aluminum plate I can use to perform the necessary modification. Most likely, to address this issue, I will slice away the lobes and modify my pan or fabricate my own pan with drain on bottom and oil return from turbo on passenger side of pan.
Not to cause any undue assumptions I will have to correct later, I state that the bell housing you see in the first photo is on a ZF4hp22 auto that will NOT be used as I am using the R380 of which is yet to be pulled. The placement of the oil sump pan is just for reference.
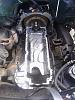

Not to cause any undue assumptions I will have to correct later, I state that the bell housing you see in the first photo is on a ZF4hp22 auto that will NOT be used as I am using the R380 of which is yet to be pulled. The placement of the oil sump pan is just for reference.
Last edited by raeuspius; Jun 10, 2014 at 05:04 PM.
I have cut the 3/4" thick HDPE material I am going to use as my adapter plate with a jigsaw. Below shows the steps I took to make it.
The first is an image of the plate cut from the HDPE material I showed previously outlined in blue spray paint. I set the bell housing engine side down and shot it trying to include the bolt holes for reference. Next I placed the bell housing over my cut piece to get the bolt ring from the om617 flywheel so I could get the bolt ring as centered as possible. Then using a marker, I traced the outer edge for my cut line. Then I centered a dot in the middle and used a drill and a stepping bit to bore my hole large enough to get sweep I needed to the outer edge for jig saw cutout. The cutout is for the crank flange passage as it will slip through the adapter with enough clearence to bolt to the om617 block. The last picture demonstrates the placement of the manual flywheel, friction plate and disk once bolted to crank. I have to get a piece of plexiglass or acrylic to make my bolt stencil of the block so I can start drilling bolt holes for mounting to the block.
On a side note this HDPE is super dense and cuts with moderate resistance. I haven't got to drilling for the bell housing bolt holes yet. Hovever, to do so, I plan to use vice grips or capenter's clamps to hold in place for drilling.
More to come!