

What did you do to your LR3 today?


Rock Crawling
Joined: Dec 2009
Posts: 445
Likes: 31
From: Long Beach, CA
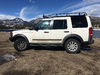
Chemical Guys Natural Shine rubber and trim dressing. It is a good product but is water based so don�t apply it if you plan on getting your truck wet within 24 hours after applying it or it will wash most of the product off. It also soaks into the plastic better if you apply it in the sun.
Here is a direct link to what I used on the trim but you can�t go wrong with any of their products, it�s the only brand to touch the inside or outside of my cars for cleaning/detailing since 2012 with the exception of CarPros Iron-X for paint decontamination.
https://www.chemicalguys.com/natural...-dressing.html
Rock Crawling
Joined: Dec 2009
Posts: 445
Likes: 31
From: Long Beach, CA
Finally changed the oil in the front and rear differentials and the t-case since the PO had no service history for the vehicle. I did the front diff first and the fluid came out fairly clean and I thought great I�m changing good fluid but when I did the rear diff and t-case the fluid was black. I�m thinking the front diff was rebuilt because there is a decent amount of grey sealant squeezed out between the two case halves. I also noticed the rear drive shaft is new and the transmission pan might be metal, I forgot to check it with a magnet before I pulled it out of the garage.
Rock Crawling
Joined: Dec 2009
Posts: 445
Likes: 31
From: Long Beach, CA
I just looked up a picture of the stock pan online and mine definitely doesn�t look like the original pan so it looks like mine has been upgraded to the metal one.

Chemical Guys Natural Shine rubber and trim dressing. It is a good product but is water based so don�t apply it if you plan on getting your truck wet within 24 hours after applying it or it will wash most of the product off. It also soaks into the plastic better if you apply it in the sun.
Here is a direct link to what I used on the trim but you can�t go wrong with any of their products, it�s the only brand to touch the inside or outside of my cars for cleaning/detailing since 2012 with the exception of CarPros Iron-X for paint decontamination.
https://www.chemicalguys.com/natural...-dressing.html
Here is a direct link to what I used on the trim but you can�t go wrong with any of their products, it�s the only brand to touch the inside or outside of my cars for cleaning/detailing since 2012 with the exception of CarPros Iron-X for paint decontamination.
https://www.chemicalguys.com/natural...-dressing.html
Love their stuff.


Mudding
Joined: Feb 2014
Posts: 196
Likes: 55
From: Madison, WI
Took advantage of the downtime over the Christmas break - Did the following, over the past few days, and finished last night -
1. Replaced the Front Passenger TPMS Initiator (this is the plastic piece that attaches to the inside of the plastic Wheel Well liner, which looks like a very miniature 'snow-shoe'). Note - It is also sometimes referred to as the 'Antenna'. OEM part number is RRE000010. Have been getting an intermittent TPMS warning light on the dashboard. For about a year... The GAP IIDTool suggested that I needed a new one. Well, I still have the same intermittent dash warning flashing at me, so some further investigation is needed.
2. Rebuilt the Air Suspension Front Valve Block (took it apart, cleaned it, replaced with new O-Rings). Very little 'dust'. Good. Bought a kit of O-Rings from Amazon, from LRNJ Autoparts, part # LRNJESVALVE, for $24. This kit has 3 separate ziploc bags with various O-Rings. 1 bag for Front Valve, 1 for Rear Valve, and another bag with 4 additional O-Rings - spares maybe? Note - It seemed to me as if the 3 O-Rings for the 3 brass screw-thread connectors very very slightly too large - some definite 'space' between the inside edge of the O-Rings and where it sits, against the circumference of the brass connector. This was confirmed when I tightened the first connector, using one of these 'new' O-Rings - There was a small amount of O-Ring which was being slightly pinched and pushed out of the connection where the brass connector sits against the Valve Block body. Fortunately I was very careful not to damage the original 3 O-Rings when I removed them, so I cleaned them up and re-used them. And also fortunately, I do not detect any air leaks. I will be contacting LRNJ to discuss
3. Replaced both front (left and right) Lower Control Arms. Because I have been getting the classic 'knocking' sound upon Braking. Replaced both arms previously (12.7.17 at 126,428 miles), so I am very familiar with the whole process. A bit disapointed that I need to do them again so quickly (I am now at 165,153), but it did not take me more than about an hour each side, and I have Lifetime Alignment at a local shop. The driver side Ball Joint was definitely really loose - almost 'floppy' - I think this was my main issue. Driver side bolts were also much more rusted than Passenger side - But that could be because I did not apply the same quantity of anti-sieze last time. Was able to undo and all nuts and bolts using a Ryobi 18v Impact Wrench, and easily push the bolts out with a screwdriver, which was an absolute pleasure compared to when I previously swapped out these Arms - both Bushing bolts were completely rusted/siezed and I needed to spend a few hours with various metal cutting tools. I used all brand new hardware again, with plenty of anti-sieze. A quick test-drive and zero 'knocking' when Braking - very pleased.
4. Replaced the Starter Motor. Old one sometimes made a weird 'screeching sound', and at the same time would not start the vehicle. I took a quick look at the teeth of the Flywheel before fitting the new one - They looked perfect.
5. Replaced the Air Suspension Relay, in the engine bay fuse compartment. Did this as a 'preventative' measure - Rebuilt the Air Compressor a couple of weeks ago, due to very loud Compressor, and apparently it's a good idea to replace the Relay at the same time. Will be keeping the old one as a spare.
6. Gently rubbed Silicone spray onto all rubber door seals, and sunroof seals. Obviously sprayed onto a cloth first, away from the vehicle. I do this each Winter.
7. Repainted and refit the front under-body protective plates.
8. Did some under-body rust touch-ups.
9. Found a slight exhaust leak. Small enough that some high-temp metal epoxy putty should take care of it. Tonight probably.
I still need to diagnose and repair the Parking Brake system - Nasty very loud screeching when I apply the Parking Brake - But I think I am getting to the end of my 'need to fix' list. That is good news, because I am hoping to spend more time in 2020 on some off-road camping trips - I was far too busy during 2019 to properly fix or use the LR3 (lots of travelling for work - 91 Flights!).
Cheers, Simon

Camel Trophy
Joined: Nov 2017
Posts: 4,986
Likes: 961
From: Green Bay, WI
Simon, did you use OEM lower arms the first time?
If you need a starter for parts, I also have a spare from the one I pulled (I kept my core). I bought an official Denso rebuilt. But I took mine apart and sealed it better with a breather kit install. But I noticed even though it was a good rebuilt the solenoid contacts were not new. They were very clean but worm enough I would have to replace them in a couple years. So I tossed new ones in since I hard it apart. Keep that in mind if you starter start to not want to start.
You want to disable your parking break before you destroy the actuator/motor. Screeching is very, very bad and if done too much will take the whole thing out. All you need is proper adjustment of the parking brake shoes to stop that noise. I had it will my 2006 when I first got it so I drove for a year with no parking break. Put new shoes and hardware in and all was well. I found that the passenger shoes were perfectly fine but the driver side were destroyed. Someone had not served them properly. I active my every so often now and rebuild them every fall.

Rock Crawling
Joined: Feb 2014
Posts: 345
Likes: 23
I had to put a new Napa Know How battery in.
Funny how a LR3 can have enough batter to run the headlights, radio battery but will not even attempt to crank the engine. My dash console was all goofed up, could not even read the text. I did get it running but the dash was messed up until I put a new battery in.
Wish it had a toggle where you could turn off all electronics and run it like the old cars that did not even need a battery once started.

