When you click on links to various merchants on this site and make a purchase, this can result in this site earning a commission. Affiliate programs and affiliations include, but are not limited to, the eBay Partner Network.
@Melburnian - 90 minutes?! You are a STUD of a "shade tree mechanic". I don't think I can get all my tools ready and psyched up to the effort to do any work on my Defender in 90 minutes....
@Melburnian - 90 minutes?! You are a STUD of a "shade tree mechanic". I don't think I can get all my tools ready and psyched up to the effort to do any work on my Defender in 90 minutes....
Well done. Looks good.
Yeah the instructions will make you disassemble a ton but taking all the side moulding off is totally unnecessary. You can trim the plastic and soundproofing from below and if you undo the pins holding the rocker panel in pace you can get an angled torx bit in to fasten the outward facing bolts.
90 minutes start to finish including wiping them down with a wet wipe after testing
Today I decided to relocate the trailer 7 pin tow harness. The standard location is a real pain to get to if you are hooking up trailers a lot. You basically have to get on the ground to do it. So I moved it to the back bumper to the right of the license plate. It does ruin the aesthetic a little but it is so much easier to get too. And I didn't even have to take the bumper off and was able to reuse all the same parts. I also moved my anderson plug to the same location.
Old location with 7 pin removed.
New location.
Any details you can share on relocating the trailer wiring connection? I'm not fond of where they placed it AND how weak the mounting is. I have to hold it steady while plugging mine in. Your mount makes 💯 more sense.
It wasn't too bad. Smaller hands will make it easier. I managed to move all of it without taking off the bumper. You will have to detach the wire cable holders to get enough slack to move it. The visible part you see mounted on the bumper is a separate piece from the actual connector.
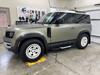
Installed a console refrigerator purchased from Hunters Prestige in the UK. Excellent instructions (YouTube video) provided the guidance and expertise to allow me to install it myself. Took about 3 hours from start to finish. Not difficult but lifting the console frame out was a bit of a pain. Someone with experience would probably be able to complete it in 45 minutes. I'm still trying to get my 90 spec'ed the way I wanted it when I ordered it. Now if I can find a good tutorial on ambient lighting retrofitting... Also added a pair of the Seatbelt retaining clips made by Simon at PowerfulUK. They make grading the seatbelt much easier. And finally, added Lamin-X yellow protective film over the foglights to help see when it's snowing.
Now projecting Yellow light..
@ThunderBob - when you applied the Lamin-X filters to your fog lights, did you cut off the little tabs on each side? Or just fold those down so they stick to the sides of the lights? I saw a Youtube video where the tabs were used to position the filter in the right place; the filter was pushed down in the middle so it stuck, and then the tabs were cut off.
Wondering what approach worked for you with your Defender? I ordered a pair and they arrived today; I thought I'd ask before trying to stick them on tomorrow.
@Mike_F I did a combination of the two. First I pulled the silver fog light surrounds of using a plastic pry tool (they pull straight out) exposing the full fog light. After throughly cleaning the glass, I tucked one of the tabs into the gap between the glass lens and the plastic fog light surround. I then slowly rolled the Lamin-x over the lens. The Lamin-x is fairly thick and there will be “fingers” or wrinkles. I used a heat gun to gently warm the material and use a plastic tool (used for installing PPF to work material down so it bonds to the lens without wrinkling. Once it was in place and I was satisfied, I used a sharp blade to score the tabs and then removed them. It’s not a difficult job but it is a bit tedious to work the wrinkles out.