
So what did you do to your Disco today?

Pro Wrench
Joined: Apr 2010
Posts: 1,450
Likes: 2
From: Upstate South Carolina
The rover oil change was therapeutic compared to the other half's 2012 Mazda 3. Low, underbody fairing, etc. Not to mention the filter was so damn tight I had to jam a screw driver threw it bc the mini Mazda filter was too damn small for my filter wrench. Why can't everything be way the hell up in the air and easy to get at.

Overlanding
Joined: Jul 2012
Posts: 16
Likes: 0
From: Los Angeles
95 Disco
#1) Tried to open my driver car door this morning. and the key lock just kept spinning. Got in through the passenger side door and set off the alarm. After opening the hood and disconnecting the horns. I disconnected the battery and reconnected it and some how was able to have the alarm turn off after playing with the door lock.
With Alarm disarmed, was finally able to get it started and drove it home.
Once there, took the door panel apart. The round plastic gromet that moves the locking mechanism as you turn the key had broken into two pieces.
Lucky for me had an extra driver side door handle with the gromet on it in good condition. Swapped it out and I am back to being able to lock and unlock my door.
#2) Took stereo out and took it apart as the mechanism that spits the tape out was not functioning.
Figured out it was the rubber ban that broke. Used a regular rubber ban to fix it for temporary purposes.
Anyone know where I can purchase a replacement rubber ban for the stereo????
Thank you in advance.

Three Wheeling
Joined: Jan 2010
Posts: 66
Likes: 0
From: SF Bay Area
Good to cross a bunch of things off my list!
Relocated my HAM tire carrier mount to a fabricated mount on the SD rack
Mounted new Firestik 4' on new beefier mount on the tire carrier (addition of SD rack created problems for HAM output)
Installed new double gang socket in console to power CB and installed.
Created a gang of relays to provide higher amperage power to work lamps (3) on rack. Designed to be triggered by (and installed) either remote switches in console and rear, as well as by the reverse lights off the trailer harness.
Reset the service engine light, again ;-)
Reversed the brackets on a pair of Hellas to reduce glare.
The "behind the scenes" required removing the front passenger seat, door sills a rear drawer system, tucked under existing carpet and weather stripping. Very gratifying to have all the systems functioning as they should.
A good day...

TReK
Joined: Mar 2010
Posts: 2,777
Likes: 625
From: NYC
Guy at the parking garage (yeah, my baby is pampered) decided to use the key which opens the gas in his attempt to start the truck. Then proceeded to break that off inside the ignition switch. What a moron.
Spent four hours reassembling a new ignition switch made from parts of my original (which had been replaced) and the one which was in the truck. Got all those little tabs smoothed out and those damn tiny little springs in place.
I was going to take this opportunity to put the original barrel in the replacement ignition switch returning my truck to a 'single key' vehicle. I carefully removed all the little brass tabs from the barrel placing them carefully on a white piece of paper to retain their order and placement. Turns out I complete f'd up and put something where it didn't belong and didn't want to spend another three hours trying to figure out the proper order of things. I grabbed the barrel from the replacement, cleaned that thoroughly, and reassembled the damn thing.
Kinda pissed because it would have been nice to have just a single key again. Oh well, that what you get when you can't put the little tabs down in the proper order. I feel like such a dumb-***.
Headliner, I love how it turned out. Reinstall was a PITA.
http://i192.photobucket.com/albums/z...729_133201.jpg
http://i192.photobucket.com/albums/z...729_133227.jpg
Oil Pressure Gauge
http://i192.photobucket.com/albums/z...729_133242.jpg
New, still 2" Terrafirma MD Rear with an HD Front. Sits a little high in front, any suggestions? Should I weigh down the front (Hi-Jack) or just raise the rear?
http://i192.photobucket.com/albums/z...728_203547.jpg
http://i192.photobucket.com/albums/z...730_194906.jpg
IMG_20120730_194858.jpg picture by honda50r - Photobucket

Camel Trophy
Joined: Nov 2009
Posts: 4,079
Likes: 227
From: IL
Why didn't you go HD all around, and where did you get s set of mismatched springs? You won't be able to bring the front down with a Hi-Lift. At this point your best bet is some cheap aluminum round stock for spacers on the rear to level it out.


Camel Trophy
Joined: Nov 2009
Posts: 4,079
Likes: 227
From: IL
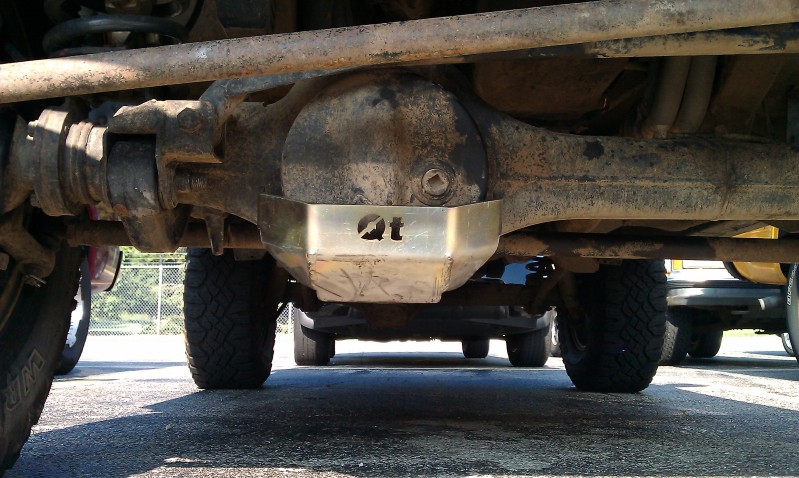
Drilled out the two holes on the bottom of my front diff. No more 3/8"-20 British Standard Fine thread. Re-tapped to 7/16"-14, a size that is readily available. Mounted the QT using the two rear bolts and will get the tabs tacked on in the next few days.

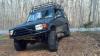
so about a 40 days a go i was hit by a plastic truck, looked bad for him.. but i needed a new bumper and tail light.. and a touch of paint.
so after a few trips to the local dealer i got some hi quotes ...
then the fun started i contacted Perry Mcneil (yes the desert racing legend)
the plan was a real budget build.. so first was his test drive .
on a big blue spring lift 4" lift , 30.5" x16r tires, pro comp shocks.no sway bars.
he came back quickly and told me i was nuts for driving my off camber rover on the road and the free way was just nuts..
so the mods started
first the whole front end was dropped
12" fox pro racing shocks we bought, super winch lp10000, custom shock towers, custom mount, so much re adjustments to get the steering and camber/caster perfect on the front end. and the front end was moved 1/2 inch forward ..
also they made some reinforced bumper brackets that i can hang my car from a crane from with no frame damage
then came the test, he wanted me to test drive it , but i insisted the perry would have a better fill for if the rover was ready for some desert time. so he pre ran it in baja. came beck and did some more adjustments , beefed up some points with bigger mounts with better flexing .. and got it diled in ..
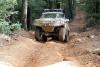
now my rover is stable on and off road ,i love it...
i have yet to get a long off road trip in, but i took it out twice and it was eating up the bumps at higher speed, and had a way softer ride and with the extra few inches of travel really help out.
and i am using every inch of shock .
also treated my self to a bunck of recovery gear, and got the new hi lift extreme with every accessible add on , 2 - 30000 20' recovery lines , 30000p ****** block, 2 -tree savers , new medic kit, new mag light set,on board air(for tools), rear view cam,
next mods: roll cage,(exo cage if i am lucky), rear/front air lockers, and i need to find a gps system that remembers trails (bred crumb).
and a few dry cell battery's, and a running parts car soon... (tho i have this Cummings turbo diesel 2007 i-6) that i want in my disco . i have access to low cost bio diesel ,and farm diesel(yes the red stuff is tax free)
and i really need off set rims to widen my tires and track...
well also i am new to this site, and i am looking for some people who want fiber glass for there d1 ? if i get 5 people with $400-600 we all get custom 1 peace front ends , hood and fenders
pm me for info , or call Perry's and ask for Mike, tell him ur talking to Eddie(me) about getting fiberglass front end on you rover..( i don't work for them) i am just a returning customer
McNeil Racing Inc - Off road fiberglass fenders, bedsides, dashes, one piece clips & race bodies!
so after a few trips to the local dealer i got some hi quotes ...
then the fun started i contacted Perry Mcneil (yes the desert racing legend)
the plan was a real budget build.. so first was his test drive .
on a big blue spring lift 4" lift , 30.5" x16r tires, pro comp shocks.no sway bars.
he came back quickly and told me i was nuts for driving my off camber rover on the road and the free way was just nuts..
so the mods started
first the whole front end was dropped
12" fox pro racing shocks we bought, super winch lp10000, custom shock towers, custom mount, so much re adjustments to get the steering and camber/caster perfect on the front end. and the front end was moved 1/2 inch forward ..
also they made some reinforced bumper brackets that i can hang my car from a crane from with no frame damage
then came the test, he wanted me to test drive it , but i insisted the perry would have a better fill for if the rover was ready for some desert time. so he pre ran it in baja. came beck and did some more adjustments , beefed up some points with bigger mounts with better flexing .. and got it diled in ..
now my rover is stable on and off road ,i love it...
i have yet to get a long off road trip in, but i took it out twice and it was eating up the bumps at higher speed, and had a way softer ride and with the extra few inches of travel really help out.
and i am using every inch of shock .
also treated my self to a bunck of recovery gear, and got
the new hi lift extreme with every accessible add on , 2 - 30000 20' recovery lines , 30000p ****** block, 2 -tree savers , new medic kit, new mag light set,on board air(for tools), rear view cam, next mods: roll cage,(exo cage if i am lucky), rear/front air lockers, and i need to find a gps system that remembers trails (bred crumb).
and a few dry cell battery's, and a running parts car soon... (tho i have this Cummings turbo diesel 2007 i-6) that i want in my disco . i have access to low cost bio diesel ,and farm diesel(yes the red stuff is tax free)
and i really need off set rims to widen my tires and track...
well also i am new to this site, and i am looking for some people who want fiber glass for there d1 ? if i get 5 people with $400-600 we all get custom 1 peace front ends , hood and fenders
pm me for info , or call Perry's and ask for Mike, tell him ur talking to Eddie(me) about getting fiberglass front end on you rover..( i don't work for them) i am just a returning customer
McNeil Racing Inc - Off road fiberglass fenders, bedsides, dashes, one piece clips & race bodies!
Last edited by d1eddie; Aug 1, 2012 at 09:47 AM. Reason: added stuff

