

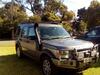
What did you do to your LR3 today?


Overlanding
Joined: Dec 2024
Posts: 21
Likes: 2
The last three days. . .
-Diagnosed an air suspension problem (leak at the drier cap, part ordered) and ordered new valve blocks as the rebuild I did 6 months ago hasn't held up. Ready to slap on when delivery arrives today
- Took off the front passenger fender to replace with the undented one I got from a ebay junkyard. This lead me to finding damage to the bumper cover brackets, bumper cover, fog light, and the pass side of the radiator support/bumper support bar (below the headlight). I think the truck had a more significant off-road accident than the seller wanted to admit to (he *tried* to glue some stuff back together). So I had to plastic weld and reshape the bumper cover, "weld" the aluminum radiator/bumper support back to a "straight" enough position with some high temp epoxy and ziptie stitches.
- 3d printed a new retainer for the headlight washer that also got lost.
- Fixed an issue with the passenger seat switch (would recline but not come back up). That took me longer than I want to admit; I tried to de-solder the switch to clean it out, but its a 6 pin switch and I don't have a solder vac (just the cheap chinese tools for an entry level kit). Ended up just prying the top cover off of the switch and blasting it with wd40 contact cleaner and is working well now.
- swapped out the two seatbelt pretensioners that had blown in whatever unreported accident the seller didn't disclose to me. I only have one LR3, the driver side is a pretensioner/buckle from an 06 range rover and didn't originally fit the LR3 seatbelt. A little shaving of the plastic around the buckle cover gives it the extra 2mm clearance to fully latch.
Before I slap the drivers seat back together, I'm on a mission to figure out why the seat heater isn't working on the driver side. I did find a plug that is just hanging loose, so I think it's something left undone by someone before me, but tracing the circuit with the workshop diagram will help me confirm if its that simple or a corroded wire somewhere.
My wife asked me if I was at least having fun, because I took three days off work to work on vehicles. Honestly, yes. It has been a fun process, even if a little frustrating realizing every day that I overpaid for this truck. Now I've got a bunch of new knowledge to use when I go to buy another lr3/lr4
Happy wrenching to all the DIYers out there
Pro Wrench
Joined: Apr 2015
Posts: 1,620
Likes: 266
From: Melbourne, Australia.
Have been on holiday in Vietnam, came home and jumped in to move the disco and it started firt turn of the key with no bings or bongs.
Spring has come early so gave it its mid year wash and doing an oil/filter change tomorrow.
Spring has come early so gave it its mid year wash and doing an oil/filter change tomorrow.

Rock Crawling
Joined: Jul 2018
Posts: 368
Likes: 91
From: Tip of the Mitt
I had the battery out and found underneath the battery in a space that looked intentional what appears to be a starter solenoid or a really heavy duty relay that has one good wire conneccted and another that has broken off at the connector-those are a lighter guage control wire. The load terminals have nothing connected. Any idea about what it's for?
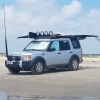
Three Wheeling
Joined: Dec 2019
Posts: 86
Likes: 23
From: Vancouver, BC
Out on vacation, and received the �check brake pads� warning light.
Ordered pads and replaced front and rear. Rears were worn. Pretty easy job with basic tools, except for using the scissor jack to lift the wheel off the ground.
Any idea of how long you have from when light comes on to total failure? Also there is no specific indication of it being front or rear pads?
Recovery Vehicle
Joined: Jul 2013
Posts: 822
Likes: 133
From: Collins, Missouri
I had the battery out and found underneath the battery in a space that looked intentional what appears to be a starter solenoid or a really heavy duty relay that has one good wire conneccted and another that has broken off at the connector-those are a lighter guage control wire. The load terminals have nothing connected. Any idea about what it's for?
Did this Rover have a factory winch at some point?
Jeff
Rock Crawling
Joined: Jul 2018
Posts: 368
Likes: 91
From: Tip of the Mitt

Here's a picture if that helps!
As far as I know, there was never a winch on this rover. It does have a couple of options I've not seen on other rovers, the wheel arches are body colored, the mirrors have chrome trim on the upper side, there are rock rails, metal grills protecting the taillights, very small "G4 Challenge" stickers on the doors right below the marker lights, and a locking rear. How much was factory done and how much was a previous owner having a laugh I can't say!
Anyways, since it is there and if it seems to be a factory winch relay, I can make use of it since I plan to install a HF winch. This install does look factory, and definitely wasn't installed by the guy I got it from.
Edit-yes, there are leaves and pine needles in there. It lived under a tree for the best part of a year and suffered a bit from debris accumulation.
Last edited by Gnomadf; Aug 18, 2025 at 04:01 PM.

Baja
Joined: Nov 2017
Posts: 5,009
Likes: 966
From: Green Bay, WI
Def clean those leaves out, there is a drain hole at the bottom. If that bay fills up with water so do your computers although it would take a lot. But that looks like a battery isolated for a two battery setup. Might say on the label if you can get a pic.
Pro Wrench
Joined: Apr 2015
Posts: 1,620
Likes: 266
From: Melbourne, Australia.
Out on vacation, and received the �check brake pads� warning light.
Ordered pads and replaced front and rear. Rears were worn. Pretty easy job with basic tools, except for using the scissor jack to lift the wheel off the ground.
Any idea of how long you have from when light comes on to total failure? Also there is no specific indication of it being front or rear pads?
Ordered pads and replaced front and rear. Rears were worn. Pretty easy job with basic tools, except for using the scissor jack to lift the wheel off the ground.
Any idea of how long you have from when light comes on to total failure? Also there is no specific indication of it being front or rear pads?
Rock Crawling
Joined: Jul 2018
Posts: 368
Likes: 91
From: Tip of the Mitt
On the way to work this morning, I was musing just well this old beast was running for having 192K miles on it, and then I stopped at the stop sign, gave it some gas to go and got a "engine system fault" indication, popped up just like that, P2105 thorottle actuator control system-P2135-62 and P2135-28, throttle pedal voltage correlation and signal bias. Speed restricted to 15 mph which made the rest of the commute really long and slow.
Hooked up the Gap, got the codes, reset them and now it's fine.
I did clean the throttle body, cleaned the connectors and used some Deoxit on the terminals.
I looked inside the intake manifold when I had the throttle body off and it's absolutely filthy with oil residue in there. When I cleaned the TB out last fall, it was really fouled with oil residue, but I'm not using any appreciable amount between changes. Maybe time for a new breather?
As for the mystery device under the battery, it is a Trombetta 974-1215-011 which research tells me is a "contacter" or a fancy word for high power relay. It might get used when I hook up my winch. Also cleaned out the crap back behind per Dakota Travelers suggestion, a timely idea, the stuff towards the bottom was damp.

