What did you do with your DII today?
#1981
 07-15-2014, 07:44 AM


made it! The only excitement we had was the a/c drains clogging up and soaking the floor. Ran 190 degrees at 17mpg over all with the a/c on full tilt most of the way. Oh and by the way the abs and traction control are pretty amazing. (don't have that stuff in my 88 rx7)
#1982
07-15-2014, 04:51 PM
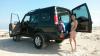
made it! The only excitement we had was the a/c drains clogging up and soaking the floor. Ran 190 degrees at 17mpg over all with the a/c on full tilt most of the way. Oh and by the way the abs and traction control are pretty amazing. (don't have that stuff in my 88 rx7)
 Disco's get a bad rep with the whole "not reliable thing", but I think it's more the owners fault for that rather then the truck itself. Maintained properly they can be great trucks.
#1983
07-21-2014, 11:16 AM

Baja
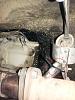
I fitted this professionally modified WABCO ABS shuttle switch kit today Landrover Discovery 2 Defender ABS Modulator Shuttle Valve Switch Repair Kit | eBay .
It works perfectly. There were no Amigos after a hard test drive. It's a similar fix to the Option B but doesn't need the earth.
Some tips on fitting insitu:
Attributes.
Allow 2-2.5 hours.
A lot of patience and an even temper.
Tools needed.
10mm ratchet swivel head combination spanner.
1/4" drive socket rathet.
1/4" drive 4mm Allen head socket.
Can of WD40 or similar.
Very small screwdriver or thin pick.
A LARGE SWEAR BOX
This task is not at all difficult just tedious and time consuming. Amazingly the most difficult part is raising and propping up the modulator which I did using a piece of 4x2 timber 4 inches long. The brake pipes can be flexed easily to accommodate this height of lift but don't forget to release them from the clips on the firewall. Removing the 3 screws is tedious as you can only turn them 1/8th turn even with a 1/4" ratchet. They remain stiff with resistance until totally removed as they have been inserted originally with a threadlock fluid. Putting the new scews back in is a doddle. In this mod it requires removing pins 8&9 from the original plug and inserting them in the new plug included in the kit. One wire in the kit goes into the old position of 8th pin and 9 isn't used anymore. It helps to remove the power steering reservoir and set aside and also the top of the air filter.
It is a fiddly job but relatively easy and very successful and also utilises the existing earth in the plug so no additional earth required. I can recommend this mod to overcome the 'trois amigos' issues provided the fault code is 'shuttle valve electrical failure' otherwise your problems may be elsewhere.
A couple of weeks on now and still no dreaded Amigos. This kit actually seems to work. I won't speak too soon but absolutely no sign of the 3 Amigos since fitting it.
#1984
07-22-2014, 08:49 AM

#1985
07-22-2014, 07:41 PM
Baja
"You can please some of the people all of the time and please all of the people some of the time BUT you can't please all of the people all of the time"
The perfect analogy for car owners. LR's are no different, they need to be looked after and often more so.
#1986
07-22-2014, 07:50 PM
Baja
 although I've read SuperSport's instructions.
 I'm just in the process of upgrading the old truck with new suspension, shocks, steering gear, brakes and a host of other essential jobs. To me it's worth it with 123K on the odometer and good service from it from new. Under the hood is cleaner and tidier than the outside body and inside upholstery.

#1987
07-23-2014, 07:37 AM

Nothing no one here hasn't seen before, I'm sure. (Please forgive the ridiculously dusty instrument panel).
On reliability, I think this car's been pretty good to me. Bought it with 83k miles on it, and it's never failed to start or take me where I need to go. I have done a ton of work on it (mostly Disco Mike's 90k service list) and a PS pump replacement. My ownership started with Amigos, and the "Option B" fix took care of those. Then I had a SES light due to a bad O2 sensor. Replaced that and the light went off. Just a couple weaks ago, I got another SES light. Codes are P1319 and P1301 (cylinder misfire-low fuel). Just haven't had the energy to it (any advice folks?). When it was the O2 sensor, the truck was chugging fuel. Thankfully, this SES light doesn't seem to be affecting fuel mileage (maybe a little bit). So I'm not in too much of a hurry on it. However, my ownership has definitely been like a game of whack-a-mole. So, in short, they're "reliable," but with lots of work.
Last edited by ThisRoverGuy; 07-23-2014 at 07:41 AM.
#1988
07-23-2014, 09:44 AM
Cleaned out the blower motor on my 04. It had huge chunks of foam in the basket. It fixed my vibration I was getting from it, but still only blows about half as hard as my 99. Thinking of swapping in a "new" (read:junkyard find) out of something else like I saw streetwolf do a while back.

#1990
07-24-2014, 05:05 PM
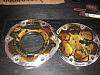
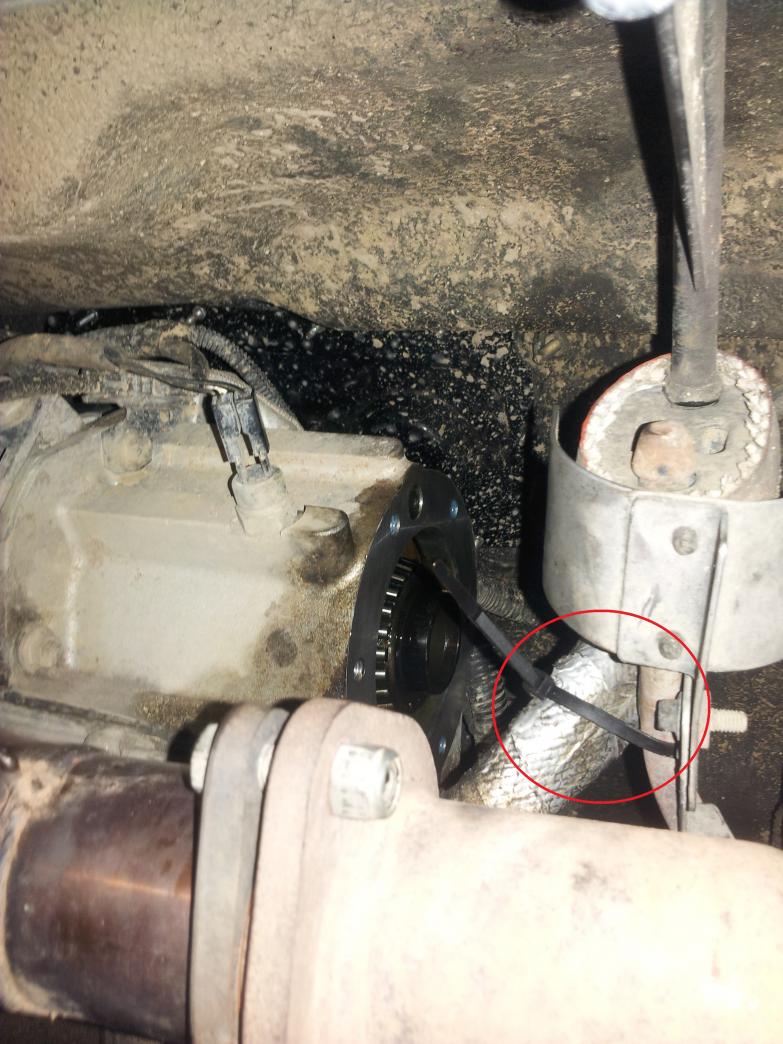
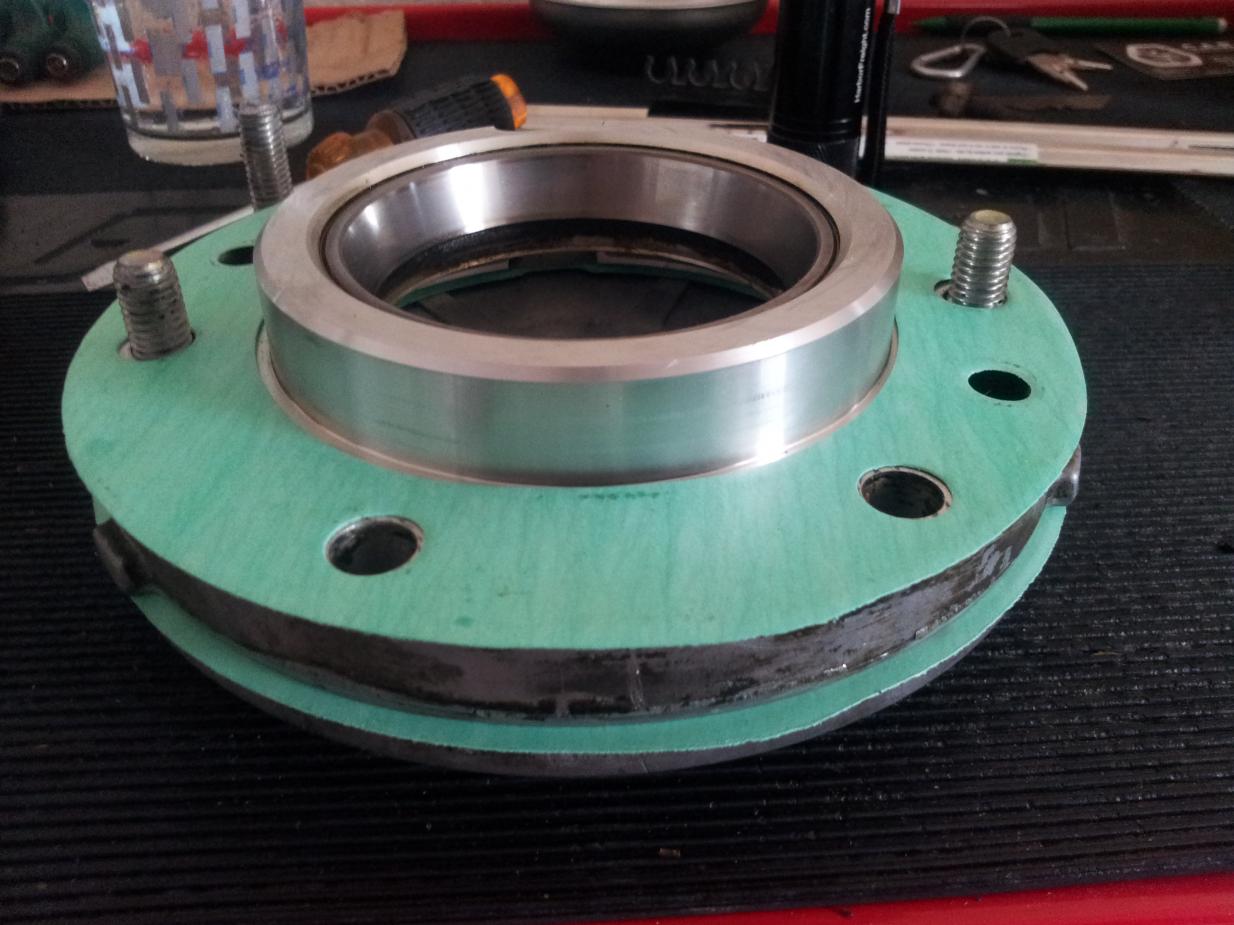
I installed a gasket on the leaky rear cover plate on my T-Case. I've been having a small leak from my T-Case for a while now and I ordered a gasket kit a few months ago and I finally strated replacing the gaskets I can get to without pulling the T-Case. I think I might have a few different leaks but it's not much (only about a nickel size spot on my garage floor each morning) but it's been driving me crazy since I bought the truck over 2 years ago. I tried blue devil stop leak but no dice so now I have to do it the right way.
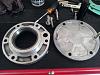
I used zip ties to pull the parking brake cable out of the way so I could get my 1/2" drive up in there to break the 5 bolts (13mm) and stud (15mm) loose. Once I broke them loose the air ratchet made quick work of the rest of the job. I just pulled everything off and out to clean it up really good for the new gaskets.
There was some thick sludge on the inside of the back cover but it cleaned up nice.
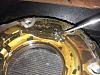
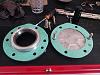
New Gaskets going on. I used two of the bolts to keep it all aligned and installed it all in one piece.

Use fresh thread locker on the bolts and stud when installing. Take extra time to get all the old thread locker off. I used a wire brush for the big stuff and through the bolts in the ultrasonic cleaner to finish it off.


The rear cover is above the fill hole so I won't know if the leak is fixed until I take it for a drive and let it sit, but I'm letting the thread locker setup before I take off. The rear plate has a gap inside it where the bearing rides and oil gets trapped up in there when your driving. That pool of oil was leaking out over night onto my garage floor. If it continues to leak then I'll pull the cover back off and use RTV along with the gasket. I'll report back any problems
Last edited by Jared9220; 07-24-2014 at 05:19 PM.